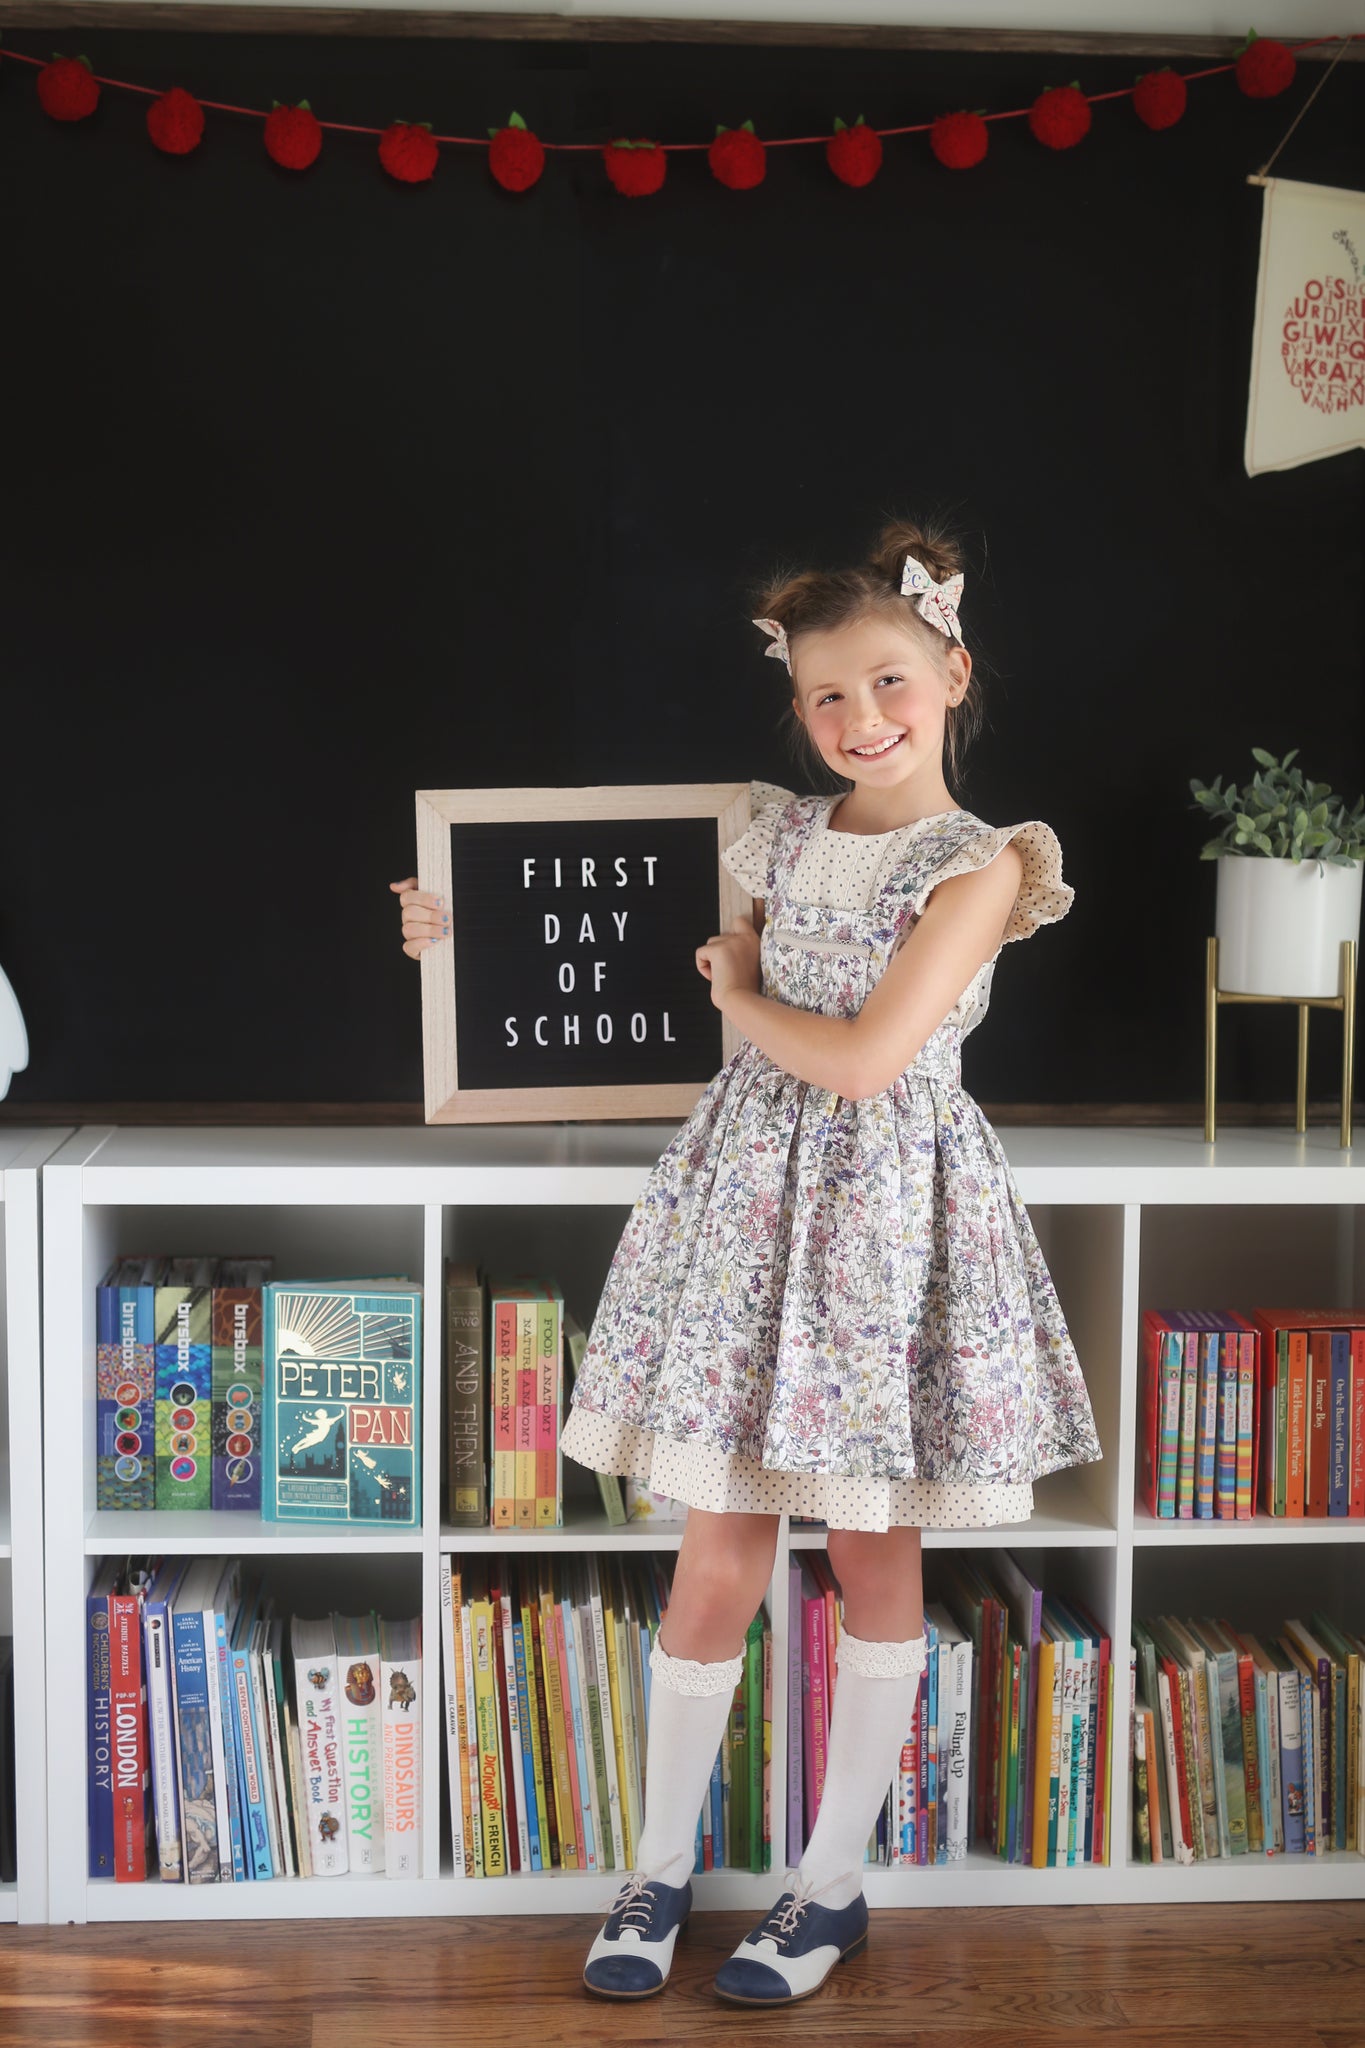
I don’t know about you, but it’s the time of the year when I am creating lots of pajama sets for my kids, and nieces and nephews too! So I’m here to share with you how to create this quick nightgown option- any length you’d like with an optional ruffle as well!
So first off, you will want to print off the Matilda bodice piece and the Matilda flutter sleeve piece. Optionally, you could use one of the other sleeve pattern pieces as well if you prefer a longer sleeve. My kids all seem to be hot sleepers and they do not like long sleeves, so we do flutter sleeves year-round for sleeping. So lets get started!
{Now, you’ll need to decide if you want to create the super quick version without the ruffle, or the slightly more time consuming option of adding the ruffle (adding the ruffle took an extra 45 minutes for me, and of course is more fabric as well- but how darling is it?) If you are creating the super quick straight version, you can continue on to step 2. If you are wanting to add the ruffle then from your SKIRT MEASUREMENT that we just determined you will want to subtract from that length how long you want your ruffle piece will be. For a vintage or knee length gown, we suggest using a 4”-5” long ruffle, or for a maxi length gown we suggest going with 5.5-7” for the length of the ruffle so that it keeps with the overall proportion of the gown. Since I am going for a shorter option for my ruffled version I will take my knee length SKIRT MEASUREMENT of 27” and subtract the 5” for my ruffle, giving me a knew length of 22” for my RUFFLE SKIRT MEASUREMENT.}
From here, if you are creating the straight gown without ruffle, you can follow all of the instructions in the Matilda pattern the same, using your new front and back bodice pieces as the full gown.
If you are creating the ruffle bottom version, you will follow the steps in the Matilda pattern as well, up until the part to hem the bottom. At this point, you will need to figure out our ruffle measurement.
And now you can finish off the top of the gown per instructions from the Matilda pattern, and VOILA! A super comfy and totally darling nightgown that will fit for years to come!
Grab your Matilda patterns now for 50% off in our Pre-Black Friday Slumber Party Sale!
Baby:
https://violettefieldthreads.com/products/matilda-dress-baby
Girls:
https://violettefieldthreads.com/products/matilda-dress
Tween:
https://violettefieldthreads.com/products/matilda-dress-tween
Doll:
https://violettefieldthreads.com/products/matilda-doll-dress
]]>Isobel Tween and Misses are finally here!!! Isobel (in Baby and Girls) is one of our best selling and most loved patterns of all time and we are so pleased that it is now available in our entire range of pattern sizes. Isobel is a dress pattern with loads of options that can be mixed and matched to make the perfect summer dress.
When sewing up my 3rd or 4th Isobel, I realized that I really needed to alter this into a top for myself. As much as I love a cute summer dress, I tend to gravitate towards tops for day to day wear. Therefore, the Isobel Top pattern hack was born..hahaha!! (Scroll to the End to find the hack for the Doll version as well!)
In case you were wondering, yes, I absolutely had "Watermelon Sugar High" stuck in my head for days after sewing this top. Seriously though, how cute is this fabric?!? I picked it up from Alyssa May Design. She has a wide variety of apparel fabrics and super fun prints.
The Isobel top features a button up front and peplum bottom ruffle. You can still use either the bodice ruffle or flutter sleeve options on the top. This top is so simple to make, the hardest part will be deciding how many you realistically need in your closet!
1. Print and cut the Bodice Front, Bodice Side Insets and Bodice Back pattern pieces out according to your size.
Note on sizing: Isobel has 1 1/4" ease at the bust and 1 3/4" ease at the waist. When sewing the dress option, sizing down (to have less ease and a more fitted look) is optional. Reducing the ease is a straight forward alteration, as the back closes with a zipper. For this top hack option, I recommend either sticking with the eases given in the pattern, or ONLY reducing the waist ease. Without sufficient ease at the bust, the button up front will most likely gape open.
2. We are going to make a few small adjustments to these three pattern pieces:
3. Cut the pattern pieces out around all your new lines and then use them to cut out the main and lining fabric.
4. Begin following the Isobel tutorial to create the Bodice, sewing Bodice Ruffles or Flutter Sleeves if desired. *When you are sewing, remember that the tutorial shows the Bodice Front as solid, and the Bodice Back split in two pieces. This is so a zipper can be installed in the back. For this hack, the Bodice Front is split in two pieces and the Bodice Back is solid. The instructions remain the same, but the tutorial pictures will look a little different.
5. Once you reach step #21 of the tutorial, remember that you are now pinning around the back neckline, around the shoulders, across the front neckline and down both of the front middle seams.
6. Once sewn, but before turning right side out, we recommend applying a 1" wide strip of fusible stablizer to the wrong side of the bodice lining right next to the center seam. This will assist in ease of buttonholes and buttons later.
7. Trim off 1/2 of the seam allowance and clip into the corners, being careful not to cut the stitch line. Turn the bodice right side out and if desired, top stitch up the front middle seam and around the front and back necklines.
Creating the Peplum Ruffle:
8. Follow steps #23-25 of the Isobel tutorial to finish the bodice. Lay the bodice out in front of you with the front edges lining up. Measure along the bottom edge of the bodice. You will use this measurement to determine the width of the ruffle.
a. Write down the measurement across the bottom of the bodice. The example in the photo measures 16".
b. Multiply that measurement x 2. So my ruffle will be 16 x 2 = 31" wide. You will be cutting 2 ruffles.
Use the below chart to determine the height of the ruffle:
Tween Sizes |
|||
10 |
12 |
14 |
16 |
5 1/8” |
5 ¼” |
5 3/8” |
5 ½” |
Misses Sizes |
|||||||||||
00 |
0 |
2 |
4 |
6 |
8 |
10 |
12 |
14 |
16 |
18 |
20 |
5 ½” |
5 5/8” |
5 ¾” |
5 7/8” |
6” |
6 1/8” |
6 ¼” |
6 3/8” |
6 ½” |
6 5/8” |
6 ¾” |
7” |
Example: If you are sewing a size 6 Isobel Top, you will cut two ruffles that are 31" wide x 6" tall.
9. Cut one of the ruffles in 1/2 widthwise to create two front ruffles. You will now have two front ruffles and one back ruffle.
10. Place the two front ruffles on top of the back ruffle with the right sides touching and the raw edges lining up. Pin together along the short side edges. Sew along the pinned seams. For a professional look, finish the seams with a serger or trim off 1/2 of the seam allowance and finish with a zig zag stitch.
11. Hem the bottom raw edge of the ruffle. Turn the edge up 1/4" and iron flat, then turn up another 1/4" and iron flat. Sew right along the folded edge.
12. Finish the raw short ends. Turn the ends in 1/4" and iron flat, then turn under another 1/4" and iron flat. Sew right along the folded edges.
13. Sew two rows of gathering stitches along the top raw edge of the ruffle. Mark the center of the ruffle with a pin.
14. Lay the bodice out in front of you and mark the center of the bottom edge of both side panels. These marks will serve as the side seams.
15. Gather the ruffle up until it is the same width as the bodice. Place it on top of the bodice with the right sides touching and the raw edges lining up. Match up the center of the back ruffle with the center of the bodice back and pin. Then match up the side seam and pin. Finally, match up the finished edges of the ruffle with the finished edges of the bodice front center seams.
16. Sew along the pinned seams. For a professional look, finish the seam with a serger or trim off 1/2 of the seam allowance and finish with a zig zag stitch. Iron the seam allowance up towards the bodice and topstitch if desired.
17. Mark for button holes on the wearers right side of the bodice front. The front will overlap 1". We recommend using 4-5 buttons and placing them on the bodice only (not the ruffle). Place the first button 1/4"-3/8" down from the finished top edge and space the remaining buttons evenly.
17. Sew the button holes using your sewing machine. Open the button holes. If you are using a seam ripper, be sure to place a pin at the top of each button hole, so you do not accidentally rip the garment.
18. Overlap the front center bodice by 1" and mark for buttons. Sew the buttons either by hand or with your machine.
That's it!! You have now created an Isobel Top!!
This top is going to quickly become your summer staple. Please be sure to post them in the FB group and Instagram and tag us in your post!
xoxo,
Ericka/VFT
Edited to Add:
The Amazing Caroline Gehman has created this hack for the doll version of Isobel as well!
Even without a hack, Ainsley is such a great pattern with options for a jumpsuit, knee-length or maxi dress! I feel like knit garments are so rewarding to sew because they are easier to fit, require less tailoring and, lets be honest, you feel like you are wearing your pajamas while looking fabulous..hahaha! But this ruffle pant trend kept popping up everywhere I looked; it was on my Pinterest, Instagram and even in some of my favorite boutiques. Here are a few of the jumpsuits that were inspiring my hack:
I finally realized that this would be such an easy pattern hack for Ainsley, giving my go to pattern even more options! So I gave it a try and I LOVE IT!!!!!!! I feel like it is so on trend and gives it a an extra feminine detail that I can't get enough of. I actually loved it so much that I wanted to share what I did with you guys too!
So let's get started!!
First, go ahead and print out all the Ainsley pieces and assemble them as normal. But I have one important tip before you start hacking your pattern pieces:
TIP: Measure the inseam of the pant pattern pieces to ensure accurate length prior to cutting and sewing the hem ruffle. If necessary, cut off or add additional length.
Measure your own inseam to the desired length. This ruffle mod would look cute with a full length pant leg that brushed the foot or a cropped ankle length.
Okay, now that we know the length is correct, lets get started:
1. Begin by placing the back pant leg pattern piece in front of you. Use the charts below to determine how far to measure up from the bottom edge and mark.
INSEAM EDGE: Measure up from the bottom edge of the back leg pattern piece according to the chart below and draw a ½” line.
Girls Sizes |
|||||||
2T |
3T |
4T |
5 |
6 |
7 |
8 |
9,10 |
3 ¼” |
3 ½” |
3 ¾” |
4” |
4 ¼” |
4 ½” |
4 ¾” |
5” |
Tween Sizes |
|||
10 |
12 |
14 |
16 |
5 ¼” |
5 ½” |
5 ¾” |
6” |
Misses Sizes |
||||||
XXS |
XS |
S |
M |
L |
XL |
XXL |
6 ½” |
6 ¾” |
7” |
7 ¼” |
7 ½” |
7 ¾” |
8” |
18" Doll Pattern |
1½”
SIDE EDGE: Measure up from the bottom edge of the back leg pattern piece according to the chart below and draw a ½” line.
Girls Sizes |
|||||||
2T |
3T |
4T |
5 |
6 |
7 |
8 |
9,10 |
6 ¾” |
7” |
7 ¼” |
7 ½” |
7 ¾” |
8” |
8 ¼” |
8 ½” |
Tween Sizes |
|||
10 |
12 |
14 |
16 |
9 ¼” |
9 ½” |
9 ¾” |
10” |
Misses Sizes |
||||||
XXS |
XS |
S |
M |
L |
XL |
XXL |
11” |
11 ¼” |
11 ½” |
11 ¾” |
12” |
12 ¼” |
12 ½” |
18" Doll Pattern |
2.75"
2. Draw a curved line from the outside edge line across to the inseam edge line that you drew in the previous step. You can either use a curved ruler or simply freehand draw the line as accurately as possible.
3. Cut right along the drawn line, creating two pieces, the back pants top and back pants bottom ruffle.
4. You now need to add a 1/2" seam allowance (or 1/4" seam allowance for the 18" doll version) to the bottom edge of the new back pants top pattern piece and the top edge of the back pants ruffle. Tape a piece of paper to the edge and trace a new line that extends ½” past the cut.
5. We now need to add width to the bottom ruffle piece, this will allow us to gather it up. To determine how much width to add, lay the ruffle out in front of you and measure it along the bottom edge.
6. Write down the full measurement. Now take that number and divide it by 2. Cut a piece of paper that is the same height as the tallest side edge of the pattern piece and as wide as your new number. Tape it to the pattern piece as shown below to create a new, longer pattern piece.
i.e., If the bottom edge of your pattern piece measures 13.5”, divide that in two and you get 6.75”
You now have a new pattern piece that is Cut 2 on the fold. This will create a gathered bottom ruffle.
Note: I ran the pattern piece straight along the top edge of the new piece that extends out. Once the ruffle is gathered and attached back onto the pant leg, it is not obvious that area runs straight.
7. Cut out the Bottom ruffles and sew 1-2 rows of gathering stitches along the top raw edge.
8. Place the gathered ruffle on top of the cut bottom edge of one pant leg with the right sides touching and the raw edges lining up. Ensure that the shorter ruffle edge is lining up with the inseam edge of the pant leg and the longer edge is lining up with the outside edge of the pant leg. Pin to secure.
9. Sew along the pinned seam with either a stretch stich or zig zag stitch. For a professional look, finish the seam with a serger or trim off ½ of the seam allowance and finish with a zig zag stitch.
10.Repeat for the remaining ruffle and opposite back pant leg. Ensure you are created two mirrored pant legs, this can be an easy mistake since not all knit as an easily distinguishable right and wrong side.
11.Repeats steps 1-10 to create the front pant legs with bottom ruffle.
Now you will just follow the Ainsley tutorial as stated to complete your jumpsuit! I hope you enjoy this hack :)
xoxo,
Ericka {VFT}
]]>
Have you seen our Lovey Lamb? She's the sweetest little lamb, and has just joined the Violette Field Threads stuffie family! Now, meet Leo Lamb!
Not wanting to leave her little boy out of the stuffed animal fun, Ashley (designer of Lovey Lamb) re-designed Lovey to become Leo! She created an adorable boy face template & SVG file, modified the Lovey bloomers to become overalls, and added elastic to the bow to become a bowtie!
Included below are instructions to create Leo Lamb using the original pattern for Lovey Lamb and a free printable template for the boy face, as well as an SVG file if you have a vinyl cutting machine. If you do not already own the PDF pattern for Lovey Lamb, click here to purchase. Click (here) to download the face template and (here) to download the SVG file.
Additional materials needed:
- 7½” of ¾” elastic
-7½” of ¼” elastic
To make Leo, follow all of the steps from the Lovey Lamb pattern & tutorial, but print out the face template for the boy and trace it in step #7, or use the SVG file and apply heat transfer vinyl. Continue all of the steps to make the lamb.
Now that Leo lamb has been created, it's time for his clothes!
To create the overalls, cut two bloomers using the pattern pieces included for Lovey. Sew the inseams of each bloomer.
Serge the finished seams of each leg. Iron the bottom raw edge of each leg ½” and then another ½” and sew along folded edge to create the hem.
Continue with the instructions for Lovey from step #42 through creating the buttonhole in step #45.
To create the straps:
Cut two strap pieces (9” by 2”) in the bloomer fabric. Fold each in half with the right sides together. Stitch along the long raw edge as well as one short edge.
Turn the straps right side out and iron flat. Top stitch along all three sewn edges.
Prepare the top hem of the shorts. Fold the top raw edge down ¼” and iron. Fold down another 1” and iron flat.
On the front of the shorts, place a pin 1½” from the center seam on each side. The space between the pins will be left open to insert the elastic, also creating the flat front.
Insert the straps into the back of the shorts. Place the straps ½” inside the prepped hem. Each strap will be ½” away from the back center seam.
Starting at one pin on the front of the shorts, stitch all the way around to the second pin. Take your 7½” piece of ¾” elastic and attach to a safety pin or bodkin. Insert the elastic through one open end of the front shorts.
When the elastic has only ¼” remaining, pin to secure the elastic and continue pulling the elastic through to the other open end, again leaving ¼” elastic past the sewn casing and pin to secure. Sew vertically along the waistband to secure the elastic at both edges.
If desired, continue the stitches across the bottom of the waistband, between the two elastic edges.
Criss cross the straps and pin to secure.
Create a small stitch along the top edge of the waistband to secure the straps up.
Making sure to continue with the straps crossed, bring to the front and pin just inside the stitches you created to secure the elastic. Stitch to secure, along the same stitches as previously topstitched.
Stitch buttons at the bottom of the front straps if desired.
To create the bowtie, follow the tutorial for Lovey’s hair bow. Cut a 7½” piece of ¼” elastic and thread through the back of the bow.
Overlap the edges by ¼” and stitch to secure.
Pull the elastic around and hide behind the bow center.
That's it for Leo the Lamb! Super simple, right?! We can't wait to see all of the amazing creations made using this tutorial! Be sure to share your creations on the Violette Field Threads Facebook page.
Hey Friends!! Back to School season is here and we are so excited to introduce you to one of our three new designs in our 2020 B2S collection: HARRIETT!
]]>
Hey Friends!! Back to School season is here and we are so excited to introduce you to one of our three new designs in our 2020 B2S collection: HARRIETT!
Harriett is the epitome of vintage yumminess that makes our hearts swoon! It is available in the following size ranges - Baby, Girls, Tween and even Doll! This classic silhouette is a straightforward sew, and includes a new design feature, button shoulders! The skirt is a gathered 1/2 circle skirt, for show-stopping twirls!
Harriett can be sewn as a top:
as a dress with a simple skirt:
or as a dress with the wide ruffle on the bottom:
But you know what everyone's favorite detail has been so far?! It's not the optional side seam pockets... because, let's be real, you know EVERYONE loves pockets....no, it's the....
...shoulder placket with the darling button closure!!
The button shoulder has us all swooning...it's both unique and classic and we are IN LOVE!! Have you noticed the other fun styling option for Harriett?! Look closely.... it's the optional ruffles on the sleeve cycle!
What do you think? Have you decided which version you want to sew up first?! No matter which options you choose, you really can't go wrong!
Happy Sewing and Back to School!
]]>
Hey Friends!! Back to school 2020 is in full swing and while some routines and traditions may be changing this year, we don't think a cute back to school wardrobe should be one of them!
]]>Hey Friends!! Back to school 2020 is in full swing and while some routines and traditions may be changing this year, a cute back to school wardrobe shouldn't be one of them! And on that note, we are so excited to introduce you to our 3 newest patterns!
Introducing:
Reagan
Available in Girls, Tween and Doll
Alexandra is a vintage inspired beauty! The front of the bodice can have optional pin-tucks and the back of the bodice closes with buttons. Due to the drop waist style of the dress option, no placket is required. Alexandra has a darling hand tied bow knot collar and includes two sleeve options: cap sleeve and 3/4 length sleeve with ruffle hem. Alexandra can be made a drop waist dress or as a blouse that perfectly pairs with so many VFT Bottoms, including our favorite combo, the Autumn Pinafore.
The Autumn Pinafore is a must have layering piece! Autumn features a sweet vintage length and high waist fit. The straps are finished in the back with a crisscross basket weave tie back. Autumn is perfectly paired over a variety of VFT tops and dresses, including the Alexandra top/dress.
Harper is a vintage inspired woven dolman dress with a round high neckline. The Harper bodice features front darts to allow for a tailored waistline. Harper can be sewn with short sleeve or an elbow length sleeve with a cute ruffle. Harper also includes an optional collar and waist sash. The Harper bodice closes with buttons down the back and has a skirt placket. Harper can be sewn as a top length or dress.
Lulu is a darling pinafore that layers wonderfully over your favorite Violette Field Threads dress, but we especially love Lulu layered over Harper. Lulu is a woven circle skirt high-waisted pinafore. The cute suspender style straps are held together in the back with either ribbon ties or a little button tab. Lulu features a short zipper closure in the back.
These patterns are darling separately, but combined created an unbeatable combo! And they are also available in our Tween size range as well!!!
Penelope is well known for our special occasion tulle skirt, but did you realize this one pattern also includes the every day version as well? It features a perfect peter pan collar that extends around to the bodice back. The front bodice has 4 pin-tucked rows and a waist sash with side ties. The back features button closure.
Penelope can either be made sleeveless or has two sleeve options: cap and 3/4 sleeves with bow details, making it the perfect dress year round and for all day school play!
Sooo what'll it be for you?! Which of these is your favorite Back 2 Class style?!?! Comment below and next week we will choose TWO people to win a Back 2 Class bundle of their choosing (2 patterns out of these 5 listed)!
As always, HAPPY SEWING!!!
🎉🎉🎉 CONGRATULATIONS to our winners: Carla Wisdom and Kim Babin! We will send you an email so you can claim your prize!! 🎉🎉🎉
We are SOOOOO excited to share with you our FIRST EVER Summer Misses Mini Collection!! Introducing Celine, Iris, Katia and Faye... the perfect styles to mix and match all summer long!
]]>We are SOOOOO excited to share with you our FIRST EVER Summer Misses Mini Collection!! Introducing Celine, Iris, Katia and Faye... the perfect styles to mix and match all summer long!
We'll break down each new design, detailing out all of the pattern options and then we'll show how beautifully each piece can be paired and mixed and matched with the other pieces in the collection to create loads of stying options.
{CELINE}
Our new {Celine} Top is a super trendy, cool and comfortable, knit top with sleeveless, cap or short sleeve options!! Celine can be sewn with plain front or you can also create the option for the chic front twist at the waist. Celine includes three length options: cropped, tee or tunic length, so you can choose which works best for your style!
Celine pairs beautifully with the Katia Skirt, Iris Shorts or Iris Skirt!
{IRIS}
{Iris} is the perfect paper bag waist style skirt or shorts!! With optional slash or rectangle pockets you definitely can't go wrong, and who doesn't love the optional cute bow belt! The shorts can be cuffed or sewn with a facing for a clean finish. The skirt has the option for a faux button placket for extra detail (FAUX, you read that right - so no button holes)! Iris has an elastic waistband for easy fit and comfortable wear and pairs perfect with the Celine Top or Katia Top!
{Katia}
{Katia} is one gorgeous, breezy pattern with so many options! It can be used to create a top, a skirt and/or a dress!! The top features a gorgeous square neckline, adjustable straps and pairs great with the Katia skirt or Iris! The skirt & dress can be sewn as a mini, knee length or maxi length. Katia Maxi has the option for a simple skirt or a *five* tier skirt that graduates in length and width for a really spectacular style! The Katia skirt & dress has an elastic waistband for easy fit and comfortable wear.
{Faye}
To wrap up our first Misses Mini collection, what better than the Faye Headband? This elastic back headband features a super cute twist detail. Faye pairs perfectly with the entire collection and is great for keeping your hair back during workouts, while removing or applying makeup and is super stylish for everyday wear!
Only a couple of weeks ago, we released our beloved June dress pattern in extended size ranges. When our June pattern originally released a few years ago, it was only available in Children (2-10 years) and 18" doll sizing. Now, June is available in Baby (0-24 months), Tween (10-16 years), and Misses (00-20) sizing!
With the release of these additional size ranges, our tester team got busy (and creative) while sewing up our June pattern. One of our testers, Laura Hilton, created an absolutely STUNNING June that received lots of admiration and praise! We have had dozens of inquires into the modifications she made to create this jaw dropping masterpiece.
Laura has graciously agreed to create a blog tutorial detailing out her modifications! So without further adieu, we give over the VFT Blog to Laura!!!
Laura:
"Hello everyone! I am so excited to share my "After the Storm" rainbow version of the June dress with all of you today! This dress means so much to me. Rainbows have always been a symbol of hope to me. Hope for the beauty of things to come after we weather the storm.
Start by cutting out the rainbow fabric:
- (2) 8.5” x 44” rainbow strips. These pieces will be used on the skirt.
- (3) 4.75” x 44” rainbow strips. These pieces will be used for the back bodice and back bodice ties.
- (2) individual strips of *each* of the colors in the rainbow fabric. These strips for the front ruffled V shapes. (I used 6 color strips, but you can use any you determine based on your personal preference.)
Creating the Bodice Back Rainbow
Depending on the rainbow fabric you are using, you might need to make a slight modification to the back bodice pattern pieces. It is easiest to do this before you cut the back bodice pattern piece out. My rainbow fabric was a little wider than the back bodice pattern piece, so I made the back opening slightly smaller to accommodate all of the colors of the rainbow fabric. First, cut out the rainbow at the width you would like and lay it over the top of the bodice back pattern piece. If the fabric is wider than the back bodice, draw out the needed extra width, making the adjustments to the opening in the back, not the side seam. Remember, if adjust the back opening, you will need to adjust the elastic back panel, decreasing it by the same amount you increased the back bodice.
Now cut out the main fabric as instructed in the June pattern. To create the back rainbow, lay the rainbow fabric on top of the main fabric. Both the main fabric and the rainbow fabric will be facing up.
Next tuck and pleat your rainbow fabric so it fits along the curve of the bodice back main fabric. Press the pleats as you go, being sure that the colors are lining up.
Now repeat this process for the other side. It is easiest if you place the side seam sides together.
Now, pin down your pleats and top stitch them down, making sure to line up the colors.
It is easiest to start with the inside stripe and work your way out to the outside stripe, nearest the side seam. When you get to the outside stripe, you will need to tuck and iron it under so that the top stitch will hold it down. As you can see from the picture, this is the top part of the curve, and the raw edges would have been exposed on the back bodice. Once all of the stripes of the rainbow are all stitched down, turn the pieces over and cut away any extra rainbow fabric that extends past the main back bodice fabric.
Now the back bodice pieces are ready and you can treat them just how you would following the June pattern.
Creating the Ruffled Vs on the Front Bodice:
To create the ruffled Vs on the front bodice, start by cutting out the individual stripes from the rainbow fabric into strips. I would have preferred to be able to cut the strips on the bias, but I really loved the colors in this fabric, and it was printed horizontal. If you are using a different fabric that allows for the strips to be cut on the bias, I suggest doing that. Cutting on the bias will cause the raw edges to chenille up, rather than fray. I left my edges raw, as I like the frayed edge look.
Cut (2) of each individual color stripe and stack the matching strips together with the wrong sides touching (the right sides will be showing on the outside). Then run a gathering stitch down the center of the strip and pull the top thread to gather the ruffle. You will want to use thread colors that coordinate with each color strip.
Prep the bodice front main by folding it in half widthwise and press it with an iron to create a guide line down the front center. Using the Square Omnigrid and a washable pencil, draw on the lines you will use as a guide to place your ruffles. I used a 30 degree angle, but you may want to adjust your angle depending on the size you are making and your preference for the finished look.
Carefully pin the ruffle to the bodice and use a zigzag stitch to secure it to the bodice. Make sure the raw edges of the strips are lined up with the raw edge of the bodice so they get caught in the seam allowance. Repeat this step for each color strip.
Now follow the June pattern for the bodice front main.
Creating the Bow Ties
To create the ties, fold one of your 4.75” strips in half lengthwise and sketch out the bow shape. One side of your ties will be about an inch longer at the beginning before it goes wide for the bow part. Sew the right sides together, trimming away any excess, and turn the bow right side out. Repeat for the remaining bow tie.
Top stitch through the colors.
Make sure you line the color stripes on the ties up with the stripes on the ties. Attach the ties following the June pattern.
Creating the Paneled Skirt
The last two (8.5”x44”) strips will be attached to the bottom of the skirt. I used 8.5" for the size I was making, but you may want to shorten or lengthen this based on the size you are sewing. When you cut the main skirt front and back, make sure to cut it shorter than the pattern calls for to reflect the amount the rainbow strips will add.
I also used the VFT sleeves basic curved cap sleeve and the inseam pocket tutorial to create this dress.
I hope this tutorial helps any who would like to create their own "After the Storm" Rainbow June dress." - Laura Hilton
We hope you enjoyed this beautiful tutorial created by Laura - one of our amazing testers on our team! Isn't this dress jaw-droppingly beautiful?! If you are on instagram, we would love for you to give her account a follow and let her know how amazing she is! You can follow her at @littlebonniebelle
We cannot wait to see what you all create with her lovely hacks!
As always, Happy Sewing!!
Hey, hey Friends! You asked, and we answered!
Our {June} pattern has been a classic summer staple for the past few years, but was originally only available in our girls (2-10 yrs) and doll size range. Well, after multiple requests, comments and emails, we have expanded our catalog to include our June pattern in all our size ranges - Baby (0-24m), Girls (2-10yrs), Tween (10-16) AND Misses (00-20)!!
Not only is the June pattern now available in these expanded size ranges, but we have also included a few new options, including two new back options for the Tween and Misses sizes.
The open back is the traditional style for our June dress and DOES hide the bottom band of your bra, so you can easily wear a strapless bra with it! Or, if you prefer more coverage, you can sew up the partial open back that covers straps for a normal bra or even the fully closed back with a zipper option!
We also made a few additions to the skirt! ALL SIZES of June now include the option to make a simple gathered skirt in addition to the paneled skirt pockets. Both skirts feature vintage and knee lengths as well. So many choices all in one amazing pattern!
It has never been easier to create precious Mommy & Me sets now that we have June Available in all size ranges from Doll up to our Misses! And to top it off, June was chosen as the pattern for our July Sew Along coming up soon! So if you have ever wanted to try this pattern out, now is definitely the time!
We're dying to know, which size are you the most excited to sew up?!
And just a little hint, we have an extra special guest blog coming up soon with details for a certain "magical" June one of our testers created! Trust me, you are not going to want to miss it, so stay tuned!!!
]]>
Hey Friends!! How are you all holding up?! Summer is just around the corner, can you feel it?! Time to break out of all this isolation and get some fresh air (at a distance from everyone else of course 😁). And we have the perfect new pattern to celebrate with: introducing {Viola}!
]]>Hey Friends!! How are you all holding up?! Summer is just around the corner, can you feel it?! Time to break out of all this isolation and get some fresh air (at a distance from everyone else of course 😁). And we have the perfect new pattern to celebrate with: introducing {Viola}!
Hey Friends!!! June is here and it has definitely brought along the excitement of splashing away the warm summer days! We are all feeling the urge to get outdoors and live out the Ralph Waldo Emerson quote - "Live in the sunshine, swim in the sea, drink the wild air," and we realized that now would be an awesome time to remind you about all of our amazing swim options! It was so much fun reaching out to many of our customers to be able to include their pictures in this blog, and we have to say thank you to all of you who share your lovely creations with us to see!! So definitely follow along and participate in the giveaway we have listed at the end!
]]>
Pippa is bringing glamour to the beach! This darling retro inspired two piece swimsuit features a sweetheart neckline with halter ties around the neck. The front is adorned with a bow that allows for tons of fun coordinating swimsuit colors and prints!
Pippa bottoms are comfy to wear and have amazing fit and coverage. A playful skirt version is also included! The skirt can be dressed up with pom-pom trims or tulle for a special one a kind look.
Up next?! Our Ruffle-y {Roxie}!!
Roxie is a feminine two-piece swimsuit that features super stylish high waist bottoms with optional leg ruffles and full bottom coverage. The Roxie top has two options: three tiers of ruffles or one longer ruffle, which means you can't go wrong since we all love ruffles!!!
Speaking of ruffles, the straps criss-cross and tie at the back and, of course, have the option to add ruffles!! Really want to go all out with this beauty? The ruffles can also be embellished with lace, trims or pom-poms for extra customization!!
And finally, our last swimsuit option to re-introduce you to is our sweet {Saylor}!
The Saylor swimsuit is retro at it's best, featuring a rounded front collar and inset that is perfect for mixing and matching patterns. Saylor can be made with an optional side flounce or button tabs and have halter ties or fixed criss-cross back straps Who ever said all day water play couldn't be glamorous?!?
Now that you've seen our fabulous 5 swim suits, did you know we also offer a couple of cover up options as well?!? Our Samantha tunic cover up is an amazing option for pulling over a wet suit while taking a break, and our Leilani mermaid coverup will be your daughters most favorite addition to her closet!
In case you are new to swim fabric and aren't sure if you are ready to take "the plunge," let us reassure you of one thing.... YOU CAN DO IT!!! Sewing with swim fabric is much easier than most people realize and all of our swim patterns will walk you through each and every step from choosing the right size to finishing techniques. At the beginning of each swim pattern, we have also included a 14 page "Sewing with Swim 101" guide that is chalk full of tips and tricks on fabric selection, sewing information and sewing machine settings like shown here:
So, what do you think?! Are you ready to create your custom swimwear?!?
Now on to the extra fun part - who is ready for a GIVEAWAY!?!?! Would you like to win a $50 gift certificate to our shop?!? How about that PLUS a $50 gift certificate for new fabric?!! WHOOO HOOOO!!!!
We are excited we were able to to partner with Purpleseamstress fabric to offer you this combined giveaway worth $100!!!!
Entering is easy...all you have to do is comment below with which swimsuit you would choose to create if you were to go on your dream vacation (and let us know where that is so we can all daydream along with you!!) Be sure you are following both of our facebook pages (linked below) to be qualified to win! And that is it!!
We will be drawing for our winner next week, so go ahead and comment below!!
https://www.facebook.com/violettefieldthreads/
https://www.facebook.com/PurpleseamstressFabric/
EDIT: CONGRATULATIONS to
🎉Julianne Ratliff🎉
for winning this contest!!! Please send us an email to
info@violettefieldthreads.com and we will get your prizes set up!
If you are anything like us, you are dreaming of long, hot summer days spent exploring in the sunshine and basking in the beauty of the outdoors! Our talented Maya had just that in mind as she was designing our newest pattern: {Shiloh}!
]]>If you are anything like us, you are dreaming of long, hot summer days spent exploring in the sunshine and basking in the beauty of the outdoors! Our talented Maya had just that in mind as she was designing our newest pattern: {Shiloh}!
Introducing Shiloh- the perfect little sundress, available in baby, girl, and doll sizes!!
Shiloh is a precious pattern designed for woven fabrics with endless options and possibilities all rolled into one!
Let's talk skirt options first...
Want to create a super twirly dress? You're all set - just choose the gathered DOUBLE circle skirt option as a dress length! (Yes, yes, you read that right - DOUBLE CIRCLE SKIRT!)
Wanting to create a sweet little top for all-day-play to pair with shorts (like our Daisy shorts... on sale this weekend)? You're good to go - just choose the simple gathered skirt option in the top length!
But you know, skirt options aren't the only thing that makes each Shiloh created different and unique... oh no! Have you see the back options?! Ooooh the back options!!!
What elicits the feeling of childhood nostalgia quite like a dress with criss-cross back straps, flutters and a twirly skirt? Shiloh offers all of that and more!
This back option features an elastic casing at the waist and the criss-cross straps that button at the side seam. You can create these straps as basic straps OR you can add full or partial flutters down the straps as well!
If the cross back option isn't your style though, OR you would simply like to change it up after you've created a few hundred of that style, Shiloh also includes an option for a button back style that ties at the neck and offers a bit more coverage across the back! This pattern is just FULL of so many ways to customize it and change it up!
You know what else is awesome about this newest release!? Maya is hosting the VFT Sew Along in our dedicated Facebook Sew Along group....which means there are multiple videos in that group with step by step instructions of sewing a Shiloh, from start to finish! So you can check out that group and review the videos to help walk you through sewing up one of these beauties all on your own!
So, what you do you think? So many amazing options for your next summer sew!! Let us know in the comments below which option you are planning to sew up first!!
As always, Happy Sewing!!
]]>Hey Friends?! How are you holding up during this isolation time?! 2020 sure has been throwing us all sorts of curves, but we hope you are doing well and maybe even getting some more sewing time in!
]]>With many states (and countries) implementing stay at home orders, we decided now was a good time to introduce you all to a new way to lounge in style!
Meet Cecilia & Delphine - the perfect combination of comfort and class!
{Cecilia} is a GORGEOUS and classic cami and shorts set, that has no closures - so you know what that means, right?! This entire set sews up like a BREEZE! And it will literally feel like a breeze when sewn in lightweight fabrics like rayon challis or voile.
The Cecilia scoop neck cami top can be sewn with a small facing inside, or with a partial lining that can include an optional shelf bra!! The straps can be left simple or they are also the perfect place to add some lace detail or even a little ruffle as well!
The Cecilia Shorts are an easy fit short with a super comfy elastic waist! You can easily shorten or lengthen them, to achieve the look you would like for your set. And how perfect are they for showcasing some lace or trim for the bottom edges? These really will make you feel like your "loungewear" has become a treat to wear and show off! One warning though, you may have to physically pry them off of your littles :)
And what is the perfect lounge set, without the perfect robe to top it off? Introducing {Delphine}! The classic, lightweight robe of your dreams!!
Have you ever created a robe for yourself?! Me either...and we decided it's high time we have fixed that! Robes are such a great piece to have in your closet - whether it's for after showers, unsuspecting door bell rings, or just that added comfort on top of your loungewear! This is one item you will be grabbing to use non-stop!
Delphine features drop shoulders for a relaxed fit and a fold over traditional collar. It also includes an optional sash with belt loops and optional front patch pockets (hello phone/keys/sanity holder)!
Creating Delphine in light and breezy fabrics such as rayon and voile is sure to give you an extra dreamy and feminine feeling robe!! We also just LOVE adding lace and trims along the sleeves and hemline to give it an even higher end feel!
Both Cecilia and Delphine are available in Girls, Tween, Misses and Doll sizing, which means these create the PERFECT sets for so many occasions!
Slumber party?...CHECK!
Bachelorette party?...CHECK!
Spa day?...CHECK!
Just staying home and lounging around?...DOUBLE CHECK!
Just wait and see, Cecilia and Delphine will become your most used items you've ever sewn up!
Regardless of how you create your lounge set, we hope you all are doing well, staying safe and finding the silver linings through all of this! And of course, Happy SEWING!
]]>Evangeline is the final pattern we are introducing of our new 2020 Spring patterns, and we may just have saved the best introduction for last!
Evangeline is a woven dress or top that has the most whimsically, flattering silhouette. When we put these on, we couldn't help but imagine we were actually walking through small Parisian alleyways or art walks. The trendiness of Evangeline is spot on and is sure to have you envisioning your next outing or travels as well!
Evangeline features a squared neckline and is available in girls, tween, misses & doll sizing! The bodice features waist darts, as well as bust darts in the tween & misses sizes, to give you the perfect fit every time!
Evangeline includes three different options for sleeves. Both the short puff sleeve and elbow puff sleeves are shown in the dress examples above and the sleeveless option with feminine ties is shown in Ericka's dress pictures below. The short and elbow puff sleeves feature elastic at the top and the bottom for an easy, comfortable fit every time.
Evangeline has a zipper back closure and includes multiple skirt options. You can create the simple skirt in vintage or knee length or create the tiered ruffle skirt in knee length as well!
So let us know - where are YOU dreaming of escaping to once we are all able to travel again?! Are you going to be bringing an Abigail, Bianca or Evangeline along???
Comment below, and we will choose one lucky participant to receive all 3 new patterns in their size of choice!!
*** Contest Closed***
Congratulations to
Samantha Rodriguez
]]>Continuing on with our Spring Pattern release, we are happy to introduce you to - Bianca!!!
Once all of our studio samples were sewn up, and images of all of our testers' samples were sent in, it was easy to conclude that Bianca is just the perfect sundress! It's so flattering on all sizes.
]]>Continuing on with our Spring Pattern release, we are happy to introduce you to - Bianca!!!
Once all of own studio samples were sewn up, and images of all of our testers' samples were sent in, it was easy to conclude that Bianca is just the perfect sundress! It's so flattering on all sizes.
Bianca has quite a few different style options, and spans from Girls size 2 all the way to Misses size 20. Whoever you're sewing for, your little girl, tween, or yourself, we're confident Bianca will become a go to pattern.
Here we've sewn Maxi and Midi length Bianca dresses. Both dresses feature princess seams and a zipper back closure.
The Bianca skirt is a gathered half circle skirt. This provides a beautiful and flattering shape. There are three skirt length options: knee length, midi length with ruffle and maxi length with ruffle.
Family pictures on the beach? Maxi-length Bianca! Weekend picnic at the park? Knee length Bianca! Outdoor wedding to attend? Midi or Maxi length Bianca! This dress will have you reaching for it in your closet non-stop!
Bianca is available in Girls, Tween, Misses and also Doll sizing!
Bianca is easy to wear, both for every day and also for special occasions.
The Bianca dress features gorgeous princess seams and includes two bodice style options. The simple bodice style, shown above in the beach photos and ice cream shop, is a super quick sew, with the perfect fit! The ruffle bodice option, as shown above with the rainbow dress pictures and below with the strawberries & plaid, has a darling ruffle sewn into the princess seams and extends up and over the shoulder straps...it really adds such a lovely touch to an already perfect dress!
So, which options are you planning to sew up first? Knee length with bodice ruffles, maxi length with simple bodice? Midi length with the simple bodice?
We cannot wait to see what you create!
The bodice of Bianca is also the perfect place to add a faux button placket. Super easy and adds so much detail.
Happy Sewing!
]]>Hey Friends!! Spring has sprung, and you know what that means?! Our new 2020 spring patterns have sprung as well!
The first PDF pattern we cannot wait to introduce you all to is our brand new Abigail dress!
]]>Abigail is a truly vintage inspired beauty that will make your heart do little flips each time you see your darling doll wearing it!
It is a woven pattern featuring a unique bodice and skirt design with a front panel running down the middle of the dress. The high front and back neckline is rounded, and includes an optional small, dainty ruffle. One of the sleeve options is a small dainty ruffle, mimicking the same ruffle on the neckline.
The front bodice panel and front skirt panel are absolutely perfect for showcasing embroidery work and specialty fabrics!! Here, Jessica created this strawberry look by repurposing a white vintage table cloth that had the strawberries already embroidered on and we are just in love with how well Abigail showcased this!
When creating Abigail, you can choose between three different options for your skirt! You can choose to create the precious vintage length, a knee length (shown below in blue linen) or the show stopping double skirt option shown in these strawberry and gingham pictures!
The sash might be one of our favorite features of Abigail. The sash is attached into the front panel. It's gathered to create a wide, beautiful sash tied into a bow at the back center.
All options for the skirt feature a flat front panel, with gathered sides. For this light blue linen dress, we made a slight modification (detailed in the Abigail PDF tutorial) and used (2) back underskirt pieces to create a traditional gathered skirt.
Easy peasy!
And what is a vintage inspired dress without an option for a puff sleeve?! Whether you create it with the precious puff sleeve, the dainty small ruffle sleeve or with none for a sleeveless version, you really can't go wrong!
At Violette Field Threads we love all of the vintage details that remind us of the darling, classic looks from the past. Our newest pattern, Teagan, just released and many of our customers were interested in the horizontal pleats that Jessica Herning added to her version.using Bec Williams “Sweet Nothings” fabric from Hawthorne Supply Company.
]]>First off, you’ll want to start by choosing any pattern with a rectangle skirt. Violette Field Threads provides cut charts with the measurements for rectangular pieces, but you can easily add the extra length to paper pattern pieces if you’re more comfortable using that method. I’ve used Harper and Elodie for my examples and you’ve already seen Teagan with pleats added in Jessica's initial version!
After you’ve chosen your pattern, you'll want to decide the look you want. On my Rose themed Elodie above, I chose one large 3” pleat and for my pinstripe Harper above, I created two 3/4” pleats. On Teagan, Jessica created two 2” horizontal pleats. *Tip - Using a scrap piece of fabric to try out pleat sizes and spacing can help you visualize your final look.
Next you’ll need to figure out how much length to add to your skirt pieces. *Note - If your chosen pattern instructs you to add a lining to the skirt (such as Elodie) you will not need to make any changes to the length of your skirt lining pieces.
Formula:
Length of finished Pleat x 2 =_______ x Number of Pleats = Total length to Add on to the bottom of the skirt measurement
Example: For Harper I wanted two 3/4” pleats so my math looked like this -
3/4 x 2 = 1 1/2 (This is for one pleat and I wanted two.) I then took that total and multiplied it by how many pleats I wanted to add. 1 1/2 x 2 = 3. That gave me a total of 3” I needed to add to the length of my skirt to create two 3/4” horizontal pleats.
Once you have your total, add that measurement to the appropriate length using the cut chart in your pattern (or the pattern piece itself) and cut your skirt pieces out. Follow the directions for sewing side seams and hemming in your tutorial. Now it's time for the fun part - adding the pleats!!!
Method 1:
First off, you measure how far up from the hem you want the folded edge of the bottom pleat to fall. I wanted the bottom pleat folded edge to be 4” from the hemmed edge of the skirt.
From there, add the total length you added for one pleat. For this version I’m creating 3/4” pleats so I added 1 1/2” for each pleat. Added to the 4”, I measured up a total of 5 1/2”. Using your preferred method of marking (pins or disappearing ink pen for example) mark that measurement all the way around the skirt.
Fold your skirt wrong sides together at your markings and iron the fold flat.
Now sew along the folded edge using the length of your finished pleat as your seam allowance. My finished pleat is 3/4” so that was my seam allowance.
Once you’ve sewn your pleat, unfold the skirt so that it is laying flat with the wrong side down and right side facing up. Now you can iron the pleat down towards the hem.
Repeat the steps for your next pleat using the stitch line of the pleat you’ve just sewn as your starting line for measuring your next pleat placement.
*Note - Spacing between the pleats is a personal design choice. Use whatever length between pleats gets you the look you want. I prefer small pleats being closer together, but it’s completely up to you!
I chose to have my next pleat 1/2” above the first one. So I measured up a total of 3” from the stitch line of my first pleat. I marked it just like before.
Then, once again, I folded the fabric with the wrong sides together at my markings and ironed flat.
Finally, I sewed that pleat using the same 3/4” seam allowance....and voilà! All you have left to do is iron it down towards the hem like you did for the first pleat and you are done!!
Method 2:
For this skirt, I wanted the pleat closer to the middle of the skirt since I was creating a large pleat. After sewing my side seams and hemming, I folded my skirt in half and ironed a fold all the way around.
I then unfolded the skirt and used that fold line to measure down towards the hem the length of my finished pleat. I wanted a 3” pleat so that’s the length I measured.
Next, mark with pins and fold wrong sides together. Iron the fold.
Sew using the length of your finished pleat like before which should be the fold you ironed earlier when you folded the skirt in half. For mine, I used 3” for a 3” finished pleat.
Iron the newly sewn pleat down towards the hem. And then you can finish the skirt according to your tutorial!!
Adding Trim:
Fold the pleat up to sew your trim on to the bottom edge underneath side of the pleat. Sew very carefully and slowly along the edge of the pleat attaching the very top edge of the lace trim to the underside of the pleat.
When finished, iron the pleat and trim back down. Your top lace edge should be on the underside of the pleat.
And now you can sit back and look at the gorgeous pleats you have just created on your classic and timeless garment!!!
XOXO,
Kim Hembree
]]>Hey, hey sew sisters!! Our FIRST release of 2020 is here!!! We are so excited to introduce you to TWO absolutely DREAMY patterns!
Meet: {Flora}, the comfiest knit nightgown pattern, guaranteed to turn your little one (or Momma) into your very own sleeping beauty!
When creating Flora, there are so many great ways to customize this pattern to suite the season! Whether you want to create the long sleeves with gathers, or the long sleeves with cuffs - it's sure to keep Sleeping Beauty warm during those cooler months. But no one wants long sleeves in the summer time...so make sure to create a sleeveless version while you are at it! Add the darling ties to the shoulders and you have a nightgown fit for a princess!
Whether you're planning a movie night, a trip to grandmas, or even some fancy glamping, this is the pattern for you! Flora is available in sizes for Misses, Tween, Girls, Baby and even Doll...so this pattern is THE one for all your matchy-matchy goodness.
And speaking of glamping, we have JUST the pattern for you....Meet CLAIRE!
Have you ever thought about creating a sleeping bag, but you weren't quite sure where to start?! Look no further, as we have taken all of the guess work out of it for you!!!
Claire is a fully functioning sleeping bag, with all the bells and whistles for customizing exactly to your liking!! The front main can be created as a solid fabric, or with 3, 4 or 5 panels! Add some ruffles to that, and you not only have a super comfy sleeping bag, but your movie nights will be the talk of the town!
And that darling carrying strap you see in the picture above?! That is an optional attached strap, and the directions for that are included in the pattern! Throw in a coordinating pillowcase (also included in this pattern) and your little one will be ready for all the adventures coming her way!!
Now, we know some of you may be a little intimidated by sewing in the standard full zipper that sleeping bags usually have...but you really have no reason to be worried! Our instructions help explain things step by step, and if that is still not enough to convince you to make one- we also include 2 other closure options as well - the full ribbon tie closure or a half zipper/half ribbon tie version! Really, you CAN do it!!
And did we forget to mention? Claire is available in DOLL sizes as well?!?! SQUEAL!!!
What are you waiting for?! Grab your copies of Flora and Claire and let's get this party started!!
]]>Welcome back to the FINAL week of our tips and tricks recap from 2019! We will be reviewing tips from letters R-Z and then we will post a GIVEAWAY at the end... so lets get started!!
R is for a Rolled Hem! A rolled hem is a very narrow finish and can be made on a regular sewing machine or using a serger!
If you are sewing on a serger, you will only use three threads. The settings may vary from machine to machine, and on some you may need to remove the stitch finger. You may want to consult your manual for the correct settings for your specific machine. If you are sewing a rolled hem on your regular machine, there is a specific foot you can use (although they come in several different sizes). It features a groove on the back and a funnel on the front side.
This is where your fabric will roll up into and will go out through the back, running through the groove while the needle goes through it, creating a very small hem. Rolled hems are usually done on a regular machine when working with light-weight to medium-weight woven fabrics, but is most common with delicate fabrics. On either the regular machine or serger, it is a beautiful finish and can be especially helpful if you need to squeak out a hem that takes up less than a 1/2" of fabric.
S stands for Selvage! A selvage is the side of fabric where the finished edge stops the edges from fraying. The warp threads run parallel down the length of the fabric and the selvage is created when the weft threads are folded back on themselves at the end of each row as the fabric is woven.
The selvage has become a beautiful part of the fabric design, and holds a wealth of information, such as the name of the fabric manufacturer and fabric make up. We have seen people use them on quilts and in other small projects. Another great use for them is as size tags on your projects. The color swatch circles usually have numbers printed inside of them and, since they don't fray, they work well for small size tags.
T is for tension! In the sewing worth this can easily bring on a headache if you do not understand it properly. If you are somewhat new to sewing, you may be asking what in the world it is? Tension is what keeps your bottom and top stitches in equal timing with one another. This ensures that the stitching on the front and back of your fabric looks the same, and that neither the upper nor the bobbin thread shows up on the opposite side of the fabric.
When the upper thread (what's going through your needle) is showing on the wrong side of the fabric, this means your tension is too low. In order to fix it, you raise the tension little by little, by rotating your tension knob to the right.
If the bottom thread from your bobbin is showing on the right side of the fabric, then it means that the tension disk is too tense. Slowly begin rotating your disk to the left, checking with each movement of the dial to see if the thread tension has evened back out when you're sewing.
If you have tried troubleshooting using these tips above, but are still having issues with your thread tension, your problem might be with your bobbin. The bobbin case also has some tension for the thread, and depending on what machine you use, you may be able to adjust it slightly by tightening or loosening a screw located on the side of your bobbin case. It is definitely a trial and error situation, but once you get the settings adjusted to the proper tension, you will notice right away if something is off again in the future!
U is for Universal Needles!! Whether you have the newest model sewing machine or a basic, entry level machine, the most important tool used is your needle!
Did you know? The sewing life of a needle is 8 hours! After that, the point will become worn and stitch quality may become compromised. We always keep some on-hand to change regularly. A good rule of thumb is to use a new needle at the start of every project.
Now, on to the Universal needle. The name says it all - universal - because it can be used on the majority of projects. We can use universal needles for both woven and knit fabrics because the point of a universal needle is both sharp and rounded, allowing the needle to have the characteristics of both sharp and ballpoint needles alike. They are not optimal for knits though, like true ballpoint stretch needles. Here is a great guide to knowing what needles you have and/or need!
V is for Vinyl! One of the latest and greatest things to enter the craft world over the last several years. With the Cricut, Silhouette, Brother Scan & Cut and other home vinyl cutting machines available, we've seen all sorts of great uses for this product.
We have seen so many creative ways that our members have incorporated vinyl into their at home sewing projects, to include details for princess costumes, wording for special occasion tops/dresses, and even adding size tags inside clothing with the vinyl! One of my personal favorites though, is how Ashley Cowan used vinyl to create the face for her blushing bunny!
You can use a vinyl machine to add so many personal touches to your sewing projects! The options truly are endless!
W is for the Walking Foot! The walking foot is a presser foot that allows even sewing over lots of layers or thicker fabric.
It grips the fabric on the top, while the feed dogs grip the bottom, and they work together to help the fabric to walk through when sewing. It is a very bulky and strange looking foot, but has a few different uses.
Many people use it to sew knits, but we don't think they are necessarily helpful on all machines. Some machines sew knits just fine without it, but there are people who have lots of success sewing knit with the aid of this foot, so it may be worth experimenting. It can also be very useful when sewing multiple layers, like on straps or binding. It will keep those ripples that can sometimes show up from happening because all layers of the fabric will be fed evenly through. Whatever you decide to use your walking foot for, it is a very handy foot to own!
X is for X-tra! We are getting close to the end of the alphabet, and finding "sewing" themed tips for each letter has been a lot of fun...but the letter "X" had us stumped! Not being able to come up with a term that started with the letter "X" we decided to get a little creative!! Letter "X" for our tips and tricks is going to stand for being a little "X-tra" = something we always encourage!! We provide the patterns, and what's great about them is all the room for creativity you have with them! We love it when we see designs that have gone the extra mile: put on that extra trim or those special buttons. Sometimes it's the extraordinary touches that brings an outfit from great to spectacular! So, don't be afraid to be a little "X-tra!" Make your garment unique to you and "X-tra" special!!
Y is for a Yardage Chart! When you are out and about at a fabric store, having a handy yardage chart for easy access can make deciding on how much you need cut a simple task! Just print (or save a screen shot) of this cute little chart below and keep it for a quick reference!
And moving on to our FINAL letter of the alphabet - AND our giveaway as well.....
Z is for ZIPPERS!!! Zippers are something we are ALL familiar with using in our day to day lives, but did you know there are many different kinds of zippers? Depending on what project you are working on would decide which type of zipper you should purchase?!
Although there are many types of zippers, for times sake, we are going to cover the 3 most commonly used zippers!
The first type of zipper (shown above) is the Nylon Coil Zipper (also knows as an all-purpose zipper) and is the most common zipper option and can be used to make a variety of projects. Coil zippers are thin, lightweight zippers with small teeth. They are made of plastic with polyester sides and come in a variety of colors. The endless varieties of colors available make this zipper a great choice when making our patterns, since you can usually find a match for the fabric you’re working with. This lightweight zipper can bend and flow with the garment and doesn’t weigh down the material like a heavier type of zipper would.
The second type of zipper (shown above) is the Invisible zipper! Unlike the nylon coil zipper, the coil for an invisible zipper is located on the back of the zipper, which hides it from view. The only part of the zipper that is exposed is the tear drop pull at the top of the zipper. This zipper is also lightweight and has very fine teeth. An invisible zipper can be tricky to sew, and I recommend ironing the zipper open before pinning it to your garment. You can also use an invisible zipper foot which helps to create the best seam.
The third type of zipper is the metal and plastic molded zippers. Both molded plastic and metal zippers have teeth that have been molded at regular intervals on both sides of the zipper tape. Both of these zipper options are very sturdy and do well when using heavier material, so better to be used for jeans, bags or jackets versus lightweight dresses.
And there you have it - our A-Z Sewing Tips & Tricks Roundup!! We hope you enjoyed these helpful tips and tricks being posted in one handy location for future reference! And to end it with a bang, we would love to do a GIVEAWAY for one lucky reader to be able to choose ANY 3 of our patterns to download, FREE OF CHARGE!! All you have to do to enter is comment below with your 3 favorite tips we have shared (they can be from any of these 3 past blog posts from our A-Z roundup!) and we will choose one random winner to receive the patterns of their choice next week!
Edited to add: CONGRATULATIONS to our winner = Lindsay Gibson!!
We will be sending you an email so you can claim your prize!
HAPPY SEWING!!!
]]>
Hey Sewing Sisters!! Welcome to 2020!! And to the 2nd edition of our Tips and Tricks Recap! Today we are going to continue our recap of last years tips and tricks that were shared in our newsletters, continuing on with the letter I and going through letter Q!
]]>Hey Sewing Sisters!! Welcome to 2020!! And to the 2nd edition of our Tips and Tricks Recap! Today we are going to continue our recap of last years tips and tricks that were shared in our newsletters, continuing on with the letter I and going through letter Q!
I is for interfacing. What is interfacing and why is it important? Interfacing is used to provide stability, shaping and support.
Collars, cuffs, facings and plackets are the most commonly interfaced areas, but are not the only areas it can be used. For example, our Wren weekender bag is a great place to use interfacing!
There are several types of interfacing, such as fusible and sew-in. Some very lightweight fabrics cannot withstand the heat of fusible interfacing and it also adds a little more stiffness. If that isn't your desired outcome, you may want to go with sew-in or lightweight interfacing as lightweight interfacing will not take away from the drape or airiness of your fabric. Another great place to use interfacing is in your button plackets. Using it there will reinforce your holes, which is especially helpful if you have little ones who like to dress themselves.
J is for JUST DO YOUR BEST!!! It was one of our favorite tips from this collection, as it applies to EVERYONE! Each of us are in different places in our sewing journey. Some of us have been sewing for many years and some may have picked up the craft just this week. No matter where you are on your path of sewing, remember to just do your best. Give yourself grace and time to improve and grow as a sewist! Don't get discouraged, and just take each project one step at a time!
If you are looking for a place to share your projects or get answers to questions, our Facebook group is a great place to get encouragement from others who many have been where you are & might have wonderful words of wisdom to share! We are all in this together and love to rejoice in each other's successes!
K is for Knits. We are sharing some of our favorite tips and tricks for sewing with knits. Sewing with knits may seem a little foreign, especially if you are only used to working with woven fabric, but it is such a great tool to have in your toolbox as knits are always kid-approved and many times knit patterns are super quick sews!
The first thing to learn when working with knits, is that there are many types, and each works better for different projects. Some knits are easier to sew with than others. The less stretch a knit has, the easier it is to sew with, however it might not be the right knit for the project. Knowing a little about the types of knits available will help you choose the correct type of knit for a specific pattern. Here is a list of 7 more commonly used knits:
Cotton Jersey (shown above): A knit fabric made of natural cotton and used mostly in t-shirts. This knit has a sturdy hand and wear with minimal stretch. Note: unless the T-shirt has a wide neck opening, another type of knit would be needed for the neckband.
Cotton Lycra (shown above): Known for its smooth hand, excellent stretch and recovery. This is what we would suggest for most of our patterns.
Cotton Interlock (Shown above): A double knit that is thicker and a little heavier than a single knit, which can make it a bit easier to sew with. This knit typically is the most stable of all knits, keeping its shape very well.
Cotton Ribbed (shown above): A double-knit fabric in which the wales or vertical rows of stitches intermesh alternatively on the face and the back (like a t-shirt neckband)
Jersey ITY (shown above): Typically comprised of 92% Polyester/8% Lycra, this knit is ultra soft, does not wrinkle and has great stretch and drape. It is perfect for active-wear, dresses and tops.
French Terry (shown above): Features looping and piling on one side only and has a flat, unlooped back. Typically this knit is 100% (meaning not much stretch), but it can be found with spandex or other fibers for increased stretch and recovery.
Lycra Spandex (Shown above): This type of knit has a heavier weight, very smooth hand, and a four way stretch for a dded comfort and ease. Perfect for swim wear and dance wear!
As we were discussing those 7 types of knits above, we often referred to the stretch and recovery of the knit. Why is this important? Most knit patterns will instruct what time of knit is recommended, by some will even instruct the percentage of knit stretch recommended. This is important because most knit patterns are designed with 0 or negative ease. This means the garment is designed so that the knit will stretch to the subject's measurements when worn. If your fabric does not stretch enough, your garment may end up being too tight or small.
The other thing to keep in mind when choosing knit is stretch recovery. Some knits (like rayons) will stretch a ton, but they tend to have bad recovery, meaning they stay stretched out. This can be a problem. For example, if you are making a neckband (which is typically 10% smaller than the neck opening) you want the neckband to stretch out while you sew it to the neckline and then bounce back to its original length to "shape" the neckline. If the knit has poor stretch recovery, then it will stretch and stay stretched making a really huge, stretched out neckline. You can easily test stretch recovery of a fabric! All you have to do is take a 10" strip and stretch it. After it is stretched, if it returns to 10" then it has great stretch recovery, since it bounced right back to proper size. If it's anywhere bigger than the original size, then it doesn't have the best recovery.
Additional knit tips:
~Knit doesn't fray, so hemming isn't absolutely necessary
~Do not stretch the knit as you sew
~Use a stretch or ball point needle (discussed in last weeks blog)
~Although a serger, walking foot or cover-stitch machine are not necessary for sewing with knits, you may find the addition of these tools takes your knit skills to "store-bought" level.
Bottom line - Don't be afraid to try knits!! They may open a whole new world of possibilities for you!
L is for Linings! Linings are included in most of our patterns. They are used to hide seam construction, help the garment to hang better and, in some instances, keep a garment from being see-through. A helpful tip would be to use plain white cotton as your lining fabric instead of wasting your good fabric in a place where it won't be seen.
M is for Muslin. You might be wondering, "Why do i need to create a muslin?" Well, have you ever used your expensive or treasured fabric on a garment, only to find that the fit isn't what you intended?
Not all people or kiddos are the same shape and size! We try our very best to make sure that our patterns fit a wide ranges of shapes and sizes, but sometimes they still may need to be tweaked for your taste or intended fit. This is when making a muslin would come in handy!
Making a quick muslin with an inexpensive fabric would allow you to get the exact fit you desire, perfect the process, avoid frustration, and in the end, you could even have an extra wearable garment!
There are a few things to think about when constructing your muslin. One would be to use fabric that is similar to your intended fabric so that you can achieve similar drape and fit. Second, even though you might be sewing a super quick test garment, make sure you still take the time to make it correctly! Be sure to cut your pieces carefully and pay attention to the grain so there is no warping or weird fabric issues with the muslin. Also, be sure to follow the seam allowances as you would on the final garment. Lastly, baste everything so it is super easy to tear apart if needed. You can always got back and reinforce the stitches if you decide you want to keep it as a wearable garment!
N is for Nap! Nap is the texture of a fabric with the raised fibers of the fabric going in a particular direction. It is most noticeable in velvets, corduroys and fleece fabrics, but it is also present in silks, satins and other smooth surfaced fabrics. Most of the time you can determine if a fabric has a nap by brushing your hand over the fabric in one direction to see whether it changes color or shade.
If your fabric is textured or has a one-way pattern, follow the "with nap" layout. This requires all of the nap to run from top to bottom. If there are pattern pieces where the nap is running a different direction, it will be noticeable. So, when you are working with one of the above mentioned fabrics, cut carefully and with your pattern pieces going in the same direction!
O is for Overlocker!! Is an overlocker (otherwise know as a serger) necessary? The answer is no! However, it does make life a lot easier and makes your finishing look much neater! And overlocker is a sewing machine that cuts and overlocks the edge of your fabric at the same time.
It can be 3-8 threads and can be used for a variety of creative stitching. Some people even use their machines for gathering! If you want to take your sewing to the next level, a serger would be a great investment!
P is for Pre-shrinking!! This is one debated topic among seamstresses! We are going to err on the pre-shrinking side though, especially for your knit fabrics.
There is a few reasons to pre-wash/pre-shrink your fabrics. For example, most fabrics are treated with chemicals and dyes while in the manufacturing process, and pre-washing washes out any of those treatments. Also, pre-shrinking means that your fabric becomes washable when made into a garment because the shrinking has already be done! This is the main reason we mentioned pre-shrinking your knits. They have a tendency to shrink up more than wovens, so pre-shrinking will ensure a proper fit after washing.
Q is for quilting! Quilting is not just for blankets and pillows! It is a really interesting technique that you can use on bodices, side panels, and even skirts! We love how Carrie Tweten from Maggie Mae used a chevron quilting technique on her bodice for this darling dress:
There are many quilting designs available which could provide great inspiration for your next sewing project!!
We hope you are enjoying these recaps helpful tips and tricks! Join us next week for our final letters of the alphabet - {R-Z} and we can't wait to see what you sew up next!
Happy Sewing!!
]]>
Hey Friends!! Can you believe 2019 is coming to a close soon?! I guess what they say is true - "Time flies when you're having fun!" We've had so much fun this year and thought a great way to wrap up 2019 would be to recap some of our favorite tips and tricks we shared in our newsletters throughout the year!
]]>Hey Friends!! Can you believe 2019 is coming to a close soon?! I guess what they say is true - "Time flies when you're having fun!" We've had so much fun this year and thought a great way to wrap up 2019 would be to recap some of our favorite tips and tricks we shared in our newsletters throughout the year!
Back in January we started a series in the newsletter called “Tips and Tricks from A-Z.” We told you about a unique tip, trick, or reminder each week for each letter of the alphabet. We thought it would be fun to do a blog post about it with a quick recap of each tip. Since there are 26 letters in the alphabet, we decided to break the blog post into three sections, so it's not too much to read through at once...so here's our A-H recap!
A is for Aurifil! The reason we always recommend Aurifil thread in our patterns is both the quality and the color. Aurifil has several types of threads. We recommend 40wt for sewing and Aurifil's 6-strand 100% cotton floss for embroidery.
Aurifil's 100% Cotton 40wt thread is available in 270 cotton colors and is wound on a green spool. Because of its slightly thicker weight, it is perfect for use with sewing bags, toys, dolls or garments. It comes on a small spool which contains 164 yards, a large spool containing 1094 yards, and a cone containing 5140 yards.
Aurifil's 6-strand cotton floss is wound on a gorgeous wooden spool, perfect for easy travel and the prevention of pesky tangles! It is also available in 270 colors and boasts 18 yards per spool.
You only have to use it once to see the difference and why we recommend it!
B is for ball point needles! Ball point needles are needles with slightly rounded tips. They are designed to part the fibers of the knit fabric rather than pierce them to prevent damaging the fabric.
When you are sewing a woven fabric, you want a needle with a sharper point so that it will go through the fabric without snagging it. However, if you used that same needle when sewing knits it would poke a hole in your fabric that usually tends to grow with wash and wear. Using a ball point needle or a stretch needle will prevent this from happening. It is one of the most important things you need when sewing knits!
C is for clear elastic! Clear elastic is great when you are sewing with knits. It prevents necklines, shoulders, and bodices from stretching out and looking wavy or wonky once sewn.
If can be a little difficult to handle, so if you find that it is sticking to your presser foot while you sew, you may want to use a special Teflon-coated sewing foot. When sewing the elastic onto the fabric, you should sew without stretching the elastic. Also, we recommend cutting the elastic a bit longer than necessary for easy handling as you sew. Clear elastic is a game changer when attaching a knit bodice to a woven skirt!
D is for the Darby Cloche Hat Pattern! Our tip from this week is more of reminder of one of our lesser known but very cute and functional patterns = the Darby Cloche Hat.
The Darby Cloche Hat is one stylish accessory to add to your daughter's wardrobe, or even your own, as this pattern is sized toddler - adult! Darby features a 1920's styling with a low asymmetrical brim. Add a bow or felt flower for endless options. This stylish and classic cloche hat is easy and fast to sew and requires very little fabric!
E is for Embroidery! Embroidery is decorative stitches used to create a pattern on fabric.
If you have ever seen some of the beautiful hand embroidery that a lot of our group members use on their garments, but don't know where to start, there is a great video on the Violette Field Threads Gathering place page that will show you how to make embroidered roses. (If you aren't yet a member, we suggest you join the group and check it out!) Hand embroidery is a great way to take your sewing to the next level and such a fun & relaxing skill to learn!
F is for French Seams! For those of you who do not have a serger, French seams are a beautiful way to hide those pesky inside, unfinished seams. Once you try french seams, you may even prefer to finish this way, even if you do have a serger. A french seam is a seam finish that encloses the raw edge so the reverse side is neat & finished.
Here is the process for creating a French seam. Pin your fabric together so that the wrong sides are facing each other. Sew the fabric together using a 1/4 inch seam allowance, removing the pins as you go. Trim the outside edge of the seam so you are left with 1/8 inch seam allowance. Open the pieces of fabric and lay it out flat on an ironing board. Iron across the seam on both the right side and the wrong side of the fabric so it lays perfectly flat. Then, fold the fabric so that the right sides are facing each other. Sew your second seam, this time using a 1/4 inch seam allowance. Iron the completed double seam one more time and there you have it - French Seams!!!
G is for grainlines! The grainlines are the direction in which the threads are woven. The straightgrain (lengthwise grain or warp) runs parallel to the selvedge and is the strongest. The crosswise grain (weft) runs perpendicular to the selvedge and has the weaker weave. This is important if there is going to be a lot of stress on the garment, you would want your stronger yarns to be where the stress of the garment is. It isn't particularly important for most of our garments, that is why people usually say you can cut it in either direction, as long as you are cutting straight. If you happen to cut off grain, it will cause our garment to be skewed or twisted.
You can also cut fabrics on the bias, which is at a 45 degree angle between the warp and weft. Cutting on the bias gives you maximum amount of stretch in woven fabrics. It is often used as binding around curves. The most important thing to note, is to be careful to cut on the grainline, be it the warp or weft.
H is for Hong Kong seams! Hong Kong seams are another neat way to finish your seams. They are similar to French Seams, as the raw edges are encased. However, instead of encasing them within themselves, they are bound either to one side or in the case of thicker fabrics, you can press the seam allowances open and bind each side separately.
Any of our pants patterns, such as Sloane Skinnies, Avery Pants & Presley pants would be a great place to try this method!!
We hope you enjoyed the first part of our {A-Z } recap! Come back to read next weeks blog post where we will recap tips {I-Q}!
Happy Sewing!!
]]>The most difficult secret to keep from 2019 = Brianna!! This is the classic, comfy & cozy PDF pajama pattern for knit fabrics everyone has literally been dreaming of!!
]]>The most difficult secret to keep from 2019 = Brianna!! This is the classic, comfy & cozy PDF pajama pattern for knit fabrics everyone has literally been dreaming of!! It has us all up in our feels, soaking in every second of our little ones in their snuggliest and comfiest attire.
Bedtime cuddles…such a precious time of the day when all the stress melts away as you snuggle up for a bedtime story!! Feeling the breathing of your little one slow as their heartbeat matches in rhythm with yours. These moments are what we as mothers live for… the physical connection of relaxing with your child and the emotional closeness brought on by you being their safe space, ushering in dreamland.
Are matching pajamas a necessity for this?! Absolutely not! However, knowing mommy (or Grandma) made their sweetest sleep set definitely is the icing on the cake!! And who doesn’t love matching PJ’s? Especially when they come with options for the whole family to enjoy!!!
Regardless of whether you choose to create Brianna with long sleeve, or short sleeves, cuffed pants or shorts…this is one quick sew that is super rewarding!! And did you see - Brianna is available in all our size ranges - Baby, Girls, Tween, Misses AND Doll... there really Is an option for everyone to get their cuddle on using this pattern!!
And because I know you all will be dying to know - All of the super soft and GORGEOUS knit fabric seen in these pictures comes from the amazing Hawthorne Supply Co. (Direct links posted under these pictures for the fabrics!) . Definitely head over to their website to discover your new favorite Fabric source!!
Our Mommy + Me set was created using fabric from Hawthorn Supply Co's Tundra line in the Winter Freeze color way - listed here:
Our coordinating Tween set was made from Hawthorn Supply Co's Glamorous Christmas line by Indy Bloom, shown here:
https://www.hawthornesupplyco.com/glamorous-christmas-fabric-collection-by-indy-bloom/63AC7CD18DD0/
]]>“Sugar and spice and everything nice, that’s what little girls AND our newest Primrose dress pattern are made of”. This super sweet and timeless PDF pattern will have your little one floating on air and your heart doing little leaps every time you see her moving through the room in it!
Primrose is a DARLING babydoll inspired dress that can be sewn with tulle for all of those special occasions or in simple woven fabric for all of her everyday adventures!! The dress is knee-length with loads of options for sleeve styles including - a long sleeve, a long sleeve with shirring, and our brand new cap/flounce sleeve design!
Create the simple skirt version for a quicker sew, or the tiered skirt option for a dress that will have your sweetie twirling the day away, capturing time and endless memories in her Primrose!
Our gorgeous embellished star tulle is from the amazing Fancy Pants Fabric shop! They offer so many beautiful, soft tulles that are perfect for creating one of kind Primrose dresses!
We are giving away a $50.00 gift certificate to one reader to Fancy Pants Fabric!! Simply leave us a little love in the comments below to be entered to win.
{UPDATE} Congratulations to Kate Yetter for winning the $50 gift certificate to Fancy Pants Fabric!
]]>
Hey Friends!! The temps are dropping, but keeping your little one stylish is not! So, to help keep her warm and looking darling at the same time, we have created the perfect PDF pattern, releasing in our Black Friday sale this week!!
]]>
Tilly is an adorable, chic jacket with a ruffle hem intended to hit right at the hip. Tilly features a comfortable, round band collar. There are three closure options including; button closure, no closure, and double tie closure. Tilly is quite simple to sew and is the perfect sewing pattern for beginners who have been desiring to sew outerwear. Are you looking for a sewing challenge? Try sewing up a Tilly in leather or suede for a luxe jacket!
The following Tilly jackets feature the full button closure. This is a great option for colder climates, to keep your girl cozy and warm!
The double tie closure option is my FAVORITE detail of this little jacket! It will gives your new sewing project a boho vibe and there is virtually endless options of lace or trims that can be used for the ties! Check out the trim section of your favorite sewing shop or go online for loads of inspiration.
Finally, the no closure Tilly is an uber quick and simple sew. You cannot beat the speed of this cute and casual sew.
What can make you fall in love with Tilly even more......all seams are enclosed giving it the option of being reversible!! That means two looks in one!
Are you ready to prep your supplies for a new Tilly? We want to help with a GIVEAWAY!!!
Who wants to win a $50 Gift Card to Hawthorne Threads Supply Company??? To enter, just comment below with some styling ideas/fabric choices/plans for your Tilly!! You have until 11/25/19 to enter.
xoxo,
Maya//VFT
]]>But before we get down to business, here are some maxi dress photo inspirations…
Clover as a maxi is just so dreamy!!!
Fabric Details:
Misses Dress: Spoonflower
Tween Dress: Atelier Brunette
How to Assemble the Maxi Skirt:
-Cut your skirt according to the charts below.
-Sew the front and back skirt side seams together with a 1/2" seam allowance just as you did with the Hi Lo skirt.
-Follow the tutorial instructions just as you were sewing the Hi Lo skirt. Hem, with a 1/4", 1/4" seam allowance. So simple, right?!!
Misses Maxi Skirt- 54”-55” - (Length x Width) |
|||||||||||
00 |
0 |
2 |
4 |
6 |
8 |
10 |
12 |
14 |
16 |
18 |
20 |
38 3/8” x 46 ½” |
38 3/8” x 47” |
38 ½” x 47 ½” |
38 ½” x 48” |
38 ½” x 48 ½” |
38 5/8” x 49” |
38 5/8” x 49 ½” |
38 ¾” x 50” |
38 ¾” x 50 ½” |
38 7/8”x 51” |
38 7/8”x 51 ½” |
38 7/8”x 52” |
Tween Maxi Skirt- 44”-45”- (Length x Width) |
|||
10 |
12 |
14 |
16 |
34” x 41” |
35 ½” x 42” |
36 5/8” x 43” |
38 1/8” x 44” |
Child Maxi Skirt- 44”-45”- (Length x Width) |
|||||||
2 |
3 |
4 |
5 |
6 |
7 |
8 |
9/10 |
20 3/8” x 36” |
22 ¼” x 37” |
24 1/8” x 37 ½” |
25 ¾” x 38” |
27 3/8” x 38 ½” |
28 7/8” x 39” |
31 1/8” x 39 ½” |
33 3/8” x 40” |
Just sitting here writing this blog I can already think of two more hacks…knee length version using the front skirt pattern piece and also a knee length with the ruffles. OOOH, ruffles!!!!
Now that you have the inspiration and the charts, let's have a Giveaway for some FREE fabric!!!!
One person will win a $50 Gift Card to Spoonflower. All you need to do is comment below with your favorite Winter activity. You have now until 11/25/19 to enter. Good Luck!
-Alexis
]]>
Hello ladies!!! It's me, Maya, lover of all things Boho!! As most of you know my personal style tends to have that hippie feel... Emery and Delia definitely fit right in!!!
]]>Growing up I always loved looking at old photos of my Mom, with her Bell bottoms and flowy tops! aaaaaand of course that HAIR!!! So now that you know my inspiration for these designs, I'll give you the details!
Emery is just so sweet & several different options:
* The Ruffle Sleeve features a Hi-lo ruffle and is a set in sleeve, which gives it a nice crisp seam at the shoulder!
* The Long Sleeve is a billowy sleeve with elastic at the wrist and gathers at the shoulder to that add volume and drape to the sleeve.
*Optional Side Ties to pull the waist in for a more fitted look.
*Top length is designed to hit at the hip.
*Dress length is designed to hit 2-2.5" above the knee.
My girls LOVE their Emery Tops & Dresses which is always a win!!!
Now that you've seen Emery, we will move on to DELIA!!!
Delia knit flares are the ABSOLUTE coolest pants!! They feature an elastic waistband, and have very large flares that are TOTALLY AWESOME!!
These designs are be available in Doll, Baby, Girls, & Tween! We hope you love Emery and Delia as much as we do and we look forward to seeing your creations!!!
Use code NEW4FALL for 20% off of your purchase of Emery and Delia!!! Valid October 24th thru October 27th!!!
]]>
Hey Friends!!! Fall has officially arrived and do you know what that means?! It's time for a little wardrobe spruce-er-upper! VFT to the rescue!!
]]>
First up is our {Ainsley} Dress & Romper pattern that is available in Doll, Baby, Girls, Tween, and Misses! It is a beautiful KNIT dress or wide leg pants romper (aren’t you just loving the Romper craze this year!) The fully lined bodice includes a feminine scoop back neckline with optional back tie detail AND…wait for it… side seam pockets!! No closures on this pattern make it a dream to sew up…and to wear!
Up next we have our {Jade} pants! These knit beauties are not only comfy, but super stylish! They are available in Doll, Baby, Girls, and Tween and feature either a real button closure, or a faux button closure. A straight leg and boot cut design make them a super fast sew, and practical for her closet and fall adventures!
And Fall wouldn't be fall without our {Sienna} Top & Dress. This woven, slip-on style top or dress features a scoop back bodice and darling ruffled hem. You can choose a cross back detail, or a back tie option for customizing it how you prefer! Complete this casual look with the raglan sleeves with ruffles and you've got a stunner of an outfit that is a super fast sew, available in Doll, Baby, Girls, and Tween!
Lastly, we're put together an accessory pattern that we just can't get enough of. The {Gianna} scrunchie pattern has been nearly a daily accessory since we've made them. It's just so easy to wear and much more comfy than a traditional elastic hair tie. So glad this trend is back! Gianna is live online for pre-order and will be available to download on 10/25/19. This scrunchie has so many options! The Gianna scrunchie itself can be sewn in two widths: Slim and Full. There are 4 tie-on options, each with multiple sizing: Scarf Tie, Long Bow Tie, Angled Knot Tie, and Pointed Knot Tie.
Hope you all enjoy these as much as we do, and we cannot wait to see what Fall favorites come out of your upcoming sewing projects!
Happy Sewing!
]]>