Fiona Sew-Along Part Three: Finishing the Bodice
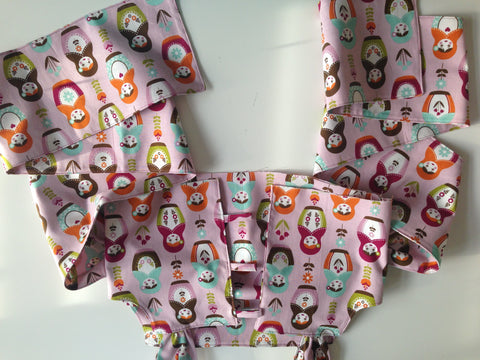
Today we begin Part Three of the Fiona Sew-Along! Our last post we finished work on the dress basics; straps, ties & button loops. As you may recall we are making two Fiona pieces, the top & the dress. So whichever you are following along with, we will be making your bodice today! One step closer...Don't forget to grab your Fiona Paper or PDF Pattern to refer to as well!
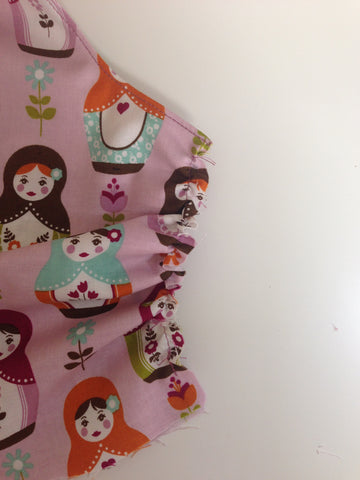
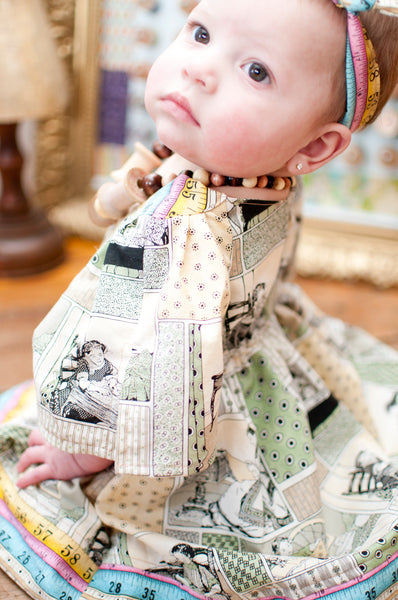
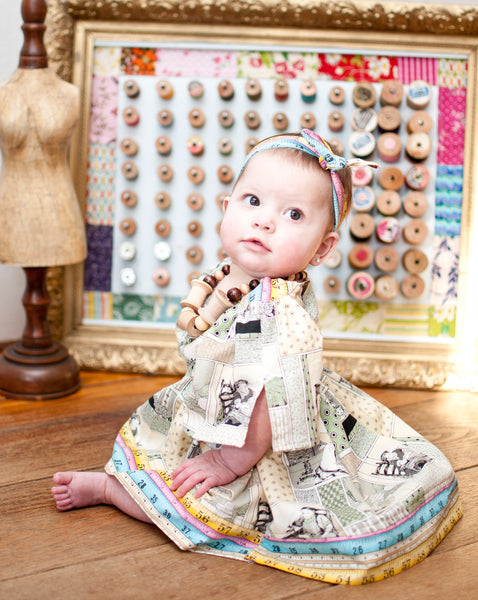
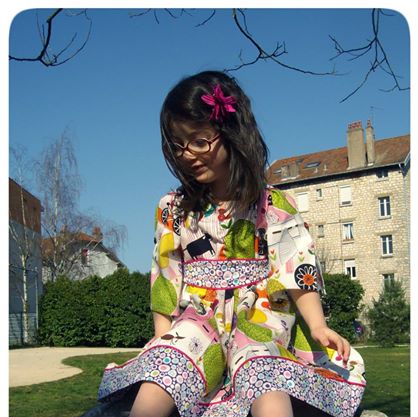
For those of you who may be just now joining us I wanted to fill you in again on my fabric choice! I decided to go with Little Matryoshka by Riley Blake Designs. It was something I already had lying around and is one of my favorite, playful patterns! Let's get started...
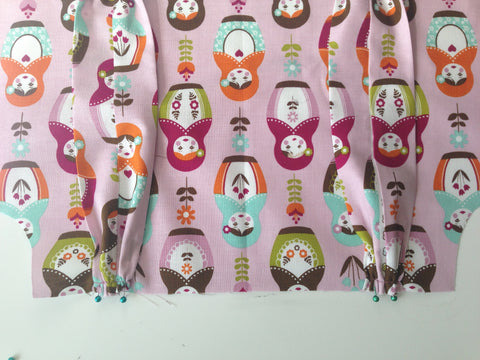
1. Pin the gathered strap inside the pattern markings. Tip: Be sure both straps are the same width at the top.
2. Place the front lining over top of the front with the straps now sandwiched in between. Put a few more pins in to secure.
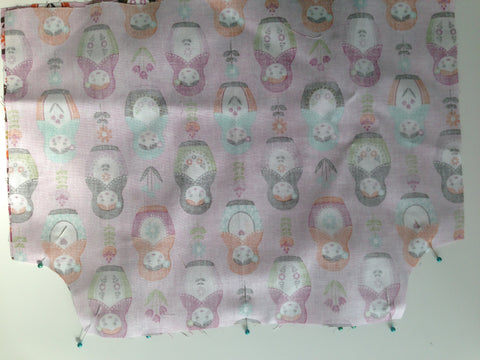
3. Sew around all pinned edges, trim off 1/2 the seam allowance and clip the corners.  Turn the bodice front right side out and top stitch right along the seam.
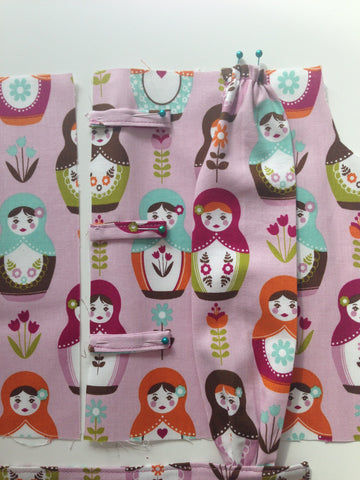
4. Now pin the straps to the bodice back in between the pattern markings.
5. Pin the button loops to the right back piece. The raw ends of the loop should be flush against the raw middle edge of the bodice back. The first loop will be 3/4" from the top edge and the other two should be evenly spaced.
6. Place the back lining pieces over top and pin to secure. Sew together along the armhole, top edge and middle edge.  The bottom and side edge will be left open. Trim off 1/2 the seam allowance and clip the corners.
7. Flip the back right side out and iron flat. Top stitch right along the seams.
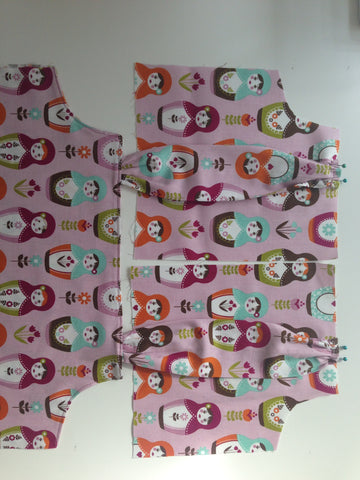
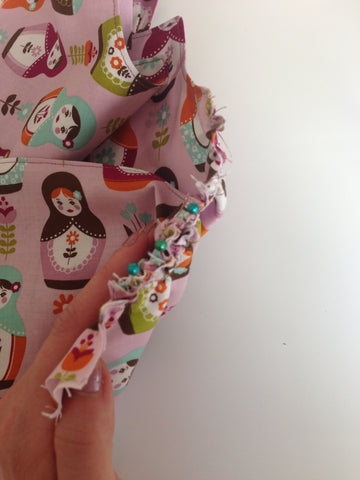
8. Gather up the raw side edges of the bodice front until they are the same height as the bodice back side edges.
9. Pin a the raw gathered edge of one side tie to the bodice front.  The side tie should be positioned so that it is 1" up from the bottom raw edge of the bodice front.
10. Lay the bodice back over top of the bodice front with the side tie sandwiched in between.  Pin to secure. Sew along the pinned seam. Trim off 1/2 the seam allowance and either finish with a serger or a zig zag stich.
11. Repeat for the opposite side and remaining side tie!
You have created your bodice...congratulations!!
Stay tuned for the rest of our sew-along posts! Here is a schedule for you to look forward too...

April 17, 2014 - Blog post on Finishing as a Top

April 18, 2014 - Blog post on Creating the Bustle Skirt

April 22, 2014 - Blog post on Tying the Perfect Bow

April 30, 2014 - Blog post on Your Creations, Finished Garments


Have any questions, tips or comments? Please share below, we love to hear from you guys. Thats what these sew-alongs are for, so let's collaborate!

April 16, 2014 by Ericka Wright

Exciting News: Vivienne Blouse & Skirt Now Sold as Set!

The Vivienne skirt has been one of our best sellers since it's introduction! To make this Violette Field Threads classic even better, we have decided to add to this popular pattern. We are excited to announce that we will *now* be offering our favorite pairing piece, the adorable blouse shown below, with the Vivienne skirt to make one complete outfit!
....................................................................................................
This sweet blouse features a delicate ruffle around the center gathered neckline.  The blouse is loosely fitted, with the sleeves and bottom of the blouse cinched in with shirring.  The shirring makes this blouse sweet tucked in, or left out. The back is buttoned up with a sweet row of 6-8 buttons. 
....................................................................................................
 
This blouse is beautiful in satin (as shown above), silk, cotton, even a sheer fabric (with an undershirt, of course) would be DARLING!
 
Don't have the Vivienne in your pattern collection yet?
With one purchase you will receive the Vivienne skirt and blouse, now sold as a beautiful set!  If the Vivienne has been on your VFT wish list, now is the perfect time to add these 2 pieces to your collection! Two separate patterns for the price of one, worn as a pair, or easily worn separate! Easy and adorable!  
 
Have you already previously purchased the Vivienne?
Don't worry!  You won't be left out! We will be sending you an UPDATED PDF that includes the newly added blouse for *FREE*!
Just follow the steps below to find out how to receive your new pattern... 


Here are a few photos of the *new* Vivienne complete outfit...

.............................................................................................................

*Each Vivienne outfit set was sewn a little differently*

.............................................................................................................

For this Vivienne Skirt, we used ruffle fabric rather than creating our own ruffles. It is sewn up in one of all time favorite fabric lines; Out to Sea by Sarah Jane for Michael Miller Fabrics. Using ruffle fabric for the underskirt made this a SUPER quick sew!


....................................................................................

For this next Vivienne outfit, we layered pre-made lace ruffles onto the underskirt instead of using fabric ruffles! They weren't as thick as our normal ruffles, so we had to use 6 rows instead of the usual 3-4.  But, since they were pre-made, it was super quick!  The Vivienne over skirt is sewn out of Pearl Bracelet by Lizzy House for Andover and it pairs perfectly with the Vivienne blouse sewn out of Hope Chest by Josephine Kimberling for Blend Fabrics.


These photos were taken just a few days ago... It's finally Spring here! Hooray!


We styled this Vivenne outfit with our *new* lace-top leg warmers!
Stay tuned for a FREE tutorial post on how to make this darling accessory...

.................................................................................................

Finally, the below Vivienne outfit was made with the classic triple ruffles sewn onto the underskirt. This sweet set is sewn up in Cotton Couture by Michael Miller Fabrics and the amazing print is Splendor 1920 by Bari J. for Art Gallery Fabrics.


 Click here to get your Vivienne set today! Enjoy, and as always, we can't wait to see what you come up with <3 

April 11, 2014 by Jessica Herning

Retail Sample Sharing Program

We are so excited to announce our very first Sample Sharing Program for retail stores carrying Violette Field Threads paper patterns! This program allows each participant to become the home to one of our Violette Field Threads pieces for 4 months! We have a gallery of sample options to choose from and will ship your choice to your retail location for display! It will come with several lookbooks and other fun goodies, great for filling bare counter space.
This will be a fun and easy way to brighten any store, not to mention boost sales! The only requirement is that you are already a stockiest of our Violette Field Threads paper patterns. 
We are happy to say samples are quickly being spoken for, so the sooner we hear from you, the more likely you will receive your favorite piece of the collection! We are also adding new pieces to the collection weekly! 
Examples of some of the pieces we are offering are shown in the photographs below. Email us at violettefieldthreads@gmail.com with the piece you would like. We will then send your VFT look within 1-2 weeks! 
 
xoxo,
Jessica & Ericka 
XXX
April 08, 2014 by Jessica Herning

Fiona Sew-Along Part Two: Straps, Side Ties & Button Loops

Are you ready to start sewing?!  Today we are going to begin our project and work on the basics; straps, ties & buttons loops. These are components that will go into our dress or top bodice. I will be creating two Fiona's, one top & one dress.  First up is my Fiona Top!
Hopefully over the past couple of days you have chosen your fabric and cut out your pattern and fabric. I am working off of the Fiona Paper Pattern, if however you used the PDF there are charts included in both versions to help with piecing and cutting of the pattern pieces.
For my fabric i decided to create a more whimsical Fiona Top that is casual enough for some serious playing.  I chose Little Matryoshka by Riley Blake Designs. My daughter loves the dolls and i already had it in my stash!
My beautiful thread is Aurifil 40W 100% Egyptian Cotton Thread. The color is 5003 and is a rich orchid hue.  I chose a thread that is a few shades darker than my fabric for two reasons:
  1.  I want you to be able to see in the photos.
  2.  Aurifil Threads has a very beautiful sheen to it that really makes top-stitching stand out and creates a prettier finished product.This is not the kind of thread you want to hide, it actually enhances the garment.
First we are going to sew the shoulder straps. 
1. Fold the straps in half and pin together along the long folded edge. The top & bottom will remain open.
2. Sew together along the pinned seam and trim off 1/2 of the seam allowance.
3. Turn the strap right side out and iron them flat. Tip: Iron the strap so that the seam runs down the middle of one side of the strap. That is now the backside of the strap. If desired top stitch around the straps.
4. Gather both short ends of each strap. First adjust your sewing machine to sew a gathering stitch. On my Bernina 350 i simply adjust my stitch length to nearly 5 for easy gathering.
5. Sew across both short ends of each strap with a 1/4" seam allowance. Pull the bobbin thread and the end will gather up.  Gather it up until it is approximately 1/2 of the original width.
Tip: Once the strap is gathered up tie the top thread and bobbin thread together into one or two knots.  This will ensure your gathering does not come loose.
Next up we will sew the side ties.
6. Place two side ties together with the right sides touching and all the raw edges lined up. Pin together around one short end and both long sides. The opposite end will remain open.
7. Sew together around the pinned seams. Trim off 1/2 of the seam allowance and clip the corners. Note: Clipping the corners allows for more accurate corners once the garment has been turned right side out.
8. Turn the side tie right side out and iron flat. Repeat for the remaining side tie. Tip: We recommend top stitching the side ties for extra durability since they will be pulled each time they are tied.
Finally, lets make our button loops!
9. Fold the button loops in half width-wise and iron flat. Open them up and now fold each edge into meet at the center and Iron flat. Finally, fold them in half one more time. You have now created finished edges for the button loops.
10. Sew the loops together right along the folded edge. Tip: Start sewing with the edge of the loop past your sewing machine foot by approximately 1/2" -3/4". Once you begin stitching you can back stitch to sew this end. This will help the loop not get sucked down into your machine as you begin sewing.
Congratulations!!! You have now made the straps, side ties and button loops for your Fiona!!
Here is a quick look at the remainder of our schedule:
April 8, 2014 - Blog Post on Finishing the Bodice
April 11, 2014 - Blog post on Finishing as a Top
April 14, 2014 - Blog post on Creating the Bustle Skirt
April 18, 2014 - Blog post on Tying the Perfect Bow
April 25, 2014 - Blog post on Your Creations, Finished Garments
Do you have any questions, tips or comments? Please share below!!
April 04, 2014 by Ericka Wright

Fabric Love-Sweet as Honey by Art Gallery Fabrics

Today we are featuring a line from Art Gallery Fabrics- Sweet as Honey! Self described as "Contemporary Elegant",Art Gallery Fabrics brings a chic and modern twist to traditional prints. We simply cannot get enough of this stylish, exciting fabric created by the talented Bonnie Christine!
Bonnie grew up in the mountains of North Carolina and finds her inspiration from the amazing outdoors. In Sweet as Honey you will find amazing bright hues that transport you to a perfect summer day! Our Piper Dress created using this beautiful fabric makes the perfect spring to summer look! Click the image below to see Bonnie's amazing website! Here are a few of our Sweet as Honey favorites:
We recently used Sweet as Honey for a Violette Field Threads photo shoot! We used four of our personal favorites to recreate our Piper Dress. We posted a few of the shots below! For these three Piper dresses we used the Honey House Sunflower, Cherished Deer Bergamot, and Bee Sweet Morning. Thank you to Bonnie and her team at Art Gallery Fabrics for the inspiration! And now for a peek at our Piper shoot: 
Would you like to sew up something "Sweet as Honey".....Enter below for a chance to win 3 yards of your choice from this fabulous line!
April 03, 2014 by Ericka Wright

Fiona Sew A-long Part 1 - Choosing the Right Fabric

Fabric selection is everything!  If you are like us then you adore fabric.  We could spend hours pouring over prints, touching silks and picking out the perfect buttons and ribbons. Choosing your materials for any project really is half the fun! 
Fiona can take on many different looks depending on your choice of fabric, so now it is decision time:
What kind of look are you hoping to achieve? Formal, semi-dressy, or play day fun? Vintage, modern, whimsical, romantic?
Lets run down some of our looks and what fabrics we chose.
First up, our formal take on Fiona. We wanted a romantic, sweet look. 
The above Fiona's are sewn up in silk and satin. The Fiona on the left features classic red dupioni siik. Dupioni silk is very well suited for Fiona because the stiffness of it holds and that show-stopping bow in the back once tied. The Fiona on the right is done up in a floral satin. This version still creates a formal look without the bustle for older girls.
Here are some fabrics that would be perfect for a formal Fiona:
   
Left: Floral Satin. Middle: RIbbon Rosette Satin. Right: Cream Silk Dupioni
Fiona is also perfect for semi formal occasions, including family photo shoots.  One option we really like is to use a border print along the skirt.  This Sarah Jane Children at Play print really could not be more perfect:
Here are a few of our favorite border prints right now:
  
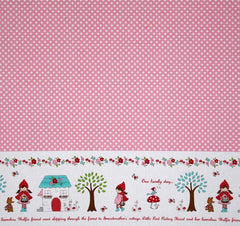
Left: Wee Wander. Middle: Little Red Riding Hood. Right: Glitz Metallic.
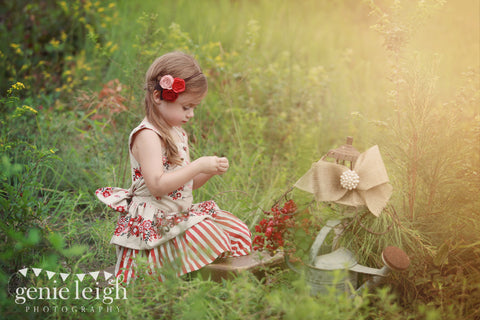
A more casual choice is to use a cotton print. This is an especially great choice for the Fiona Top. Here we created the Fiona Top out of a Lecien Folklore print. We paired the top with our Hazel skirt (without the apron).  
Here are just of few cotton prints that we adore. These beauties would sew up an amazing Fiona that is playdate worthy!
 
  
Top Left: Blown Away. Top Right: Painted Ladies. Bottom Left: Mockingbird. Bottom Right: Books

Don't forget about your notions!  You will need:

-Buttons

- Thread (in a coordinating color)

-A Spool of 1/2" Ribbon (if you choose to bustle the Fiona Dress)

We highly recommend using Aurifil Threads when sewing!

 Aurifil is a super high quality cotton thread. This superior cotton thread not only creates a stronger more beautiful garment but it is also easier on your sewing machine. Aurifil Thread is strong, so it does not leave behind lent and build up as it runs through your sewing machine. We recently discovered Aurifil and have fallen in love! 

So, are you ready to sew??? Here is a glimpse at the rest of our schedule:

April 4, 2014 - Blog post on Creating Straps & Button loops
April 8, 2014 - Blog Post on Finishing the Bodice
April 11, 2014 - Blog post on Finishing as a Top
April 14, 2014 - Blog post on Creating the Bustle Skirt
April 18, 2014 - Blog post on Tying the Perfect Bow
April 25, 2014 - Blog post on Your Creations, Finished Garments
What fabric did you choose for you Fiona? Share with us below!!
April 01, 2014 by Ericka Wright

The Fiona Sew Along

How would you like to make a Fiona together? We would love to invite you to share with us during our Fiona Sew-Along. 
 
Have you ever taken part in a sew-along? Everything is more fun with friends, but unfortunately we cannot all get together in person and sew together.  So, a sew-along is the next best thing!!  We will connect virtually and share our tips, tricks and inspiration while sewing the Fiona Dress or Top. A little further down we will have a rundown of the sew-along schedule, including the start date, but first lets talk about Fiona!
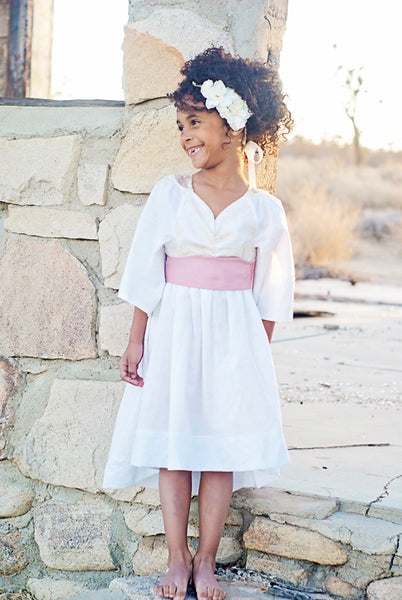
We have received so many requests for the Fiona dress to be a sew-along and with spring slowly creeping back into our lives, it is the perfect time to sew this precious dress or top! Fiona is a versatile pattern with a few different options and we will be showing each! Fiona can be made a dress with or without the bustle or as a ruffled top. Here are a more gorgeous Fiona's to inspire you!

Are you ready to sew yet....?!  If you do not already own the Fiona Pattern you can purchase it here. We are offering a discount code for 25% off the Fiona Pattern using the code: Fiona. The discount is valid now through April 1, 2014.

Here is a rundown of the Fiona Sew-Along Schedule:

April 1, 2014 - Official Start of the Sew Along - Blog post on choosing Fabrics

April 4, 2014 - Blog post on Creating Straps & Button loops

April 8, 2014 - Blog Post on Finishing the Bodice

April 11, 2014 - Blog post on Finishing as a Top

April 14, 2014 - Blog post on Creating the Bustle Skirt

April 18, 2014 - Blog post on Tying the Perfect Bow

April 25, 2014 - Blog post on Your Creations, Finished Garments

As you can see we have a fun month ahead of us sewing up these beautiful Fiona Dresses!!  The final blog post will be dedicated to sharing your creations!!  We will remind you as we go, but we hope you will share your photos with us of the Fiona dresses on your precious ones!

We hope you are as excited as we are!  If you have any questions or comments feel free to ask below and check back in on April 1st for the kick off post about choosing the right fabric!


March 28, 2014 by Ericka Wright

Maggie Sew & Win Top Five Showcase
Every entry we received in our Maggie Sew & Win is deserving of recognition! We were so impressed with the creativity shown in the design and styling of each Maggie look! We wanted to share every photograph submitted by our Top Five finalist.
These entries were so amazing we wanted to make sure to share the inspiration! Take a look at these gorgeous shoots and spread the love...
  
  
Entry by: Cassandra of Heartmade Creations
  
Entry by: Leah Pitkin
 
Entry by: Rachel Griffith
  
Entry by: Rebekah Erhabor
 
Entry by: Donna Hereford
Amazing, right? Keep the Violette Field beauty coming! The three winners will be posted on our Facebook page tomorrow! We will have many more fun things coming your way soon. Thank you again to all who participated. It was truly a beautiful VFT success! 
xoxo,
Ericka and Jessica 
March 20, 2014 by Jessica Herning

Fan Gushing: Maggie Sew & Win Contest & Giveaway
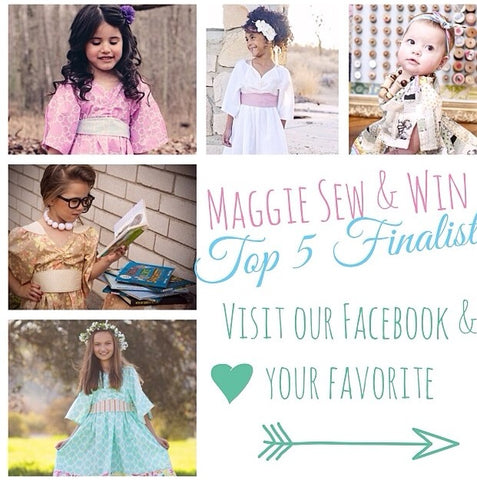
Well, Violette Fans, you've really outdone yourselves!!!
The Maggie Sew & Win was such a success! We had so many amazing entries.  Originally, we were going to choose our favorite 3 and then allow our fans to vote, but with so many entries, we couldn't narrow it down past our favorite 5.  So, here you have it! 
OUR TOP 5!
Have a look at these beauties below, and then head over to our Facebook page
........................................................
You'll see an album entitled: "Maggie Sew & Win Top 5 Finalists".  "Like" or Comment below your favorite!
........................................................
We need your help, Violette fans!
We know you're dying to see... so without further adieu...
Maggie Sew & Win Top Five Finalist
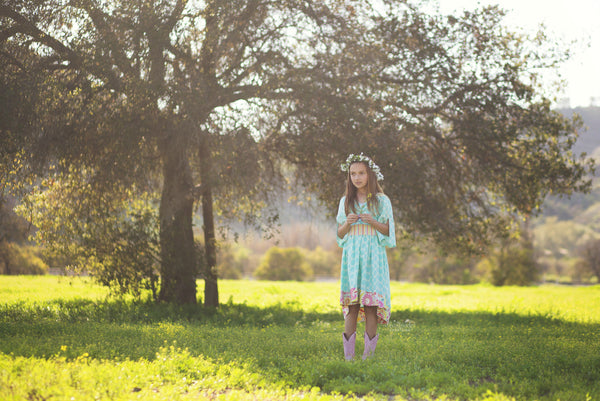
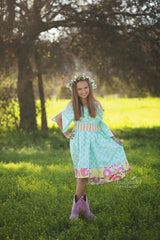
The flower halo and colored boot add the perfect fun, summer touch!
Entry by: Cassandra of Heartmade Creations 
Vintage inspiration is always in style!
Entry by: Leah Pitkin
This ethereal look is perfect for spring!
Entry by: Rachel Griffith
The styling on this entry was amazing! Accessories are everything!
Entry by: Rebekah Erhabor
A playful pattern and cowboy boots, absolutely! 
Entry by: Donna Hereford
Aren't those entries wonderful?  We were really blown away by the styling, photography, and workmanship! 
..........................................................................
These were our favorite individual shots, but we were sent lots more from each shoot.
We know you'd love to see the other shots, so tomorrow we plan to have a separate post full of yummy eye candy from these 5 shoots.  
...........................................................................
Thank you so much to all who participated! It is always so exciting to see our designs come to life on each of our beautiful fans!
We will have more contests and giveaways of this nature coming your way, so if you didn't make the finals, don't worry!
Look at all the cuteness below:
These lovely entries didn't make the finals, but we're so impressed by everyone's passion and creativity, we've decided to send them all a little something special. 
(Psst.  Check your inboxes in the next few days, ladies!!!)
Take a load off, sit back, and enjoy this eye candy for the creative soul.  We just had to share... they are all too good not to.
And Honorable Mention goes too...
How adorable is this bright Maggie on this little blonde? She is glowing!
Entry by: Mandy Clark 
We absolutely adore what Trisha did with this Maggie.  The contrasting belt adds such a fun pop to this Maggie look!
Entry by: Trisha Parker
Tea party perfection! Love the fabric contrasts and placement!
Entry by: Jamie Dorsey
We were so impressed with the sewing of this entry! Bravo!
 
 
These sister's take their Maggie look to the outdoors and we like it! Simply stunning topography!
Entries by: Kristen Stephens
 
 
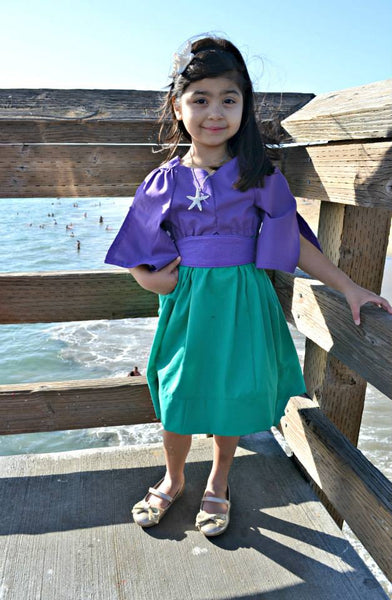
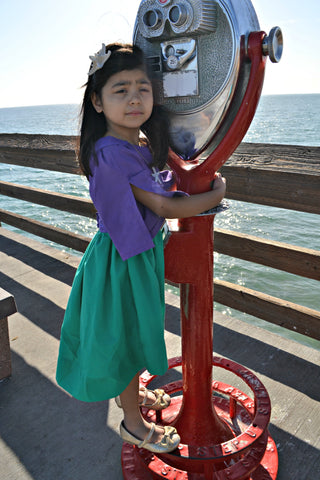
Look how Maria used the Maggie as a canvas to have some fun!  The starfish accessories and beach background are perfection for this Ariel-inspired Maggie.
Entry by: Maria Avalos
 
 
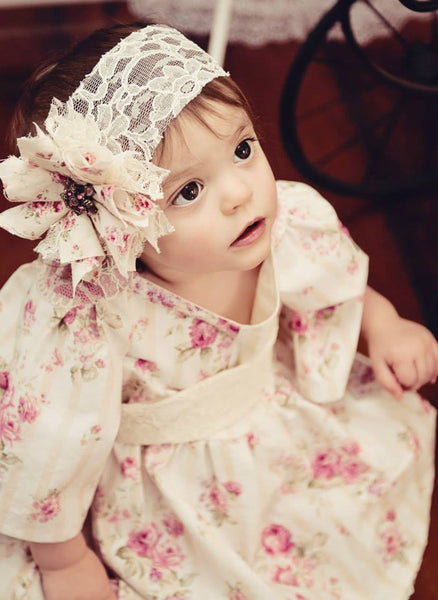
Vintage florals and lace are the picture of sweetness for this Maggie! This shoot was well planned and perfectly executed!
Entry by: Jessica Barbara
We love this nature girl look! We love the warm tones of her dress. 
Entry by: Tara Seeley
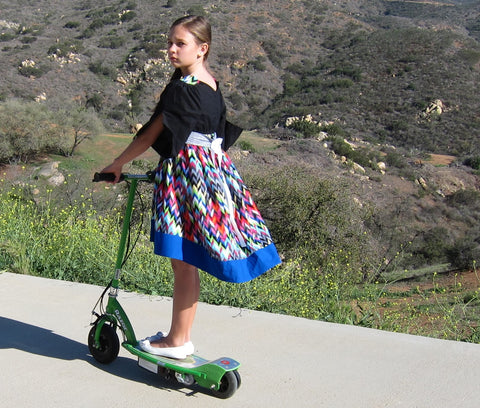
Take the chevron trend right into summer with this bright Maggie! Loving that feather fascinator, too!
Entry by: Danica Reed
 
Beautiful! This spring look is almost too cute for words! Those sandals? Absolutely precious! We also adore that sweet bunny fabric... perfect for Spring!
Entry by: Shelley Gajus
 
This pair stole our hearts! We love the styling as well! Such a creative use of fabrics/props/poses. <3
Entry by: Natalie Ewy
This little French beauty is brightening a sunny day! Love how Marie used piping to accent the dress. Perfect!!
Entry by: Marie Li-Jaubert
What a darling, day at the park ensemble! Melanie, your daughter is so precious!  What an angel baby! That smile!!!
Entry by: Melanie Gonzales
  
This Maggie look by Amanda had such amazing styling! Gorgeous job! We ADORE the flowers instead of the belt.  Seriously stunning!!!
Entry by: Amanda Simon
  
Beautiful family at the beach! We absolutely loved the "ocean life" theme of this amazing shoot! Amazing photographs to show such a creative Maggie look!
Entry by: Rachel Raymond
Once again thank you to everyone who entered! We aren't sure we're able to fully convey how much it meant to us to have so many gorgeous entries.  We LOVED seeing them so much.  We appreciate everyone's hard work! Well done, ladies!!! 
.......................................................
Don't forget to pick your Top 3 on Violette Field Threads Facebook page
.......................................................
xoxo,
Ericka and Jessica
March 20, 2014 by Jessica Herning

Look of the Week:Instagram Giveaway

We are excited to announce the introduction of Violette Field Threads' Look of the Week Instagram contest!
One of our fans will be chosen from Instagram to be the Violette Field Threads' Look of the Week!! All you have to do is post a picture of your favorite Violette Field Threads ensemble on Instagram @violettefieldthreads using #violettelotw. Each week our chosen customer will receive a $25 gift certificate to shop!!
So remember, all you do to enter is Instagram your picture @violettefieldthreads using #violettelotw.
Be sure to follow us on Instagram & watch our Facebook page. We can't wait to see what you come up with! Here are a few of our favorites so far!!


March 13, 2014 by Jessica Herning