Pattern Mod: Genevieve flounce {scalloped edge}

We are so ecstatic with the warm welcome you all have given our newest release, Genevieve. Every version has blown us away! From everyday chic to holiday glam, your creations have been inspirational!
Do you love the look of the top overlay made from lace, but are unsure how to keep the original scalloped bottom edge but still have the drape of a bias cut? We have received quite a few messages asking how to do this! Today is your lucky day! Follow these easy step-by-step instructions on how to showcase your gorgeous lace fabric for your next Genevieve!

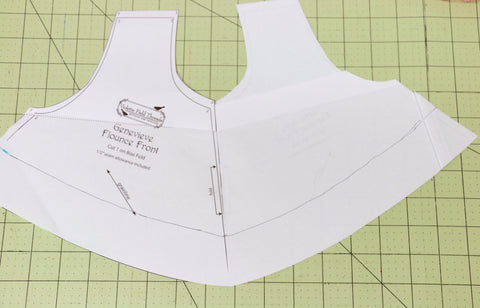
- Print out two copies of the flounce front and attach them at the fold line. Having a full flounce piece will help in making the adjustments while giving a good visual.
- Measure along the bottom edge of the flounce pattern piece to determine how much lace is needed. You will have extra so don’t worry about being super precise.
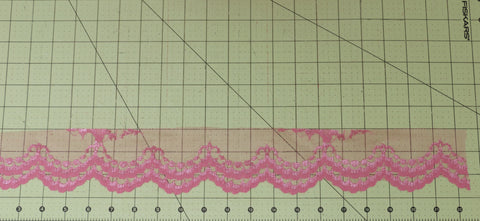
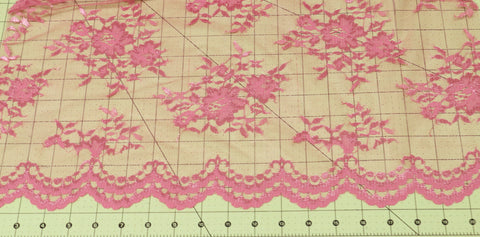
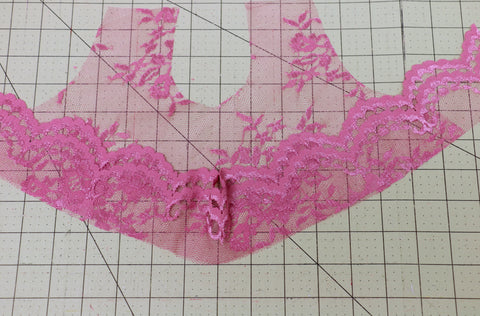
- Lay out the lace and cut above a few inches above the finished hem. For this particular lace, the scalloped edge is about 2". Make sure to add a seam allowance at the top. I chose ½" seam allowance.

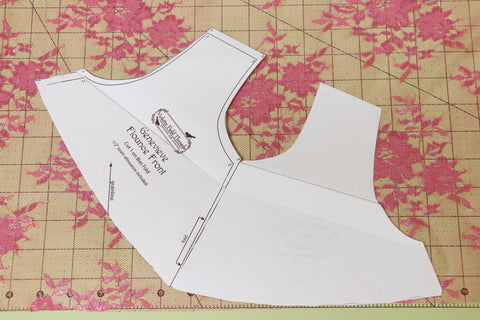
- Place your lace hem onto the flounce front bodice. Because the flounce bottom hem would have been hemmed 1/4" + 1/4", for a total of 1/2", you'll need to overlap the bottom edge of the lace by 1/2". Now, mark along the side of the flounce front pattern piece 1/2" down from where the top raw edge of the lace is. This is where the new bottom of the flounce front will be. By measuring 1/2" down from the top raw edge of the lace, you are taking into account the seam allowance that will be lost when you attach the lace to the new bottom raw edge of the flounce front piece.
- Measure across the entire front of the flounce piece using the marking you just made keeping it even all the way across. Cut along that line.
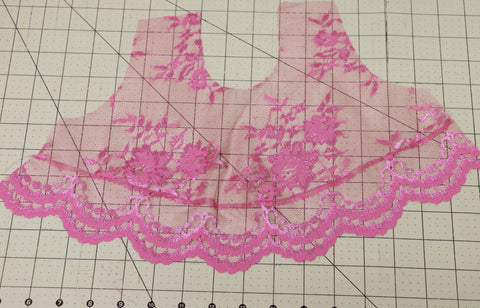
- Position the flounce front (on the bias) onto your lace fabric. Be careful of positioning if you are using a large lace print, as shown, and maximize the amount of lace on the pattern piece. Ensure the grainline is running perpendicular to the bottom edge of your lace. Cut out the flounce front.
- Align the lace hem to the flounce front piece, right sides together and pin to attach. Leave the excess lace on either side of the flounce front bodice. Sew to attach.
- Because this netted lace does not fray, finishing the seam is not required. Trim the seam allowance. If you are sewing with a fabric that needs a finished seam, a french seam is recommended. Using a cool iron, press your front flounce and lace hem, gently easing the hem onto the flounce. Cut the excess lace hem in alignment with the original front flounce piece.
If you are feeling adventurous, you can cut your lace hem along the scallops and then reattach. This is the best way to keep the drape and the scallop, but it is more time consuming and much more tedious than the above steps.
If your lace has a nice drape, you could even cut with the grain and add a few darts under the arms to bring the sides up.
And there you have it! An easy way to use that beautiful scalloped lace you've been holding onto while maintaining the perfect drape of a bias cut! We look forward to seeing lots of gorgeous scalloped Genevieves! Make sure to share your lovely creations over on our FB page!