The Sophia Skirt - Free Pattern & Tutorial by Violette Field Threads
We absolutely love sewing skirts! They are not one of those intimidating project that can last days, but rather they are fun and relaxing to sew. Both of our girly girls love to wear skirts and if they have a lot of twirl....even better! Today we have a free skirt tutorial: The Sophia Skirt!

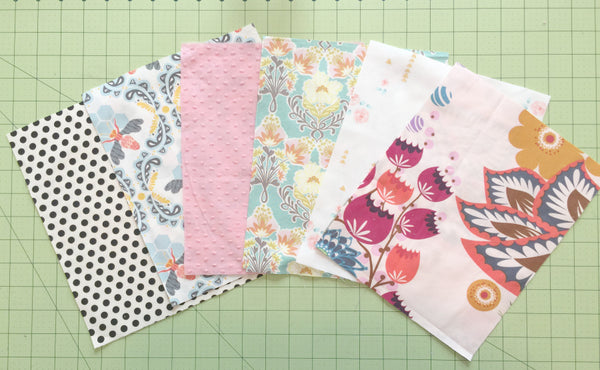
The Sophia Skirt features a patchwork main body that is absolutely perfect for using up all those fat quarters and fabric scraps that we all have laying around our work rooms. This adorable and easy skirt can make a big statement and will be a loved addition to your little ones wardrobe or your summer sewing line.
So lets get started! First up is the supply list:
The Basics:
- Sewing Machine - We used our BERNINA PE 350. We simply adore BERNINA and cannot recommend this brand enough.
- Thread - We always recommend Aurifil Brand Threads! They are the gold standard of threads. Strong and beautiful for top-stitching.
- Sewing Pins
- Scissors
- Rotary Cutter & Mat
- Iron
Fabric Recommendations:
Cotton, Cotton Blends, Eyelet, Linen, Seersucker, Chambray.
Choosing a Size:

Fabric Requirements:
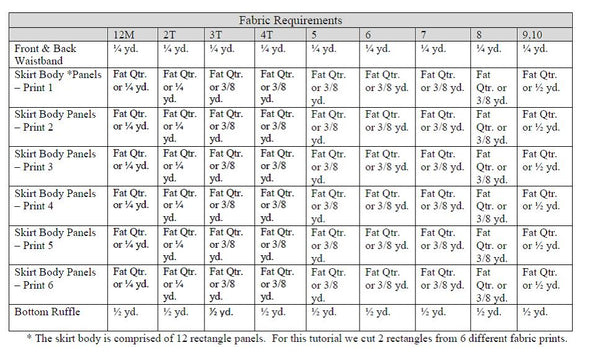
Notions:
1/2" Elastic
5 1/2 yards of lace or pom-pom trim (if desired)
Many of these supplies you already have on hand. This is one reason why we love this project, no expensive trips to the fabric shop! Now that we have our supplies ready, it is time to sew!!
Cutting Instructions:
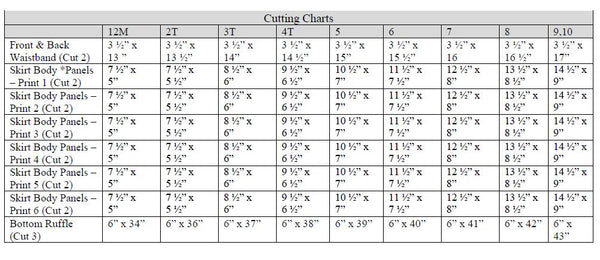
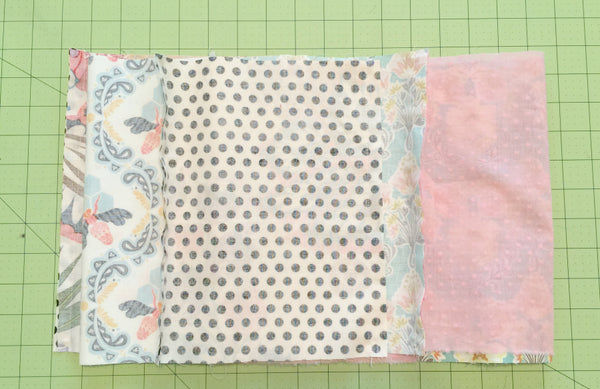
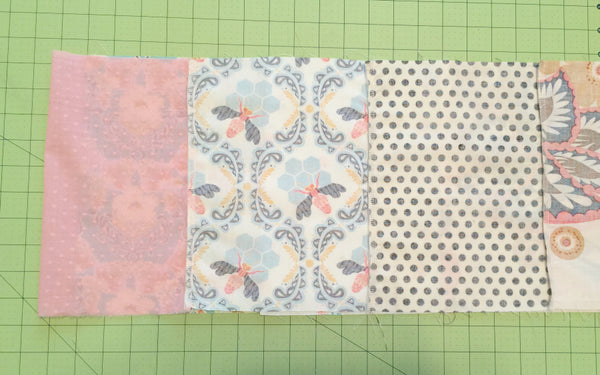
NOTE: You are cutting two rectangles from 6 different prints, for a total of 12 rectangles. After cutting you will need to arrange them in the order you want them to be in.
Sewing Instructions (Use a 1/2" Seam Allowance):
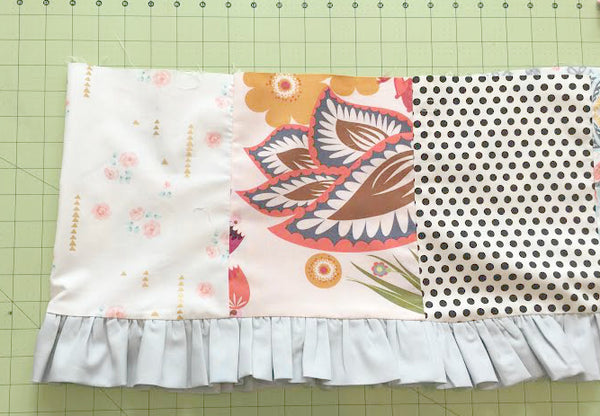
Creating the skirt body:
1. Place the first two rectangles together with the right sides touching and the raw edges lining up. Pin them together along one long side edge.
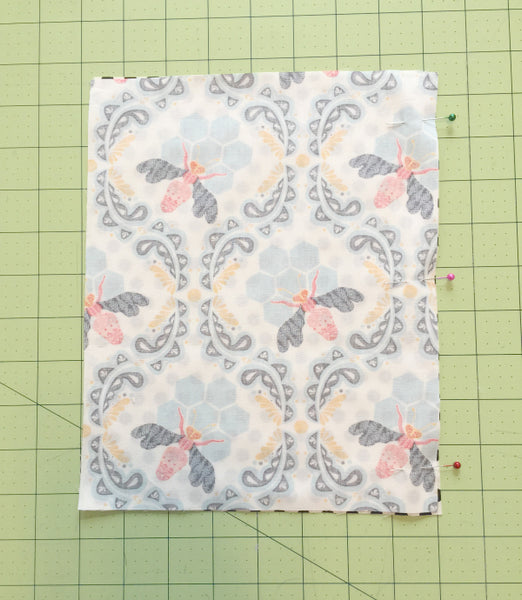
2. Sew together along the pinned seam. Open the fabric up and place the next rectangle piece on top with the right sides touching and the raw edges lining up. Pin together along one long side edge. Sew together along the pinned seam. Repeat this process until all the skirt rectangles are sewn together. Sew the ends together to create one large circle comprised of all 12 rectangles.
3. For a professional look, finish the seams with a serger or trim off ½ of the seam allowance and finish with a zigzag stitch. Iron the seams flat and set aside.
Creating the bottom ruffle:
4. Place the three ruffle pieces together with the right sides touching and the raw edges lining up. Pin together along both short side seams. Sew together along the pinned seams.

5. Iron the ruffle in half width-wise with the wrong sides touching. This has created a folded finished bottom edge.
6. Sew two rows of gathering stitches along the top raw edge. Gather the ruffle up until it is the same width the skirt body.
7. Place the ruffle on top of the skirt with the right sides touching. The raw top edge of the ruffle should be lined up with the raw bottom edge of the skirt. Pin to secure.

8. Sew the ruffle to the skirt. For a professional look, finish the seams with a serger or trim off ½ of the seam allowance and finish with a zigzag stitch. Iron the seams flat.
9. If desired, pin lace or pom-pom trim onto the right side of the skirt right above the bottom ruffle. If no lace is desired simply top-stitch right above the seam on the right side of the fabric.
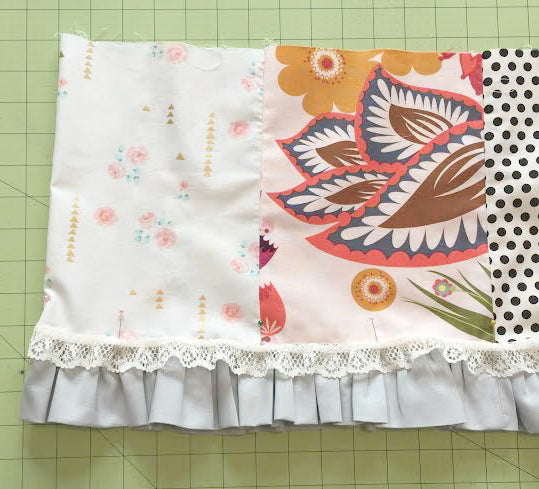
10. Sew the lace to the skirt.

11. When approximately 1-2" of lace trim is left to be sewn, turn the excess under to create a finished edge. Pin to secure and finish sewing. Set aside.

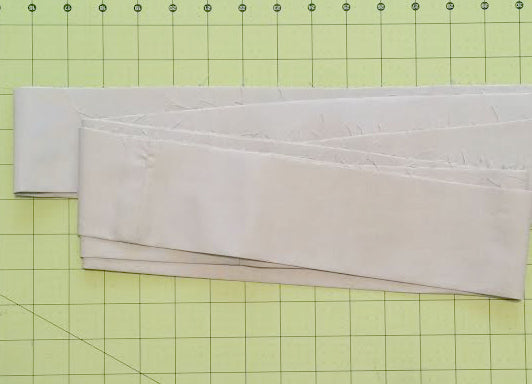
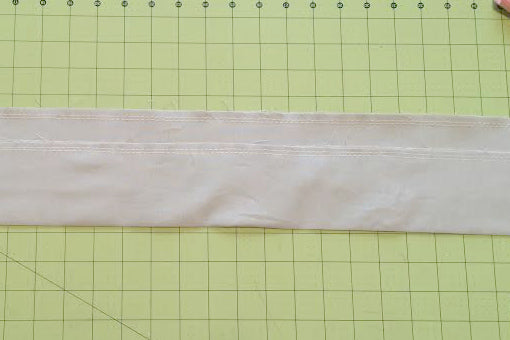
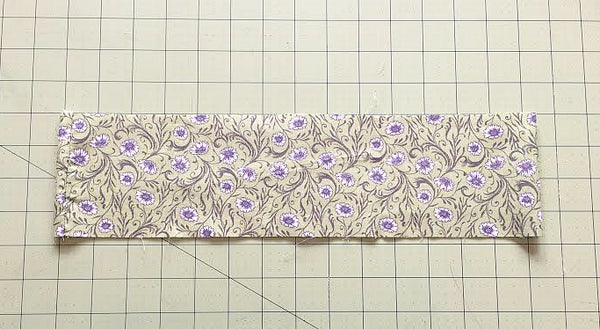
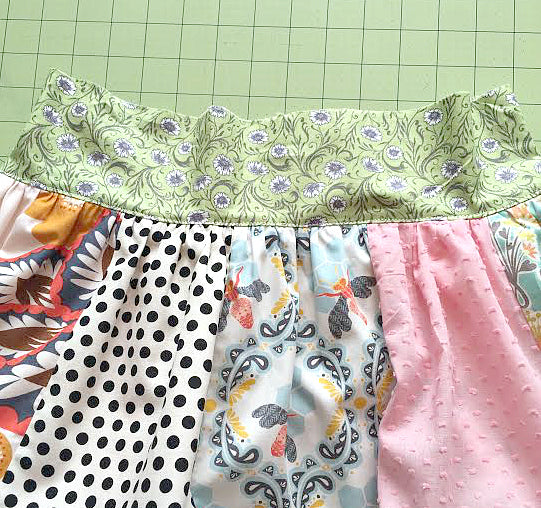
12. Place the two waistband pieces together with the right sides touching and the raw edges lining up. Pin together along both short side seams. Sew together along the pinned seams. For a professional look, finish the seams with a serger or trim off ½ of the seam allowance and finish with a zigzag stitch. Iron the seams flat.
13. Sew two rows of gathering stitches along the top raw edge of the skirt. Gather the skirt up until it is the same width the waistband. NOTE: Take care to ensure all the panels are gathered evenly.
14. Place the waistband on top of the skirt with the right sides touching. The raw top edge of the skirt should be lined up with the raw bottom edge of the waistband. Pin to secure.

15. Sew the waistband to the skirt. For a professional look, finish the seams with a serger or trim off ½ of the seam allowance and finish with a zigzag stitch. Iron the seams flat.Top-stitch right above the seam on the right side of the fabric.
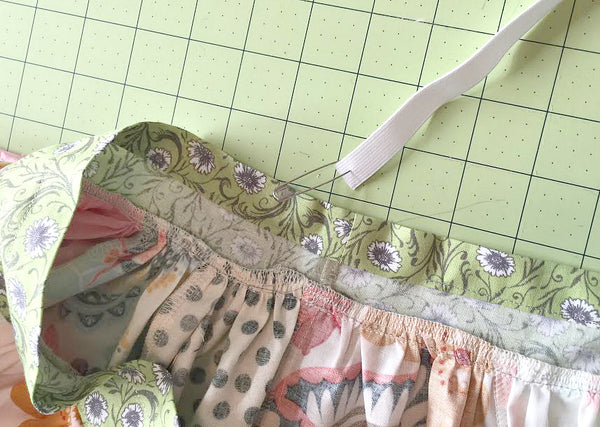
16. Create a casing for the elastic waistband. Turn the top raw edge down 1/2" and iron flat. Turn down another 3/4" and iron flat. Sew all the way around the waistband leaving a 1-2" opening in the back to insert the waistband.


17. Cut out elastic according to the chart below:

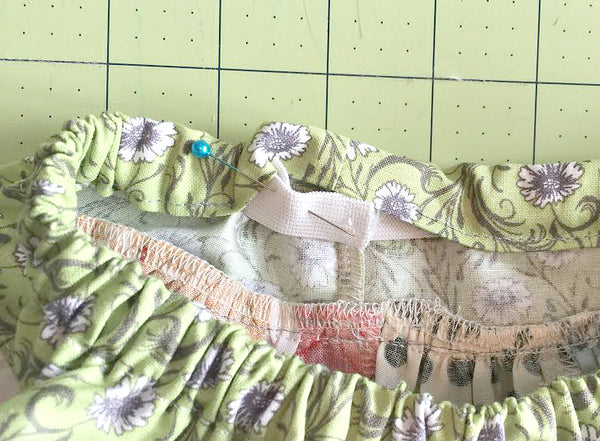
18. Attach a safety pin to one end of the elastic. Insert the pin into one side of the waistband opening. Guide the elastic through the opening and out the other side.
19. Attach the two end of elastic and sew them together. Sew closed the 1-2" opening.
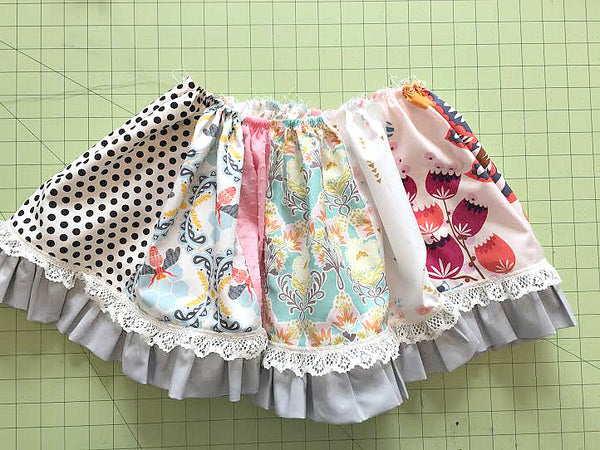
20. You have now made the Sophia Skirt!!!!

We really hope you enjoyed this free skirt tutorial!! Let us know below if you sew up your own skirts and also what you would like to see next in our free tips & tutorials section!!
For more patterns, please check out our Pattern Shop!
xoxo,
Ericka & Jessica
So loved the London dress some time back now going to make a handful of the Sophie skirts for 2 granddaughters 7yos.
I would love a pattern for 4yo to 7yo shorts and tee shirts if ever possible.
Thank you so much for kindly sharing and making sewers so happy Kind regards Helen
Is there a way to print this? I’m old school and i like paper :) lol
Thank you!
I want to Thank you for a TRUE FREE PATTERN!! I love it !!
Going to post a picture of my finished skirt..
Thanks again..
Made one yesterday and it came out so darn cute. My great granddaughter recently got a pair of cowgirl boots. I think they will look adorable with this skirt. Thank you for sharing
Great instructions. Appreciate the size charts. I’m using scraps to make skirts and dresses to send to missionaries in 3rd world countries. Every little girl should feel pretty.
Leave a comment