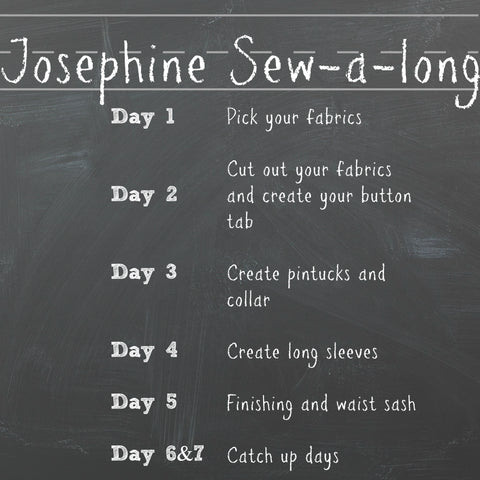
Josephine Sew-A-Long {Day 3}

Today marks our halfway point for our sew-a-long! Who's ready to get into the nitty gritty of the pattern? I know these next steps are often the ones that get the most questions!
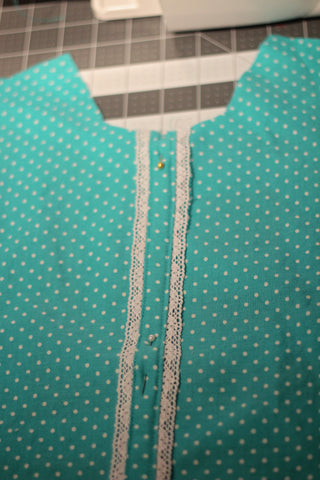
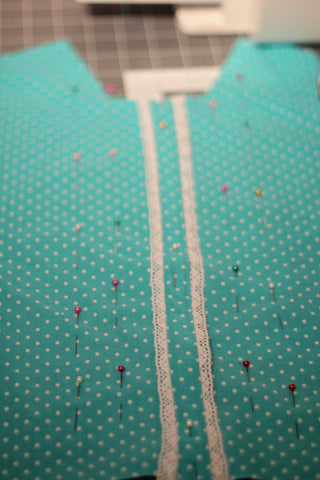
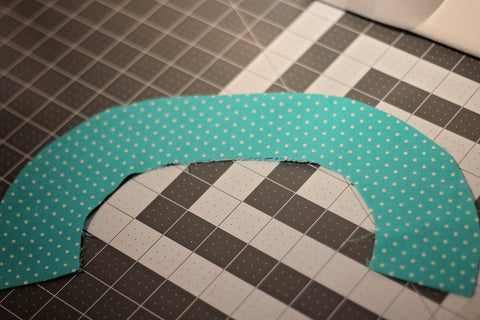
Let's get those 2 front bodice pieces ready. Yesterday we finished the button tabs, with or without embellishments. Take those pieces and place them on top of each other, lining up the button tabs and pin in place.
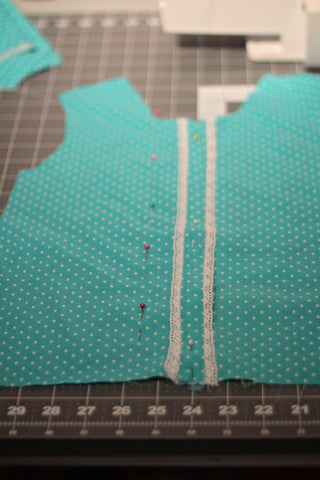
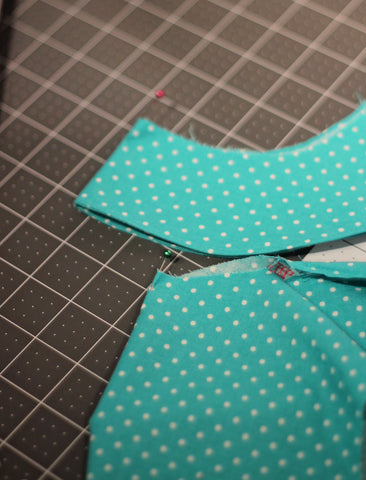
Start at the finished edge of your embellishment and measure over 3/4in and place a pin. If you didn't add an embellishment, measure over from where you sewed the tab. Do this down the entire front of the piece.
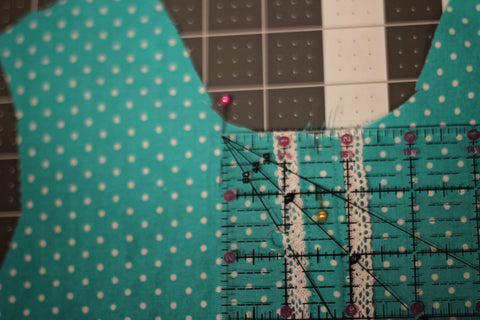
Now take your ruler and measure over 1 in from where you placed your first pin. Again, do this all the way down the front of the piece. If you are doing a size 2, like me, you will only have 2 rows of pintucks. If you are doing 3 and up, you will have 3 rows, so repeat this whole process one more time.
Once you have the left piece done, do the same for the right piece.
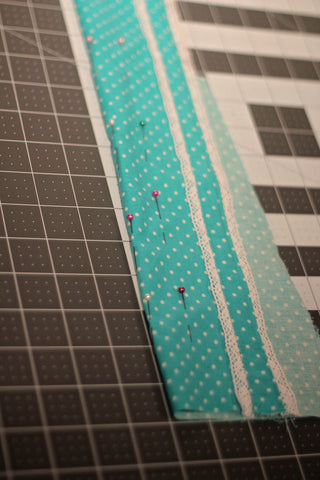
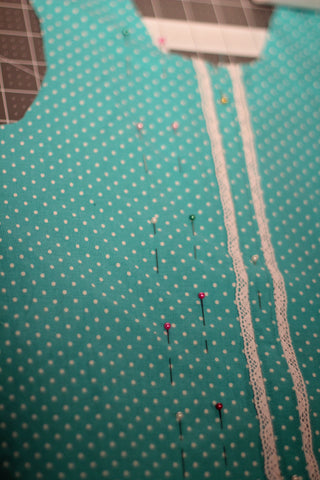
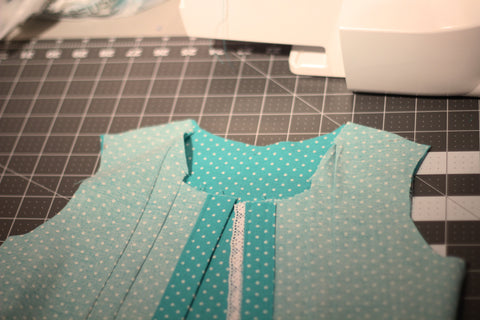
Both pieces are now done. It's time to take your left piece over to your iron. Fold with wrong sides together along where you placed your row of pins, starting with the row closest to the armscye. Iron and then take over to your machine. Sew with a 1/8in SA.
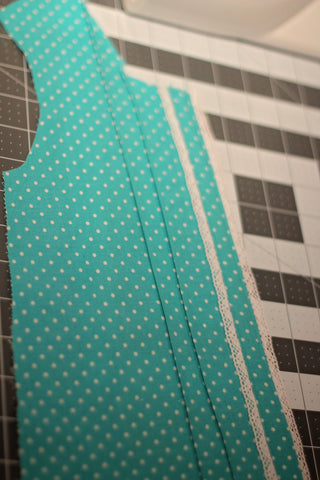
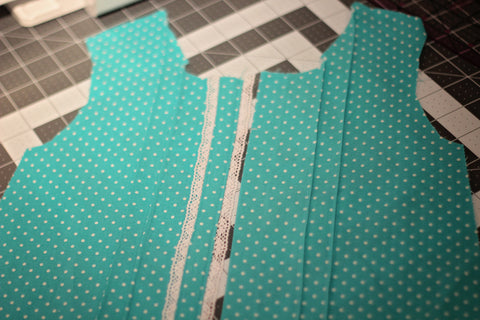
Repeat this process for the remaining rows on both front pieces. Once done sewing head over to your iron and steam the heck out of those pintucks you just created, pressing the pintucks towards the armhole. Pintucks are COMPLETE!! See, not as hard as you thought!

Grab your back bodice piece and with right sides together, match the shoulders. Sew with a 1/2in SA and finish the seam with your choice of finishing. I like to use my serger. Don't mind my pink serger thread! :)
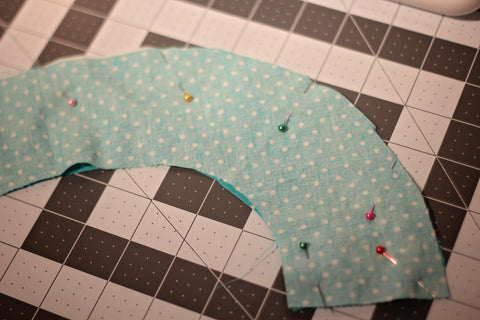
Time to move on to that collar. Take both collar pieces and place right sides together. Pin along both short ends and along the curve. Sew along pinned areas with a 1/2in SA.
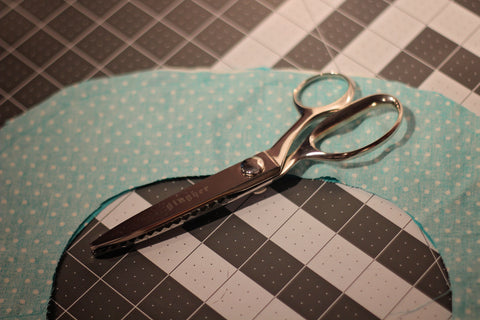
Clip your SA. I like to use my pinking shears. These things are older than me and were passed down to me from my mother when I started sewing 2 years ago! I LOVE them so much! I think every sewist needs to have a pair in her sewing arsenal!
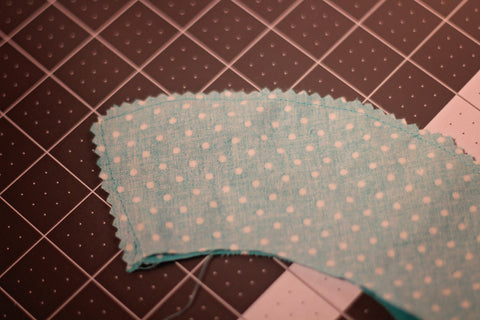
Once you SA is clipped, turn right side out and iron iron iron! Make sure to use your favorite tool to get in those corners and make them look pretty! Go ahead and topstitch that collar! Take your time :)

We now need to find the middle of both the back bodice and the collar, so fold both pieces in half and place a pin at the fold. Line up those pins, placing the collar on top of the bodice. Continue pinning around the entire bodice. Once pinned, sew the collar onto the bodice using a 1/4in SA.

Our collar is now attached, but we need to enclose that seam. Take your 1/2in bias tape and starting at one end of the collar, pin with right sides together.
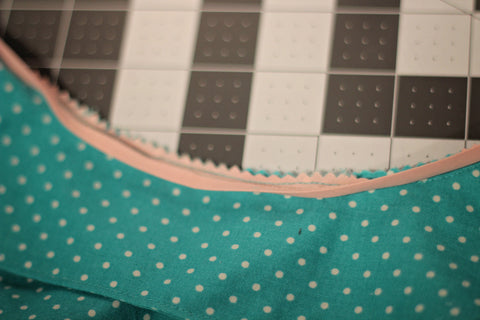
Once pinned all the way around, sew with a 1/4in SA. Clip your seams once more.
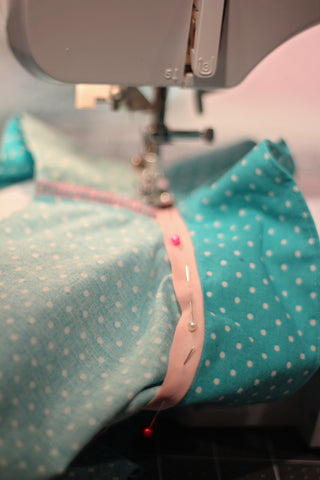
It's time to enclose that seam. Take your bodice wrong side facing up and fold your bias tape down over the raw edge. When you do this the bias tape will not be visible from the right side. Pin in place all the way around. Make sure your collar is up and out of the way, and you are not pinning into your collar! Sew that bias tape down.
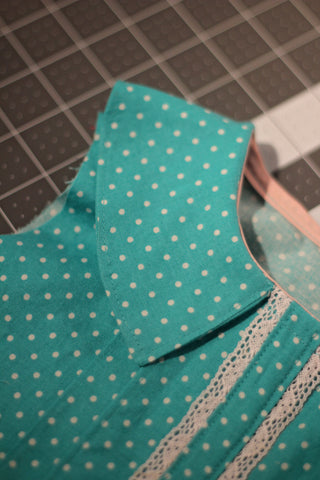

Flip your collar down and you are done! Stand back and take in all that hard work!
Come back tomorrow when we will be working on flutter and long sleeves!!! If you need to catch up, check out Day 1 and Day 2!
I’ve seen several posts on the group showing Cecelia/cammi and shorts and cannot fine it on your website ,where can i find this pattern
a new one mentioned Delphina which is also not shown…do you still offer these patterns?
Leave a comment