Blog
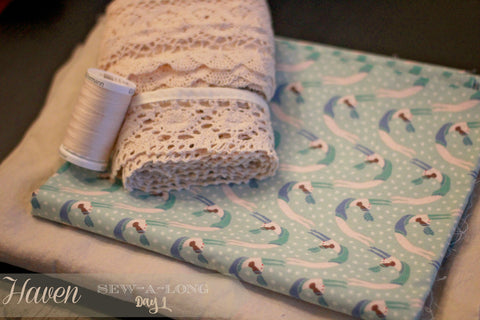
Haven Sew-a-Long {Day 1}
Introducing {Emily}: Empire bodice maxi dress
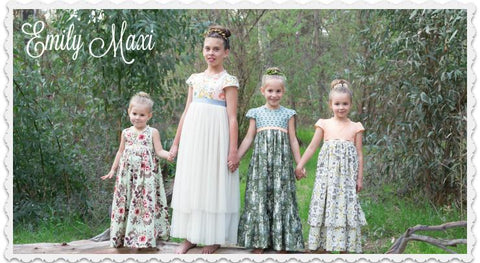
I find myself always looking to upcoming trends when I'm sewing. I like to be on the cusp of what is {hot}. The difficulty comes when I want not only high style but a vintage feel too! The highly anticipated Emily dress is the perfect pattern that incorporates both!
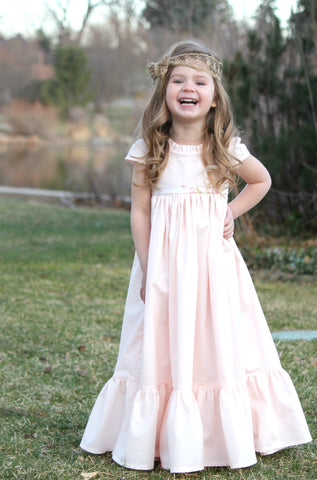
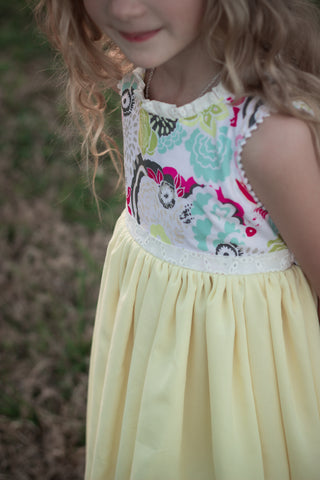
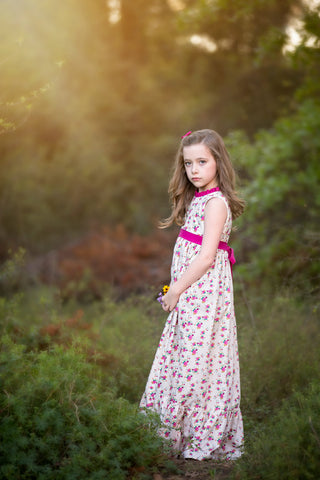
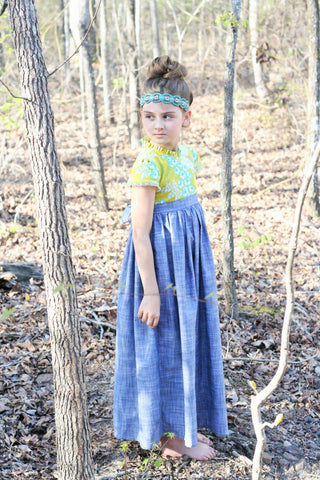
Emily is a gorgeous Empire waist maxi dress with a Jane Austen feel that seamlessly blends the old with the new.
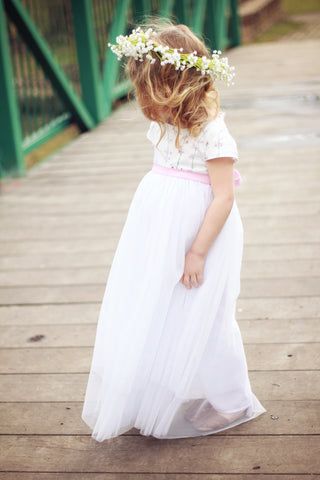
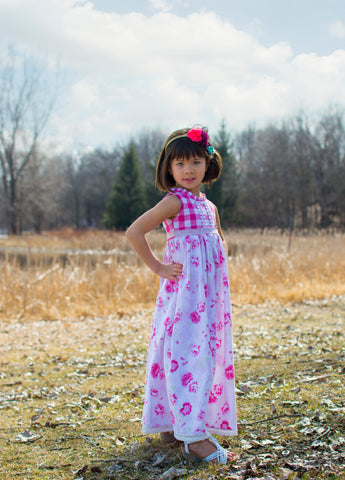
Available in sizes 2-10, Emily gives you tons of options for so many different looks, you will never make the same dress twice.
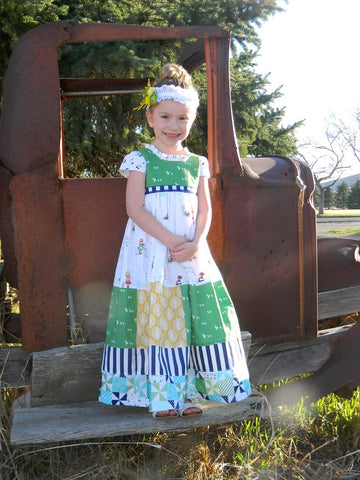
Emily boasts not only 1 or 2 skirt options, but 4!! Yes, you heard that right! Start with the simple straight skirt, and you have a lovely everyday look that is the perfect summer maxi dress.
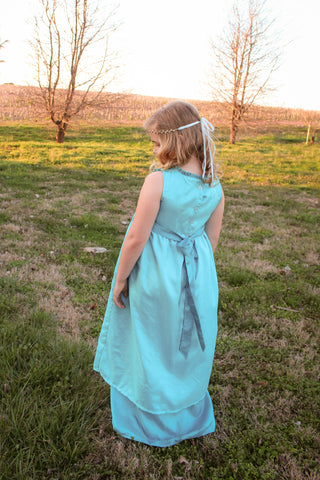
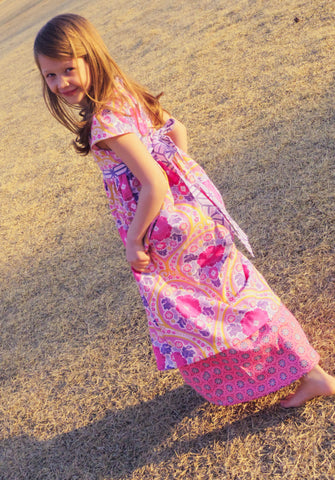
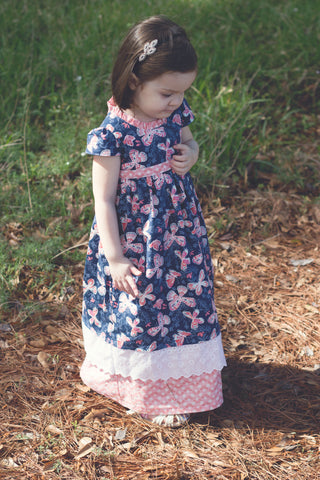
Want something with a little more pizzazz? Try the layered skirt option. This skirt has one longer skirt layered with a shorter skirt on top. So pretty and feminine. This is the perfect opportunity to play around with fabrics. Keep both skirts the same or change up the fabrics! Let your creativity shine!
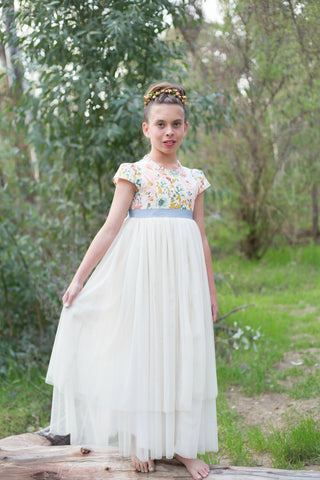
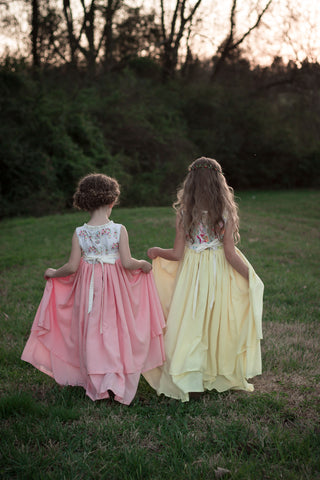
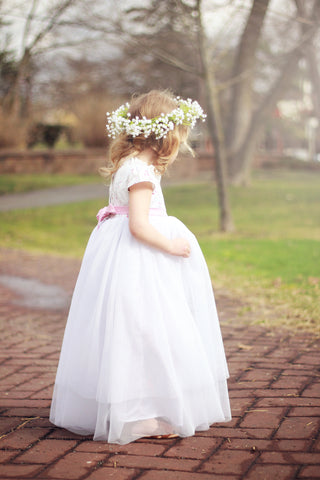
Like the layered skirt but looking for something a bit more dramatic? Then the layered tulle skirt is the one for you! This is the perfect skirt for that flowy dreamy look we all desire. Perfect for when you are yearning for that gorgeous romantic look!
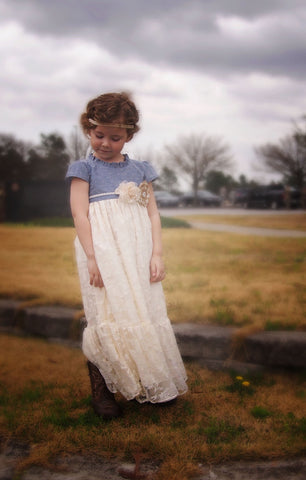
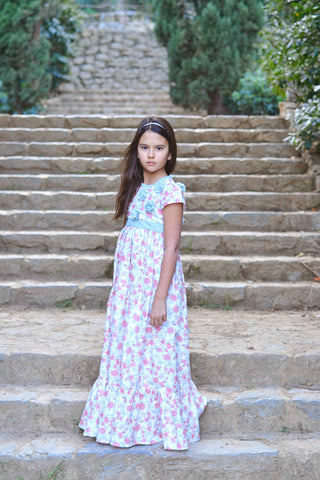
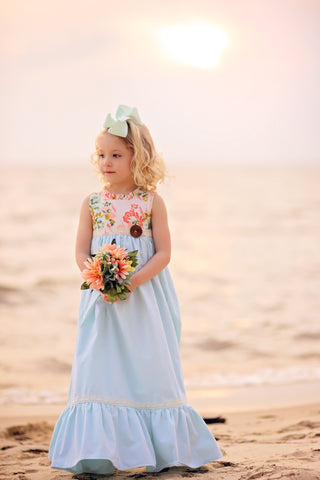
And last but not least, why not try your hand at the gathered ruffled skirt. This look screams bohemian chic and features a long skirt with a bottom ruffle. So pretty!
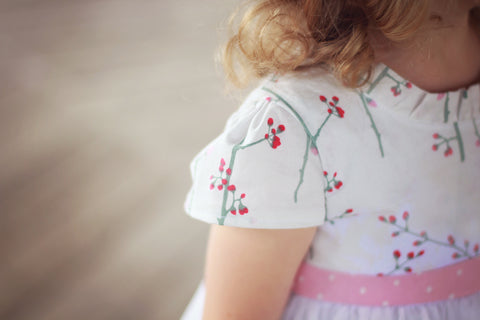
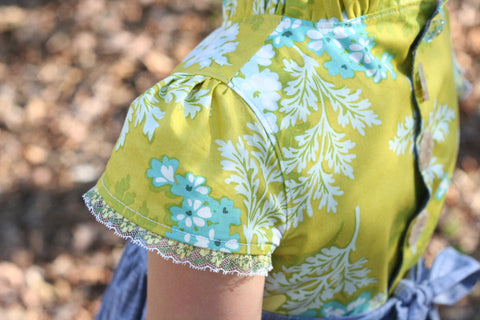
And while we are talking about options, we cant forget sleeves. Emily can be made with cap sleeves for a sweet look that is very Jane Austen-esque!
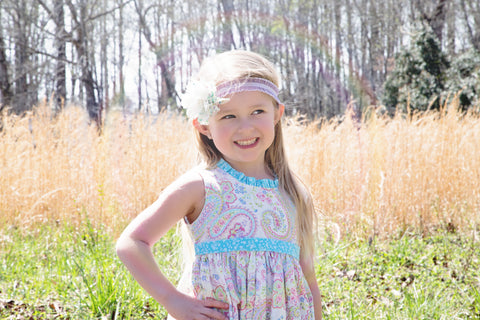
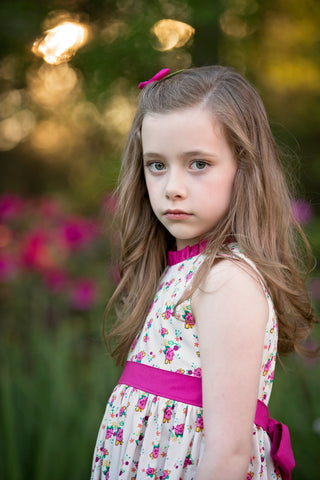
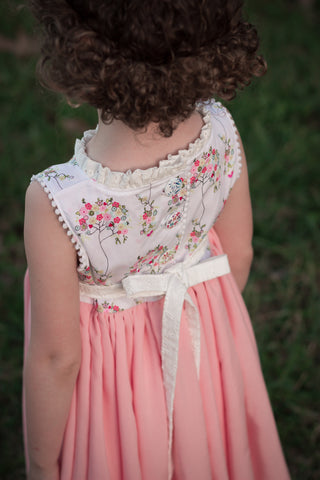
Leave off the sleeves for an entirely different, but just as charming look! Add in some trim, like a few of our testers did, and you've really created something special. Sleeves or sleeveless, you really can't go wrong with either version!
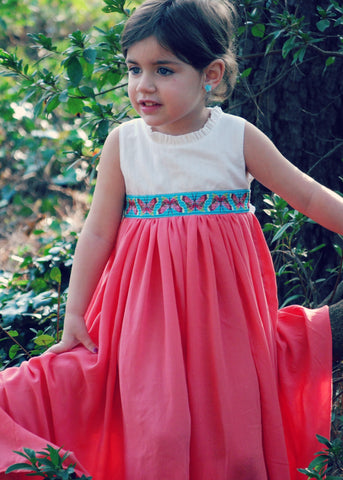
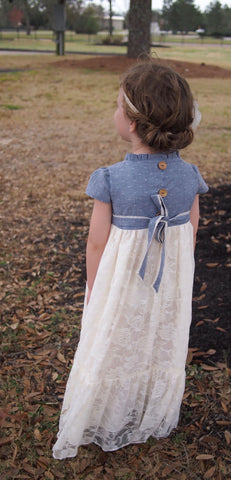
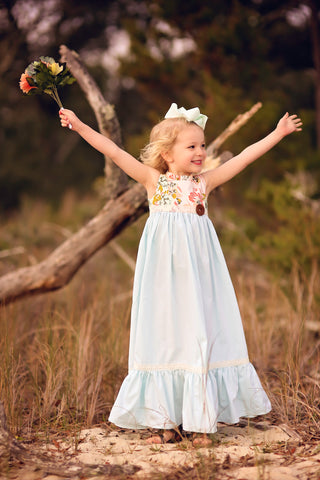
Emily has such a sweet little sash, that ties in the back. Use fabric, lace, ribbon, or trim! The sky is the limit here!
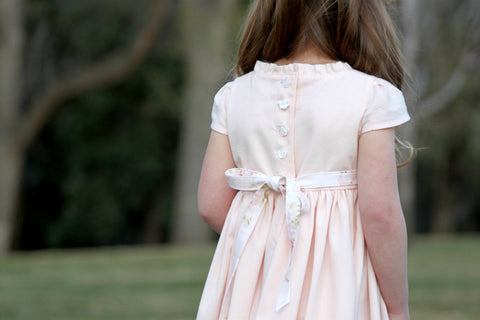
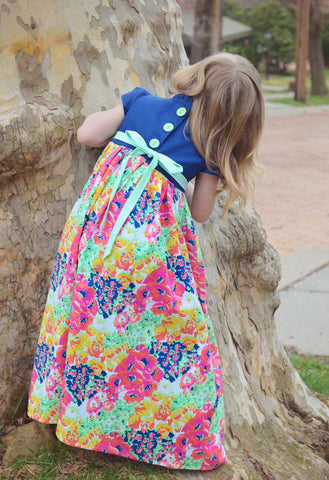
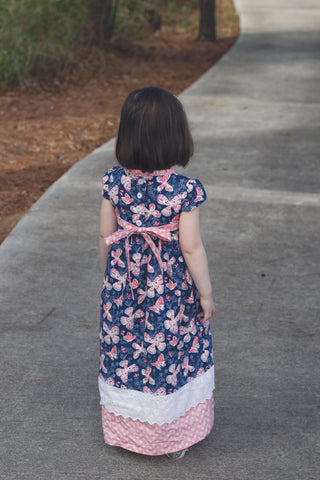
With a button back and skirt placket, you are sure to get the perfect fit for your little lady.
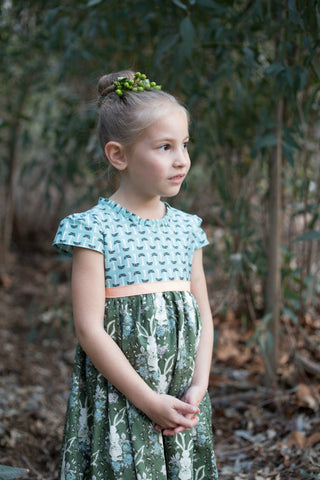
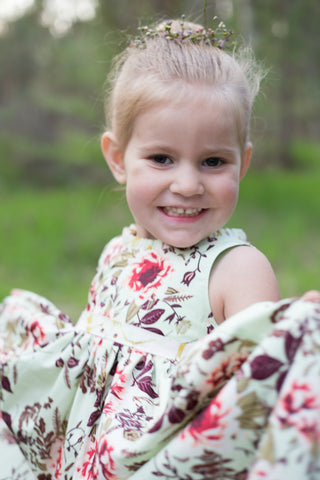
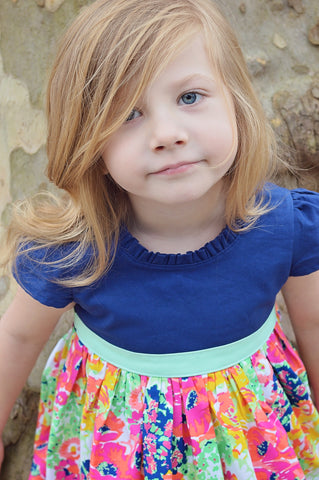
And we can't forget that amazing neck ruffle! It's the perfect subtle detail that sends this pattern over the top! Big enough to make a huge impact, but small enough to not overwhelm the design. It's the perfect design element that really makes this dress stand out.
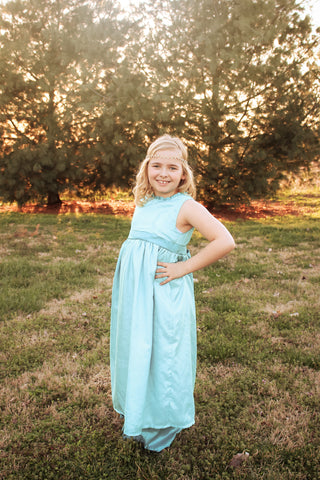
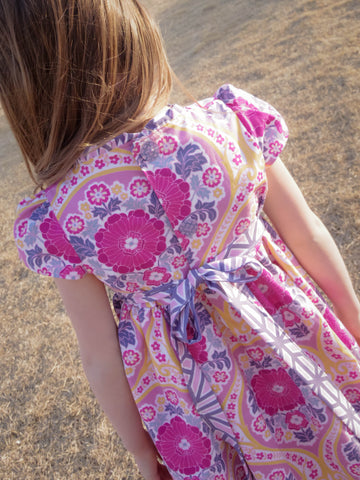
Emily is a one in a million pattern that we are sure you will adore just as much as we do!
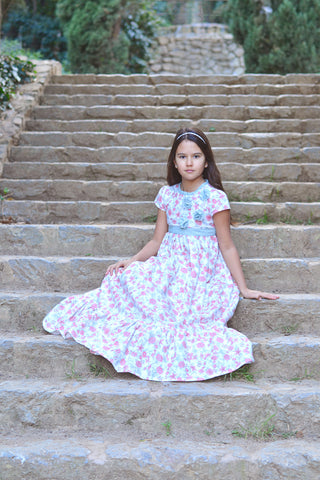
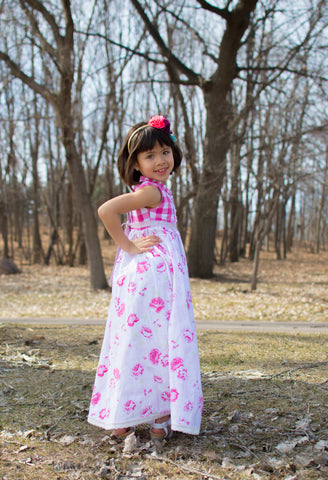
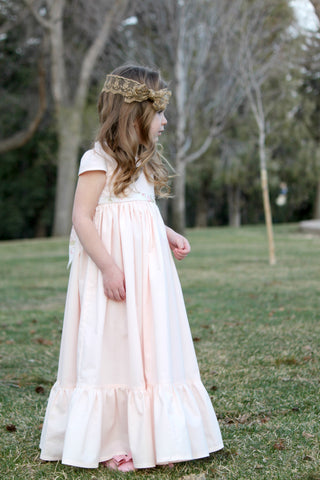
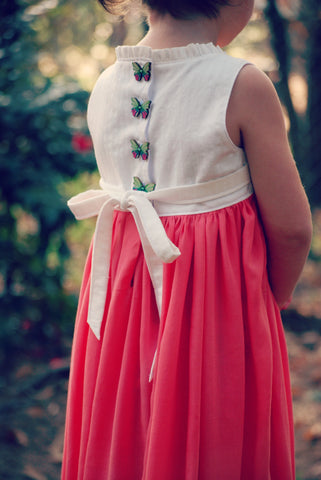
A special thanks to all of our amazing testers who really knocked it out of the park on this one!
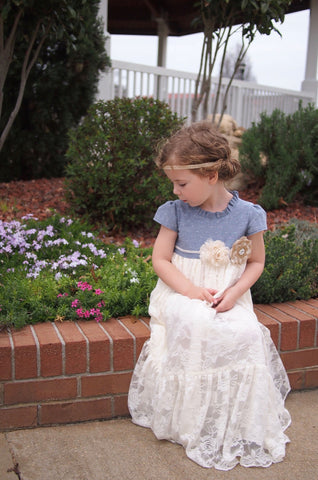
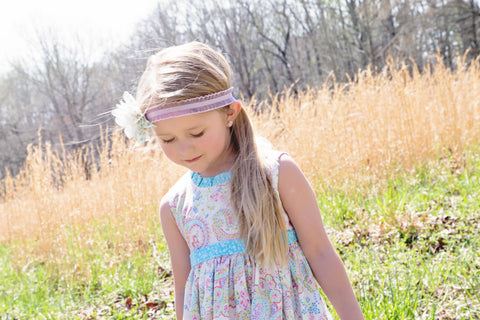
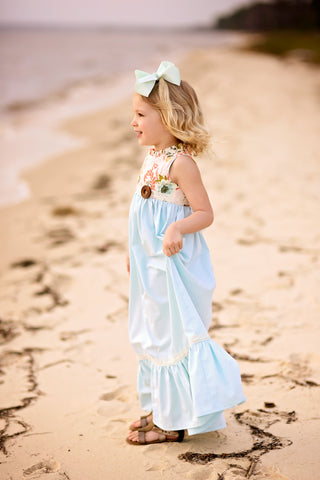
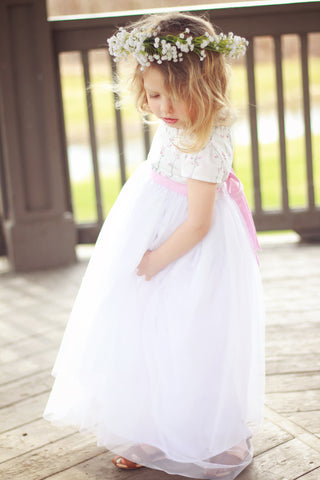
Emily is available in our shop today!!! Use code EMILY to get 20% off of this pattern now through Sunday! And don't forget to share your lovely creations over in our FB group and tag us on instagram @violettefieldthreads!
Sneak Peek: Emily by Alexis
Hi all,
Alexis here, jumping in and sharing my latest pattern, Emily, with you!

Emily, melts my heart,she is a mix of Jane Austen meets today’s trends. Some of the features of Emily include a small ½” ruffle neckline and not 1, not 2, not 3 but 4 skirt styles! I will go into more of that later. The pattern comes in size 2-10 and can be made with or without the delicate cap sleeve.
Before I jump into the pattern details let's stop and look at this fabric! This gorgeous fabric collection is Forest Floor by Going Home to Roast and Art Gallery Fabrics. This collection was the perfect blend of elegance and whimsy to compliment the Emily pattern.
Let’s start off by going through the skirt styles.

Skirt Option A is a Straight Skirt. For this skirt option cotton, cotton blends and even fun lawn or voile are great choices!! Add some trim and boom, gorgeous!!

Skirt Option B is a 2 Layered Skirt: This is a fun version for showcasing one or two fabric prints. I choose to use voile fabric in the same print for both layers. You can also add trim for a fun flare! WHAT!!?? Ya!

Skirt Option C is a 3 Layered Tulle Skirt: This dreamy skirt is made using the softest non-fray tulle like Chiffon Tulle. For my dress I used RuffleFabirc.com Tulle. It is a polyester non fray tulle. Other than being super soft and easy to work with, it is 60” wide (maybe even a little bit more) !

Skirt Option D is a Gathered Ruffle Skirt: I have always had a soft spot for this style of skirt. It brings in one of my favorite styles, Boho. This style works great with cotton, cotton blends, Voile/Lawn, and one of our testers even used lace fabric! Swoon!
So let's talk sleeves… Sleeves and I don’t always get along (while drafting) but once it all comes together my heart burst with joy! This sleeve is no different! It is a cap style sleeve that screams Jane Austen, right??!! But if you or your child prefer no sleeves, there is a option for that too!
We have a few testers that used trim which gave the sleeveless version a special touch.
Sleeve Version:

Sleeveless Version:


To finish off Emily I have included a sash that give you the opportunity to play with different fabrics prints and textures.


Make sure you checkout Violette Field Threads group page for more photos and inspiration! Check back tomorrow for Emily sale info and all the amazing tester photos!
Introducing {Marjorie}: Vintage style pleated dress
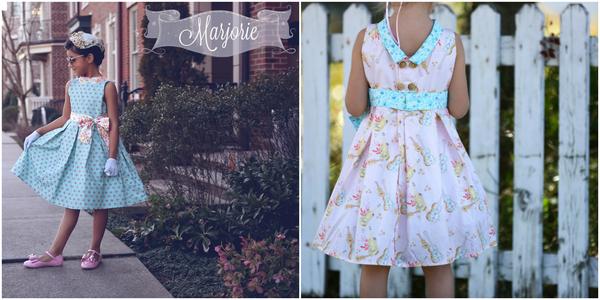
Spring is right around the corner and we are pleased to share with you our newest pattern that is perfect for the coming warmer weather.
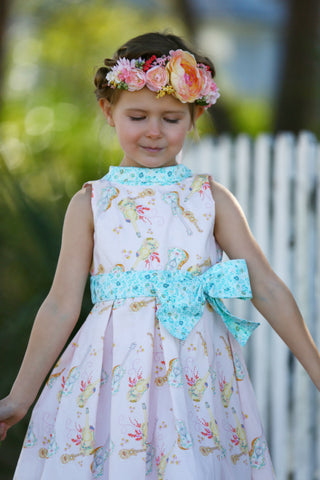
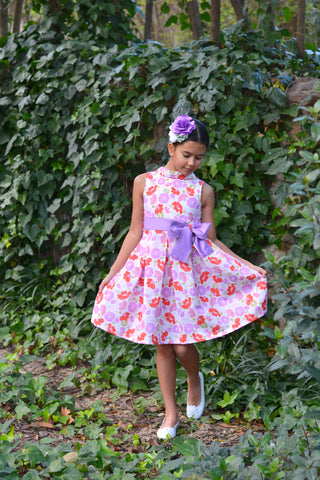
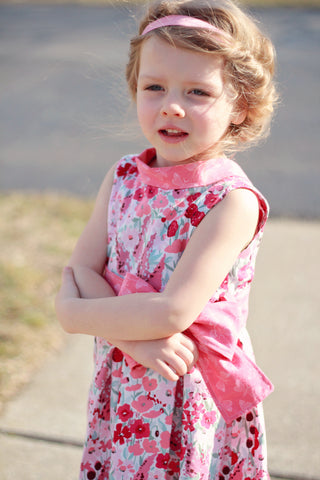
Introducing Marjorie, a vintage style dress that offers chic sophistication every little lady will adore. Available in sizes 2T-10, Marjorie is a dress that will never go out of style, and is perfect for all types of occasions.
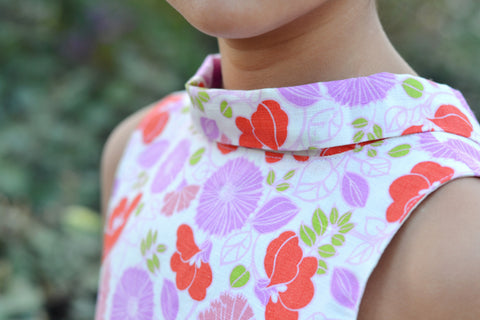
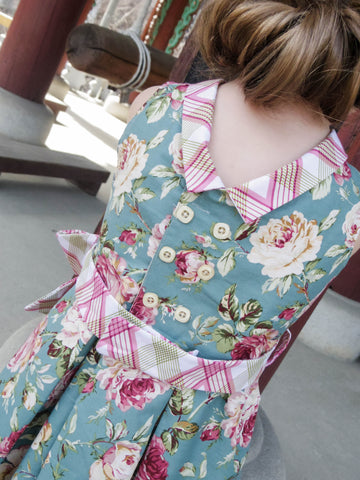
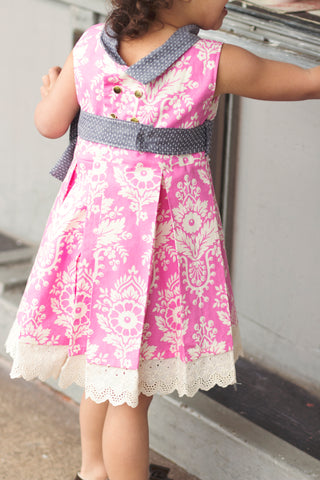
Marjorie has a charming high neck fold down collar, with two perfect points in the back. This collar helps in accentuating the real star of the show, the back of this dress! With it's gorgeous double button closure, the back is a show stopper.
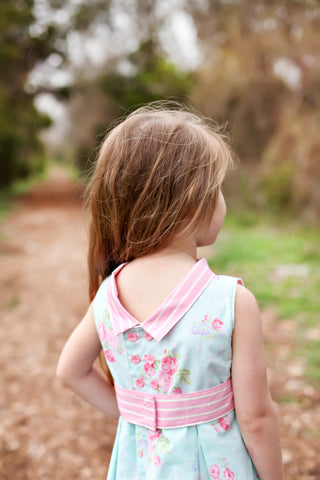
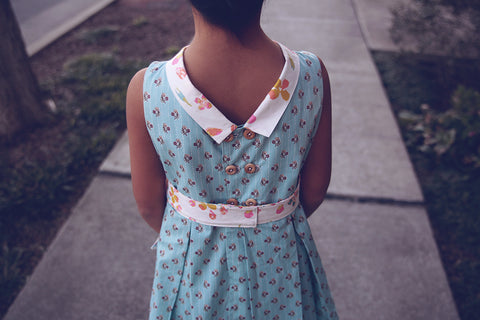
The stunning wrap style back is so lovely. Perfect for getting an amazing fit custom to your model.
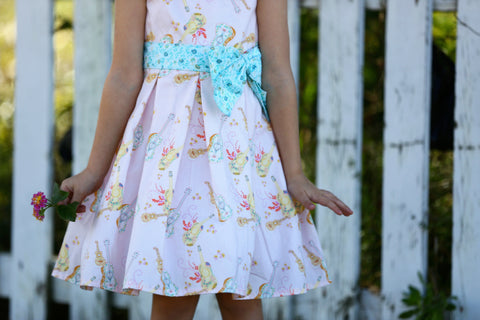
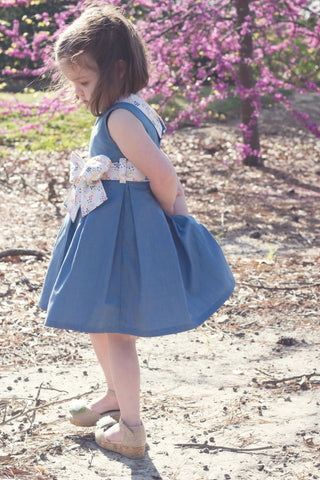
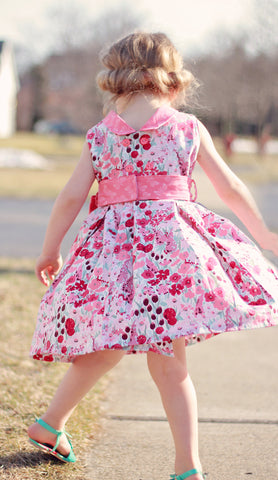
Marjorie's full skirt complete with box pleats screams elegance. Pair it with a pettiskirt, and you've got yourself an amazing special occasion look!
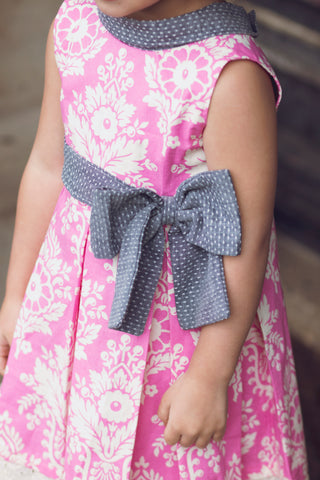

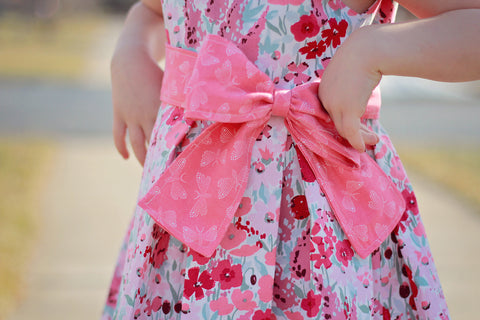
Marjorie also features a lovely waist belt and bow, that boasts a snap closure, enabling you to get a perfect fit every time!
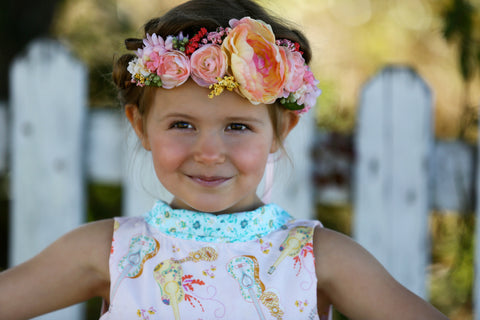
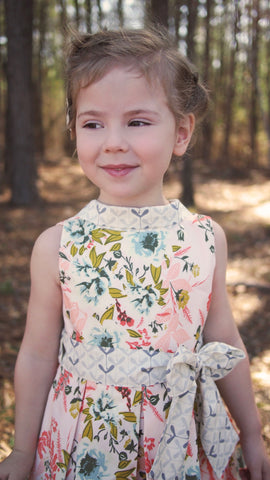
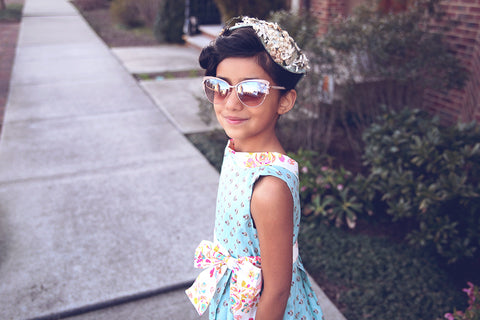
We cannot get enough of this dress, and knew when sewing it up that Art Gallery Fabrics would be the perfect blend of modern and vintage that we were looking for.
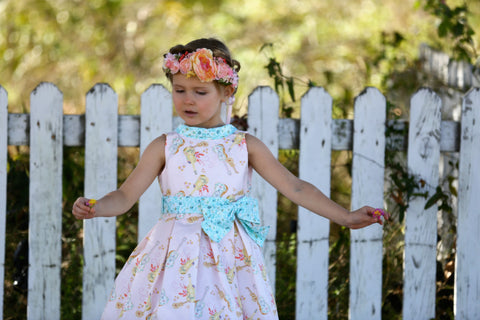
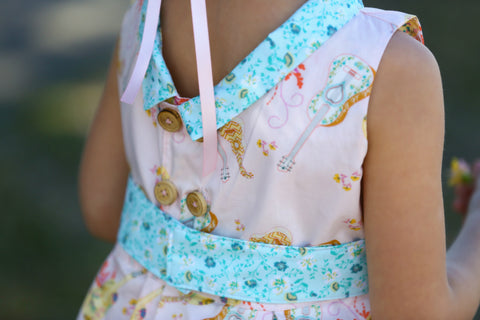
The Anne Elise line was one of the fabric lines we knew we needed to showcase! With it's free spirited look and gorgeous colors, this whimsical line is the perfect pairing for the vintage look of this pattern.
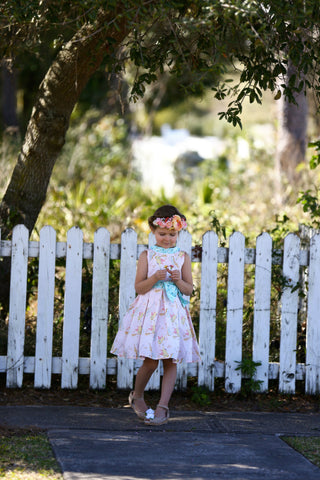
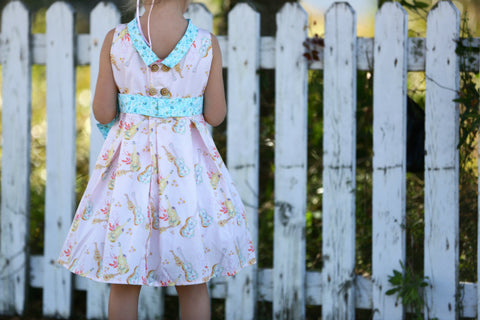
The combination of florals and music patterns go perfectly with Marjorie. We can't get enough of this lovely look. Sweet and sophisticated, it is one of our favorites!
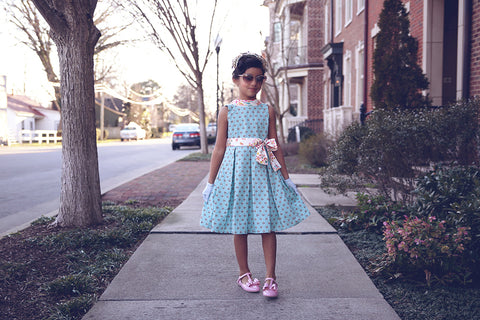
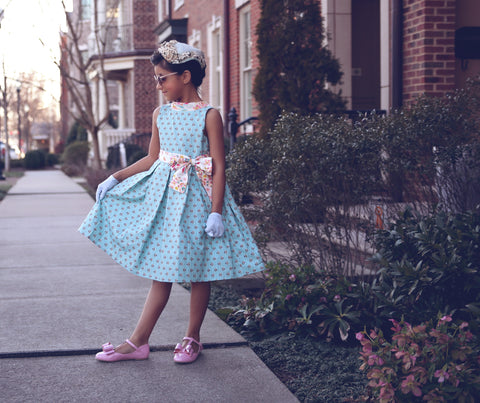
If you're looking for a vintage feminine feel, then the Fleet and Flourish line will be one of your favorites, just as it is ours!
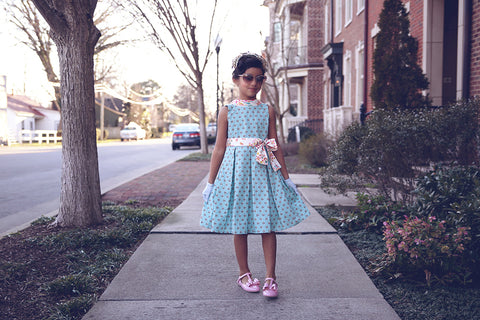
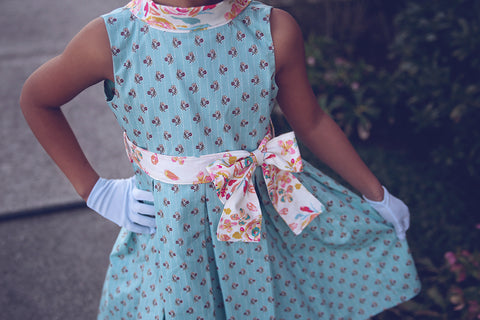
We adore the bohemian florals paired with romantic soft colors. This line is absolutely gorgeous and we think looks just amazing as a Marjorie!
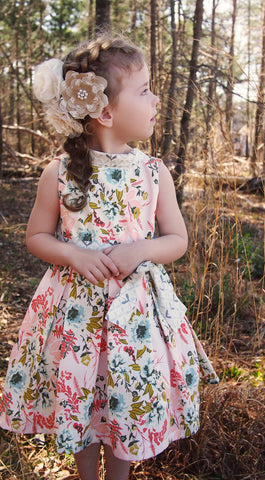
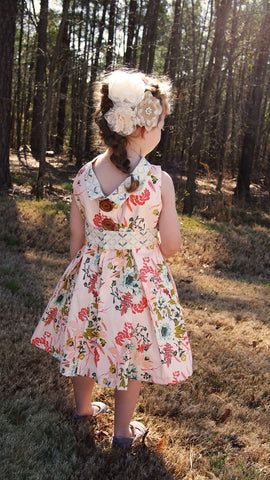
As if that wasn't enough, we saw the Forest Floor line and immediately fell in love. This whimsical line brings magical places to life and takes you on an adventure like you've never experienced before.
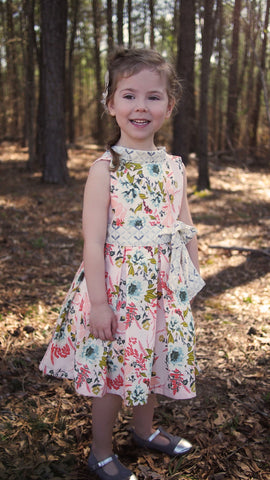
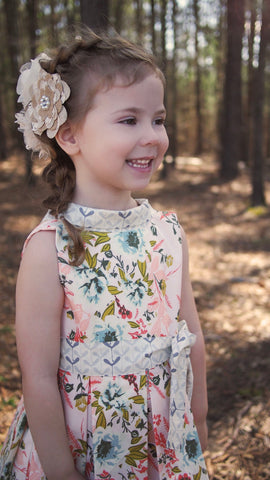
The warm and soothing colors of this line make you feel like you are in a forest, ready and waiting for what the next adventure might be.

We adore Art Gallery fabrics and thank them for letting us feature these gorgeous fabrics! Make sure to check them out on Facebook and Instagram. We know you will love sewing with these fabrics just as much as we do.
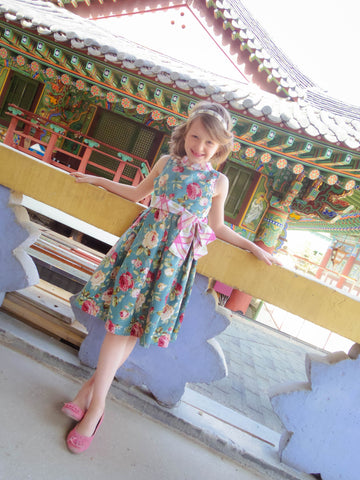

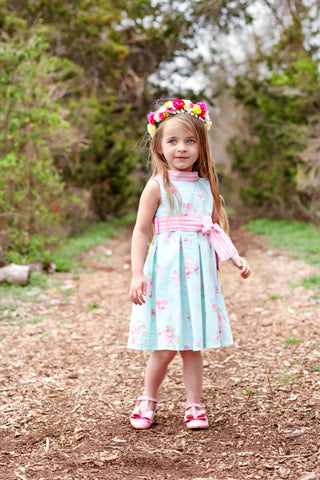
A special thanks to all of our lovely testers who did an amazing job sewing up these gorgeous dresses!

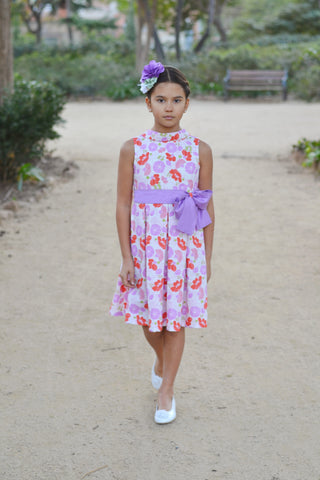
Grab your copy of Marjorie today. And because we are so excited to bring you this new pattern, we thought why not give you a sale to go with it! Now through Sunday, use code VFTSPRING for 15% off your entire purchase on both the website and Etsy! It's the perfect time to pick up those patterns you've been itching to buy!
Hawthorne Threads {Fabric Love} + Braided Headband Tutorial
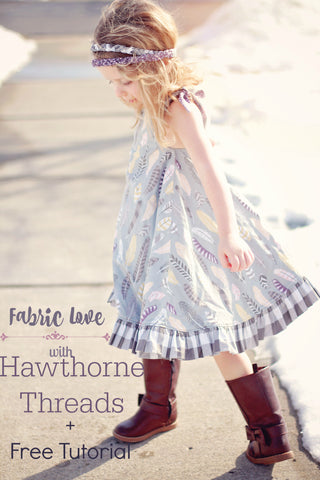
Like many of you, I ADORE gorgeous fabrics. There's something about a quality fabric that comes in tons of prints that gets me every time, so when Hawthorne Threads sent over some fabric to try out, I was more than exited to sew them up!
Hawthorne Threads fabric washes and sews beautifully. I loved every minute of sewing with these fabrics, and honestly cannot wait to get some more!

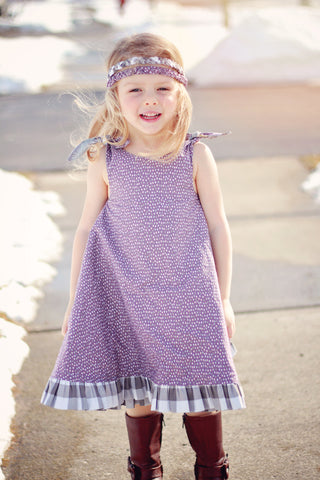
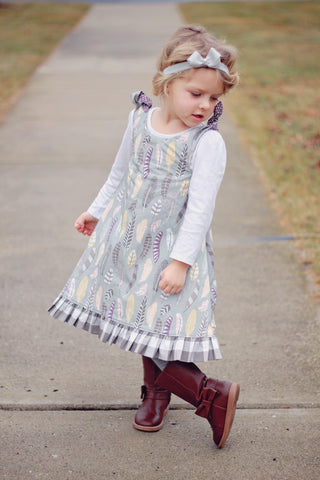
I knew I needed to do something special with these lovely fabrics, and the Hope Dress fit the bill. I decided on using Feather Collective in Sage and Rolling Stones in Mulberry for the main fabrics of my dress.
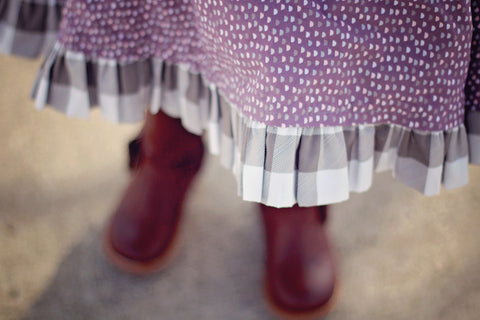
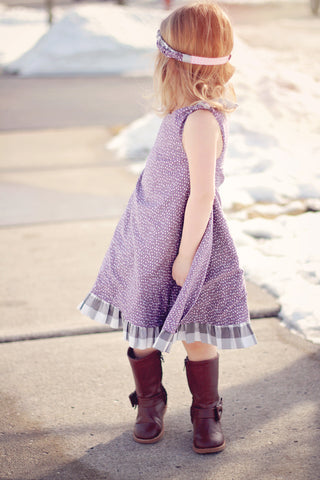
The Hope Dress is a reversible swing style dress with lots of options, but I decided to go with the ruffled hem for a super fun look. I'm a sucker for plaid, so the Buffalo Plaid in Stone was the absolute perfect accent fabric for this dress!
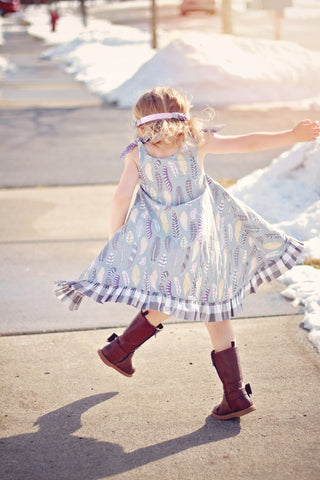
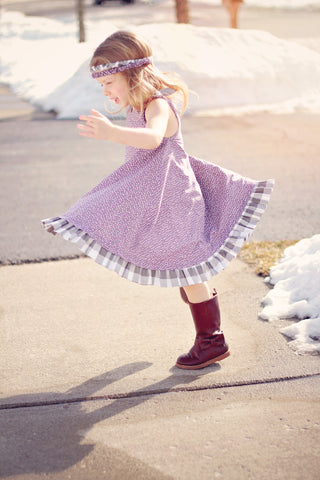
My daughter loves the twirl factor on this dress! I will say, it was difficult to get her to stop twirling to get a decent shot! It's such a fun dress, every little girl needs one super twirly dress in her closet!
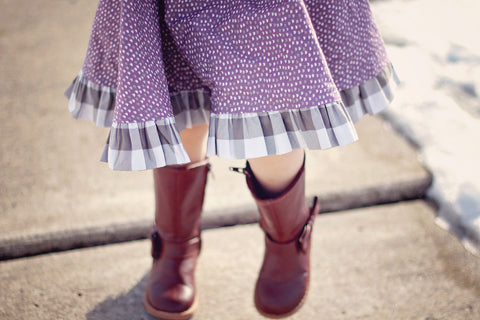
The ruffle hem may be my favorite part of the dress. It is definitely worth the extra time to gather all that fabric. I gives the dress that added something that puts it over the top!
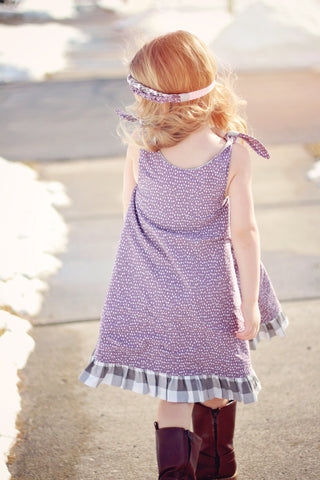
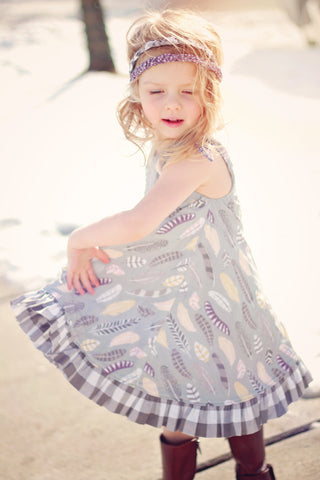
It's hard to decide which side I love better. The feathers are so much fun, but the reverse side is just as gorgeous! You can't beat 2 dresses in 1!
It's inevitable that when sewing you are left with some scraps. I end up putting all of my scraps in a bin and they sit there, for what seems like forever, taunting me to use them, which never seems to happen. Scrap busting questions keep popping up in our FB group, so I knew I needed to come up with a clever way to use my leftovers!
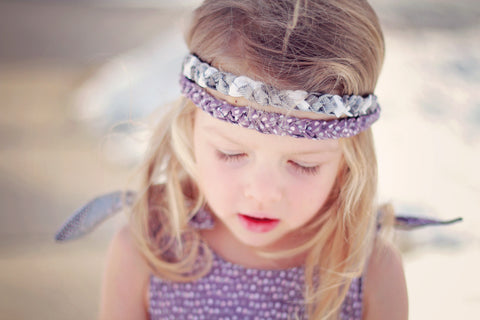
After some brainstorming I had this light bulb moment! If you have seen our beautiful Annie Dress, it boasts lovely braided fabric straps, and I knew these straps would make a beautiful headband!
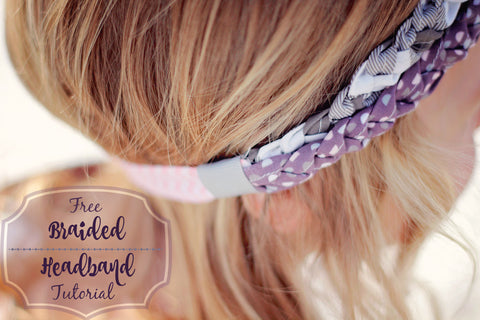
For this braided headband, you will need the following supplies:
- strips of fabric that average 20-30in in length and are around 1.5in wide. If you don't have strips that are long enough, no worries! You can sew multiple strips of the same fabric or even different fabrics together for a fun look!
- Fold Over Elastic
- 4 inches of 1in wide ribbon or trim
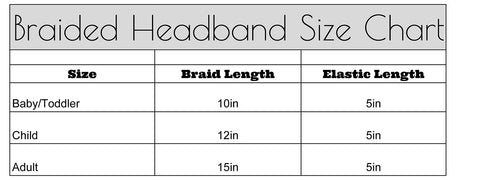
I followed the strap instructions included in the pattern instructions, but if you don't own Annie, here is a quick tutorial on how you can make them yourself!
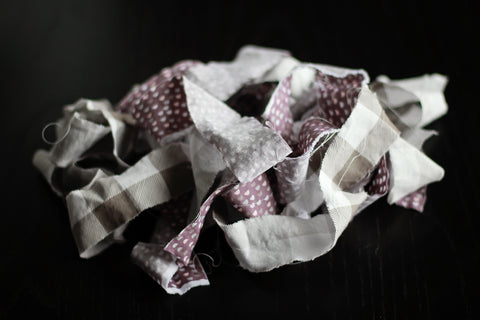
First off, cut your strips of fabric 1.5in x 30in. I cut 6 strips since I wanted to make 2 braids. You will need 3 strips for each braid.
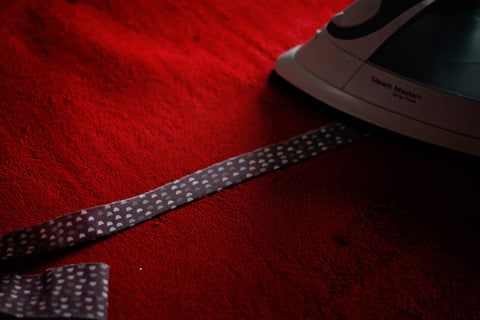
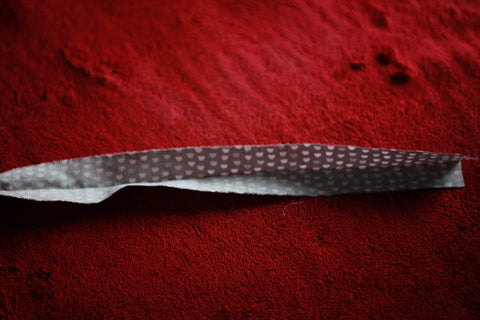

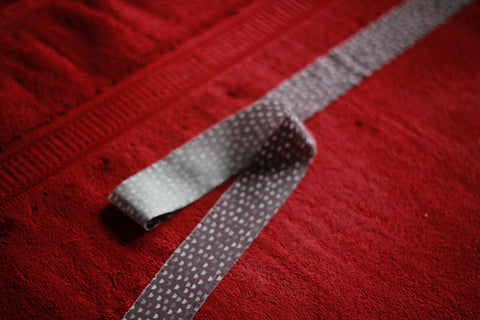
After cutting, you are going to iron each strap in half, wrong sides touching. Open it up and fold the raw edges into the middle and iron.

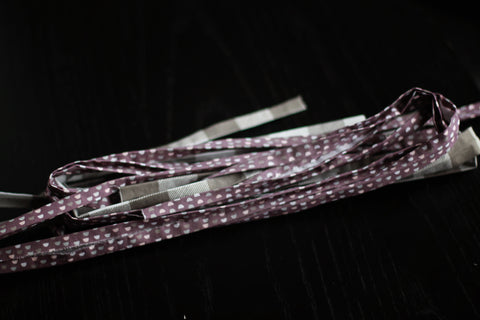
Next you will fold in half and iron. You are basically making bias tape, except the strips do not need to be cut on the bias. Do this for all of your strips. You should have a pile of pretty folded strips ready to be sewn!
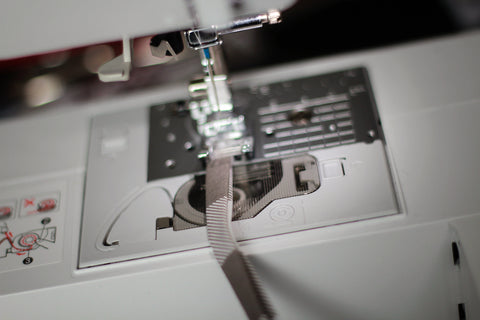
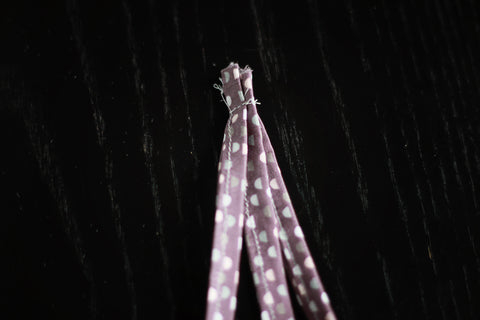
Take your folded strips to your sewing machine and sew down the edge of each strip. Once all your strips are sewn, take 3 of your pieces and place them on top of each other and sew.
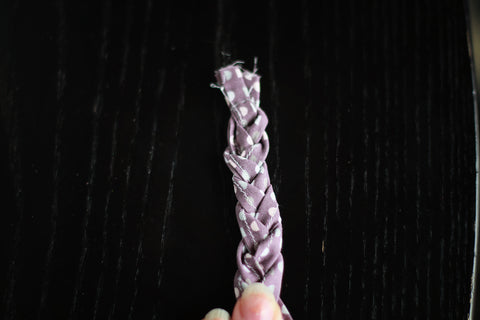
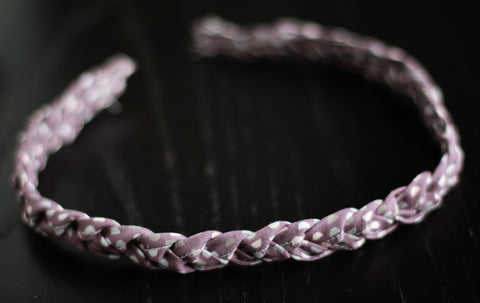
Now it's time to braid! Hold your sewn strips and start braiding, paying attention to not pull your braid too tight and try to keep the backside as flat as you can. I made my braid about 12in long, and then sewed the bottom just like I sewed the top.
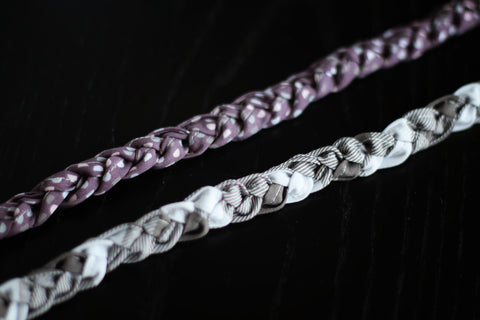
You will do this same process with the rest of your strips. You will end up with 2 gorgeous fabric braids!
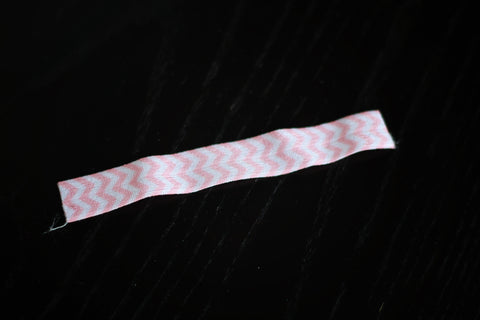

Next, grab some folded elastic and cut a 5" piece. Take the ends of your braids and sandwich the elastic in between and sew. Do this for both ends of the braids. Once sewn, your headband is almost done!
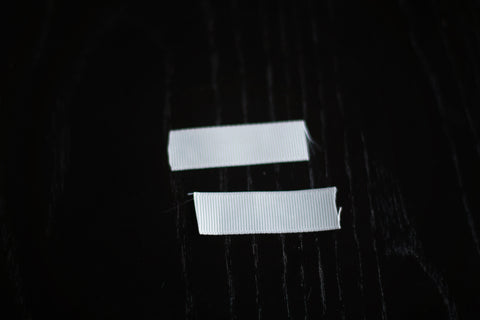
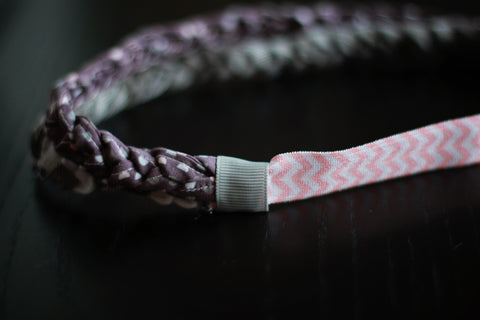
I cut two 2" pieces of ribbon to cover the sewn areas and make it look more finished. Take your hot glue gun and glue your ribbon around the sewn area where the elastic meets the braids. Make sure the ends meet on the wrong side of the headband. If you are using ribbon that frays, you can singe the edges with a match or lighter so that they will not fray.
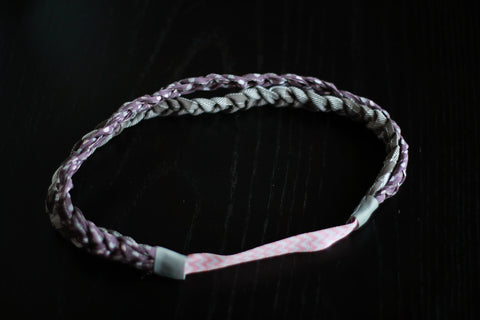
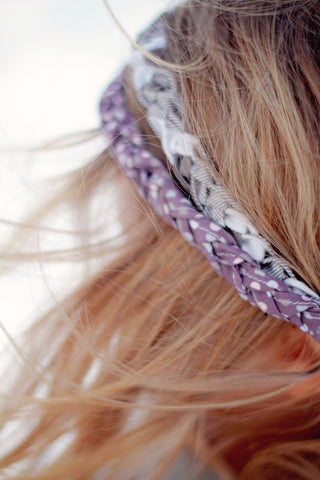
So simple and the finished product is so pretty! The best thing is that this headband is stretchy so it is forgiving and will fit your little lady for a long time!
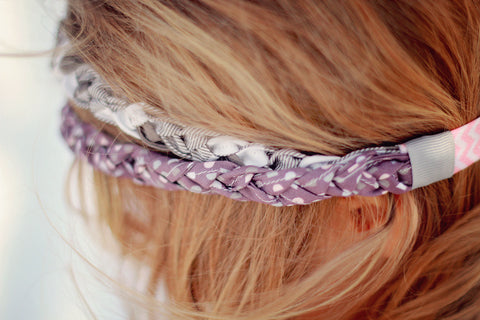
I ADORE the look of this headband and so does she! She loves how comfortable it is and I love the vintage vibe it gives! It's the perfect accessory for any outfit!
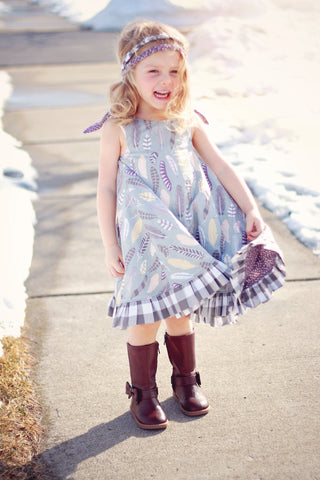
A special thanks to Hawthorne Threads for providing the gorgeous fabrics used in this post. Make sure to tag us on FB, Twitter, and Instagram with your beautiful braided headbands and VFT creations!
GIVE HOPE Campaign+Pattern
With so much hustle and bustle in our everyday lives, it can be all too easy to not stop and take a minute to reflect on our blessings. Reflection on the good things in life that have been given to us often leads to thankfulness and then the motivation to share and give to others. Ericka and I truly love our company. We readily acknowledge that Violette Field Threads would not be where it is today if it weren't for our loyal and supportive group of fans!
This past summer we spent lots of time brainstorming ideas on how we could give back to our fans. We started with the idea of a small collection of patterns that would be absolutely free. This idea felt good to us, but we both felt we were really only in the beginning stages. So, we started designing our little collection and as the weeks went on, the pieces just started falling into place. We both soon realized that this tiny idea of ours was turning into something that could have a huge impact. That's when the butterflies in our stomach and the nights lying awake in bed planning REALLY started. Yes, it's true. We all love receiving a gift. But, when we're able to give a gift of special meaning, that's where true happiness lies. So, our dear fans, we are giving to you a small, but beautiful collection of free patterns. Our hope is that you, in turn, are able to give the gift of handmade in return. And this is how the GIVE HOPE campaign was born.
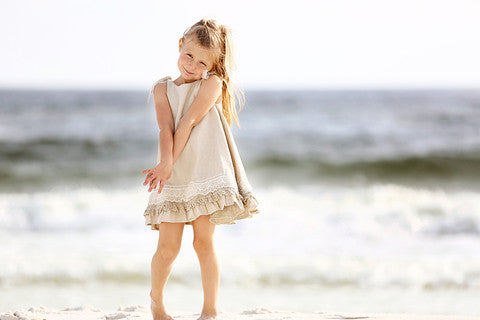
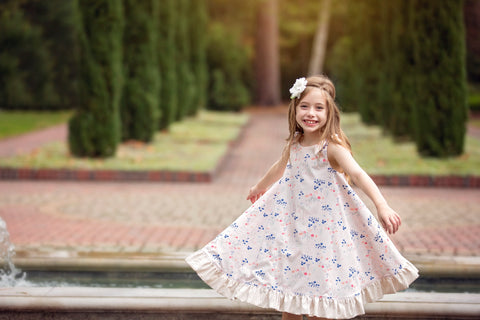
The "Hope" is a simple, yet lovely dress and tunic PDF pattern+tutorial that beautifully balances playfulness, feminine detailing, and practicality. The dress is constructed to be completely reversible and easy to fit. These design elements were very thought out, as ease of wear and fit are very important for this project. Hope ranges in sizes from 12 months-10 years.
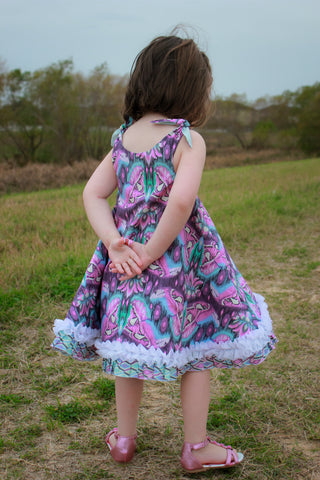
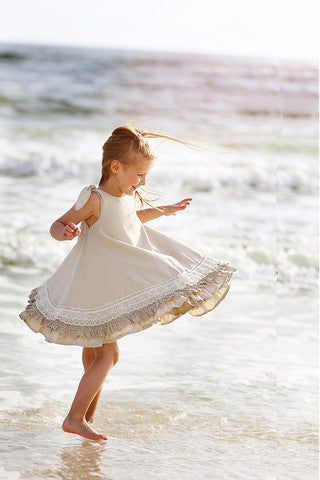
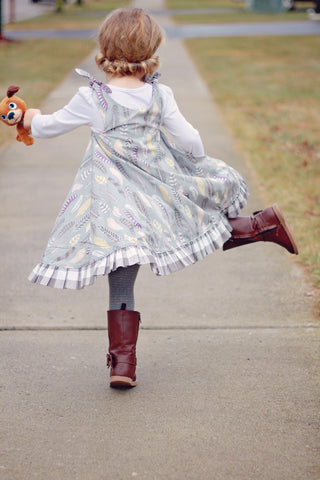
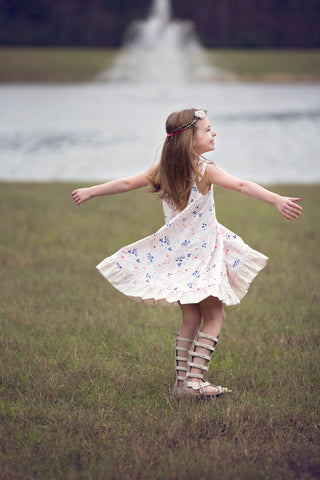
Even though the design of Hope is simple, the multiple finishing options give this pattern lots of versatility. Start with the simple tunic length for an adorable little swing top. Don't forget that every version is reversible, so your recipient is really getting two looks. The dress version can be made with or without the bottom ruffle. We adore the bottom ruffle look as it adds just the right amount of girlishness and just the right amount of added twirl! It was beautiful to note that all of our testers sent back at least a couple of pictures of their little ones looking so happy twirling in this dress.
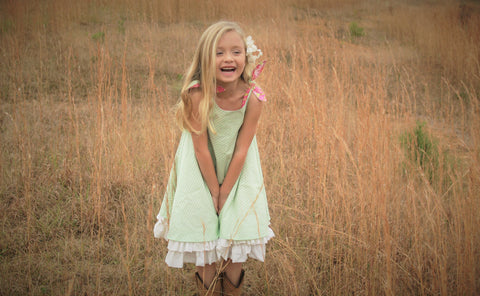
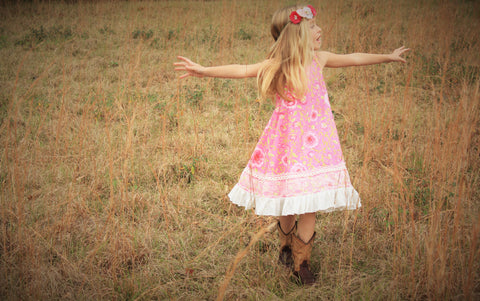
There is also a special section towards the end of the tutorial that includes instructions on how to make the Hope extra special. We call this version the Special Finishing version as it includes layered double ruffles on one side of the dress, and one ruffle with one or two layers of trim on the other. This extra special version is a gorgeous option that any girl will swoon over!
During one of our brainstorming sessions, shortly after we can up with the idea of offering these free patterns and hoping our amazing fans would want to pay it forward and sew some of these up to donate, we started to discuss who could possibly become the recipients of these very special handmade items. Ericka quietly and very seriously said, "I really would love if we could find an orphanage in Guatemala." That's all she had to say, and I was on board. We know that hope was needed all over the world, but we have a special connection with the children of Guatemala. Ericka adopted her 3 children from Guatemala in 2006 & 2007. She has been to Guatemala over a dozen times, and has seen firsthand the need these children have.
We reached out to Heather, of Casa Guatemala, and couldn't have been responded to in a kinder way. She is so appreciative and grateful that it makes this whole project seem like it's a perfect fit. Casa Guatemala is a safe place filled with learning, laughter, and love, for the children of Guatemala. Their website is truly amazing. It brings hope in itself, and is a beacon of kindness and responsibility. "Casa Guatemala seeks to provide a safe home, love and nurturing, proper health care, and an excellent education to the children of Guatemala who are abused, abandoned, malnourished, or living in extreme poverty."
We have been bubbling over, nearly spilling the beans several times and we can't believe the day to share this with our friends is finally here. With nervous anticipation, we bring to you our GIVE HOPE campaign.
The GIVE HOPE Campaign launches today, December 22nd and will run through the end of January.
There are several ways you can become involved! The first is by simply adding the Hope pattern in the "Give Hope Campaign" section of our website to your cart. You will notice that this pattern is free and includes a $2.50 donation to this project. Your donation will help to facilitate all aspects of this project from start to finish, including the shipment of all donated clothing to Casa Guatemala. (If you would like to donate more, you can add it to cart as many times as you wish to make the donation amount higher, or you can go directly to Casa Guatemala's website and donate there!)
The second way to give back is to use one of our three free patterns: Hope: a reversible dress, Lola: a tunic, and Evie: a pair of knit shorties, to create a beautiful handmade item to donate. Once you have created one (or more!!!) piece(s) to donate, we ask that you mail them to our studio:
Casa Guatemala serves over 300 children from severely impoverished areas that otherwise would not have access to education, proper nutrition, or healthcare services, among other things. If you would like to learn more about this amazing organization and how you can donate, please visit their Website, Blog, and like their FB page!
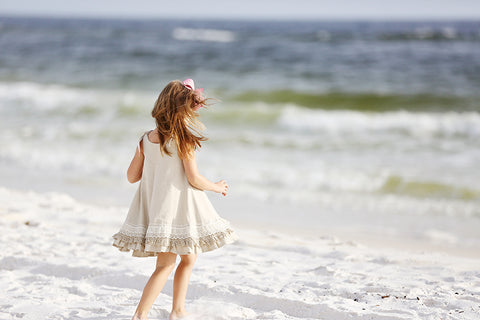
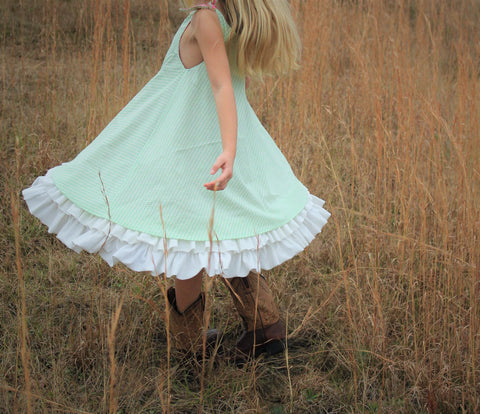
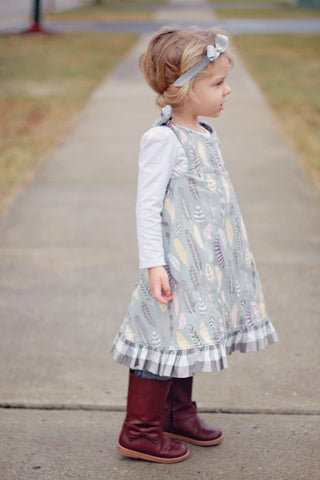
You can pick up your copy of Lola for *free* using the code in our FB Group and Evie for *free* using code FREEEVIE2015. Hope is also *free* but includes a donation of $2.50. This price covers the cost of us shipping all the dresses down to Guatemala, as well as covering the marketing and facilitating expenses of this project.
We truly hope that the GIVE HOPE Campaign touches your hearts as much as it does ours! We look forward to seeing your lovely creations and cannot wait to share them with the children of Casa Guatemala!
Additional information for the Give Hope Campaign:
If you are donating a Hope dress for Casa Guatemala, we have some information and a few requests:
*At this time, we need all sizes, 12 months- 10 years. As we start receiving donations, we will let everyone know which sizes we are lacking.
*Hope, Evie, and Lola can be sewn in any fabrics!
*Please package your dress in a clear ziplock (or similar type bag) with the size labeled on the outside.
*Please have your donation(s) mailed in by January 31st, 2016
*Please include your email contact information so we can send you a FREE pdf of your choice as a thank you for participating!
*Please send all finished garments to:
Violette Field Threads
2424 Adelaide Drive
Thompson’s Station, TN 37179
Thank you again from the bottom of our hearts,
Ericka and Jessica
Cutie Kitty Face {Pattern+Tutorial}
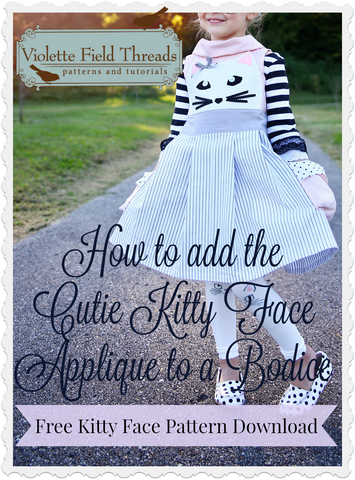 A few months ago, the lovely and talented Jessica showed off an AMAZING Alba that you all went crazy for! After so many requests for a tutorial on this, we finally decided the time was right! To continue our series of free patterns & tutorials, we are bringing you this fabulous pattern that is going to have you doing back flips!
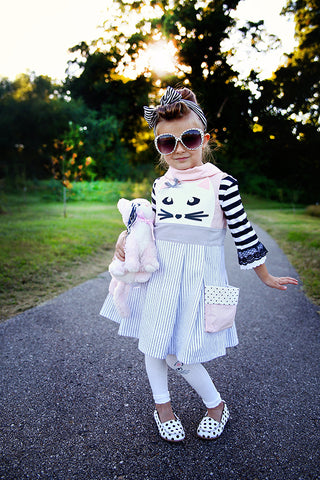
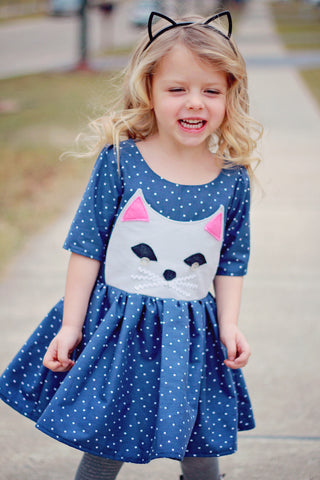
All you kitty fans out there, get ready, because this one is for you! The Cutie Kitty Face pattern+tutorial is going to have every kitty obsessed lady asking, "are you kitten me right meow?!?!?"
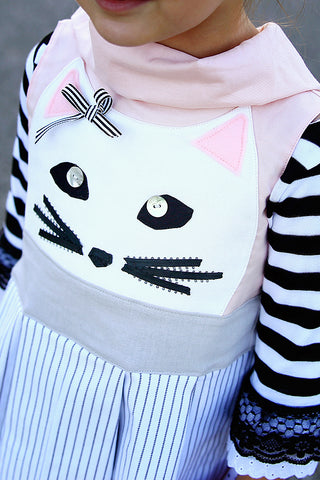
 Cutie Kitty includes pattern pieces for a full kitty face with eyes, ears, and nose! Add embellishments for the eyes and whiskers and you've got yourself a super cute kitty ready for your favorite patterns!
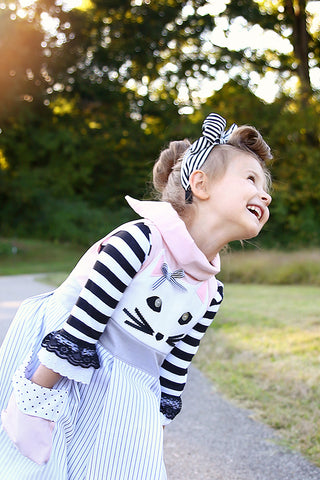
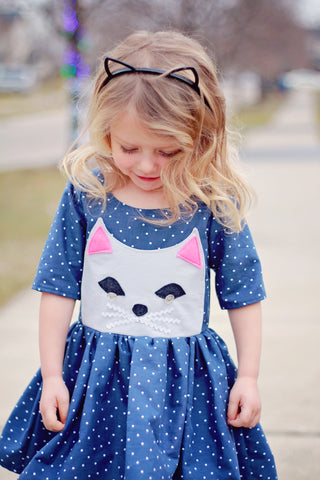
The Cutie Kitty Face tutorial will give you step-by-step instructions on how to add this adorable face to your favorite dresses and tunics! Some of our favorite VFT patterns are the PUUUUURRRR-fect backdrops for this adorable add-on!
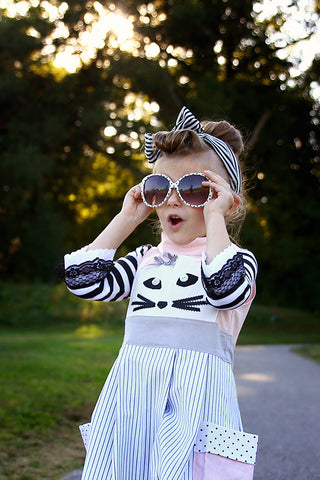
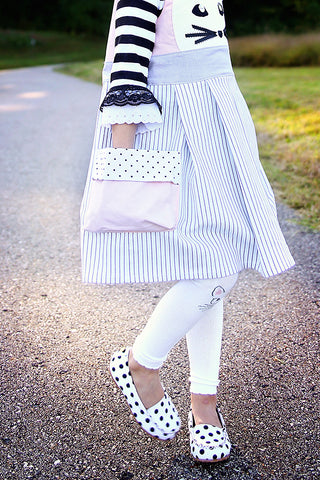
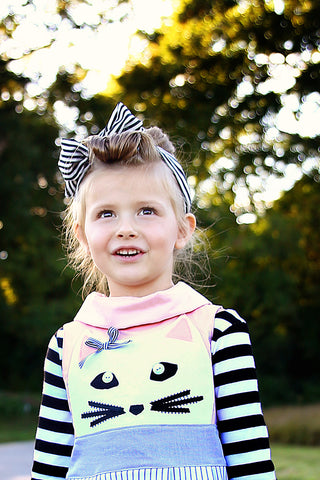
Alba is a great dress to use for your next Cutie Kitty! Alba has the perfect bodice length to show off this full kitty face!
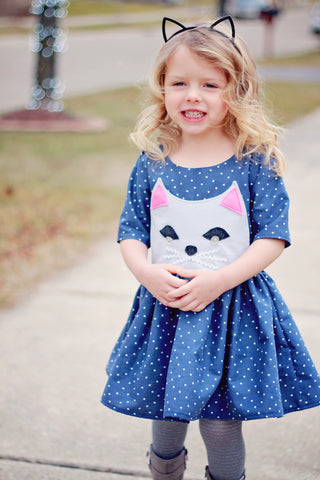

Want a totally different look? Take the flounce off of Genevieve and you've got a fantastic way to show off Cutie Kitty! Either dress is equally adorable! Use this face on any dress of tunic pattern that has a full length bodice! It's a great way to add some pizzazz to any dress or top!
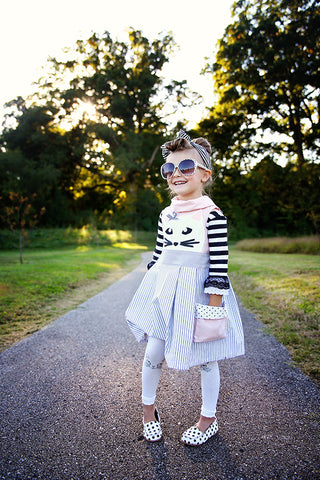
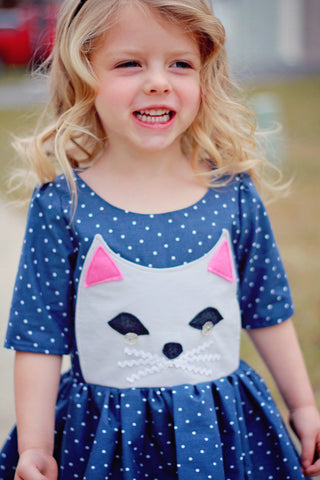
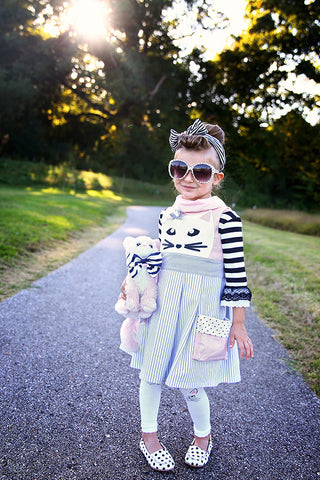
We have absolutely fallen for this kitty face and we know you will too! Download your copy of Cutie Kitty PDF Pattern here for free as a thank you from us to you! Plus today through Monday December 21, 2015 you can purchase Alba or Genevieve for only $5.00! No coupon code is necessary as the prices are already reduced.
Lola Top {Free Pattern & Tutorial}

This week we have showed off some super fun and easy free additions to a few of our favorite patterns. The FREE Pocket tutorial and the FREE Hood addition for our Molly coat were both released a couple of days ago. At the start of this 2 week series of giveaways, we promised some "How-to's", Freebies, and a very Special Project! We started with a couple "How-to" freebies and we've been overwhelmed with the response! Today is even better? Are you ready?! Today we bring you our first FULL FREE PATTERN!!! We have quite a bit up our sleeve regarding this sweet little design and how it will fit into our Special Project, but more about that later!

The Lola Top is an adorable tunic length top that features tie back straps, an optional bodice ruffle, and banded skirt bottom. All sizes 2 through 10 are included in the pattern!!!!


Lola comes in sizes 2-10 and is perfect for all the girls in your life! With an elastic back, and tie straps, the fit is forgiving and easily adjustable.


We are loving the the layered look this season, and Lola looks adorable layered over Phoebe, Elise, or even a lovely sweater dress!

The versatility of this pattern can take you from hot summer days to cold winter nights.


Lola is the perfect pattern to let your imagination run wild. The ruffled bodice is charming. Change up the look by adding some ribbon or lace accents for a new spin.

This is also the perfect bodice for your favorite monogram or embroidery designs! This pattern is perfect for getting those creative juices flowing.


The Lola Top is a great top to showcase your favorite fabrics and your fabric pairing skills! We are loving the look of Lola in multiple fabrics! It's so fun.


We really adore this top and know you will too! We love it so much that we want you to have it for FREE!!! Visit out FB Group to get a SPECIAL coupon code to purchase your Lola for free! Simply add the Lola to your cart and enter the code {found ONLY in our Facebook Group} at checkout. The $8.95 price will change to $0.00 and you will checkout as normal! Your FREE PDF will be available for download in 2 places: on the last page of checkout you will see a link that contains your download AND a link with your Lola PDF will emailed to the email address you enter at checkout. We also have a super special project that we will be sharing over the next few weeks, so make sure to pick up your copy of Lola today so you can be ready!!!!! We are so excited and can't wait to share all the details with you!
How to add a Hood To the Molly Coat: {Free Hood Pattern+Animal Ears Add-ons}
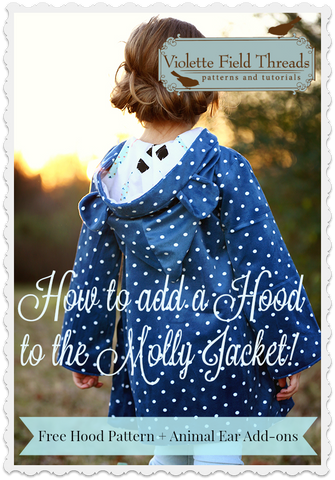
Yesterday we were so excited to share with you the first post in our newest blog series featuring a few weeks of "how-to's" and freebies! The Inseam Pockets Pattern is a must have for any pattern! Today, we are back and we know you are going to love this freebie!
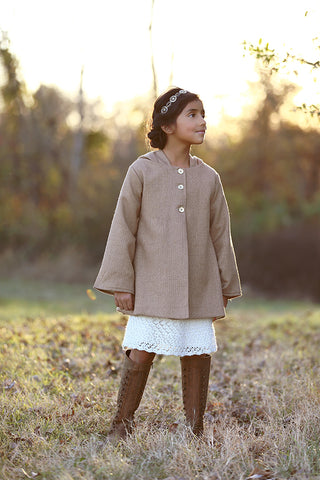
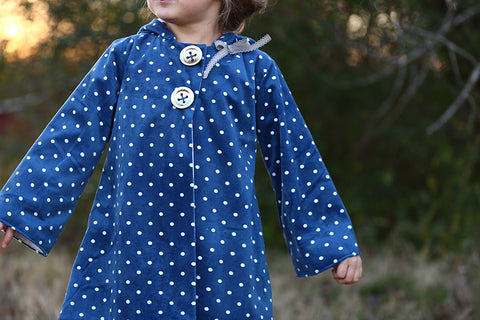
Molly is one of our favorite patterns. With the recently added sleeve lengths and coat length, and yesterday's pockets, this patterns is even more versatile than before.
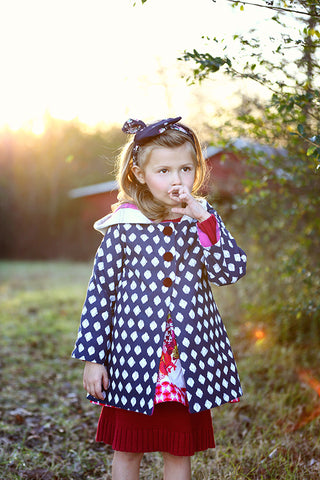

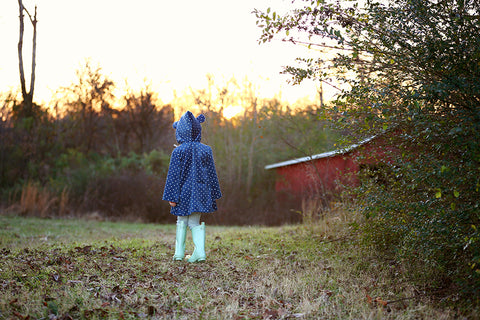
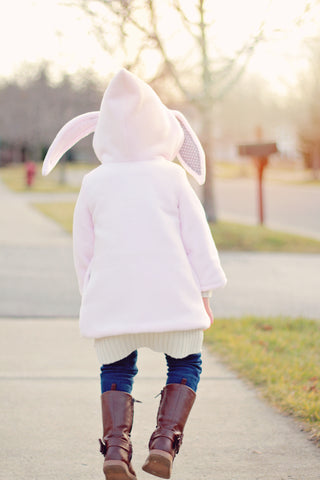
Today we bring you another addition to Molly that will take this pattern from cute to {AMAZING}! We are pleased to bring you the Molly Hood Add on (<--- click)! This super adorable addition is not only functional but will make Molly your go to coat pattern, for everyday jackets, dressy version, and even raincoats!
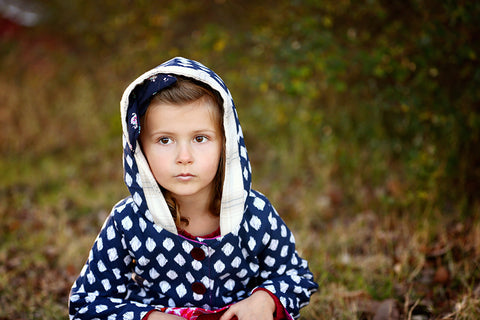
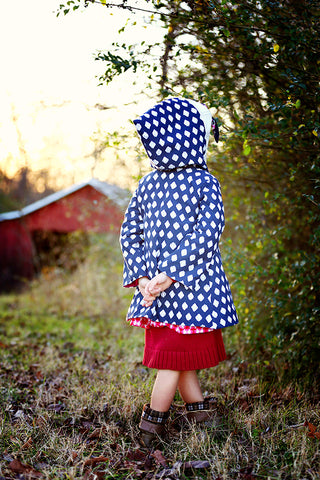
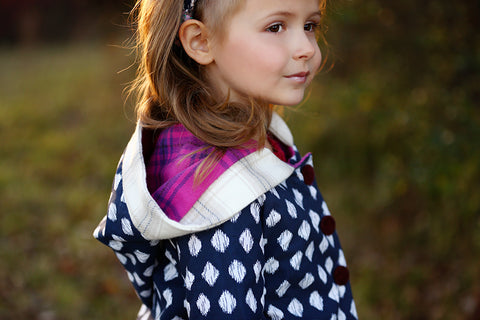
The Molly hood has been requested by so many, we knew it was time to make it happen. This hood pattern is the perfect versatile hood. With a full lining and front panel, the hood offers warmth and fantastic coverage.
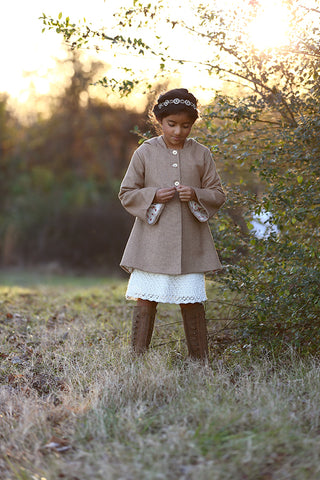
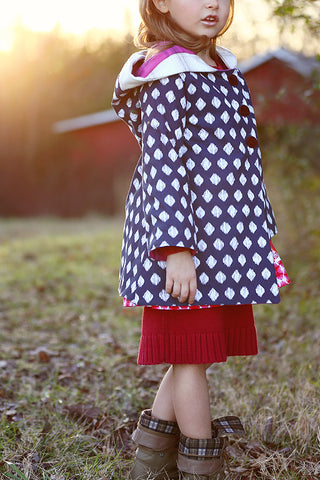
With step-by-step instructions and color photos, this add on is a quick and easy addition!
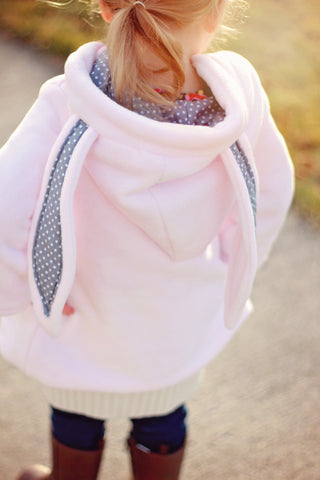
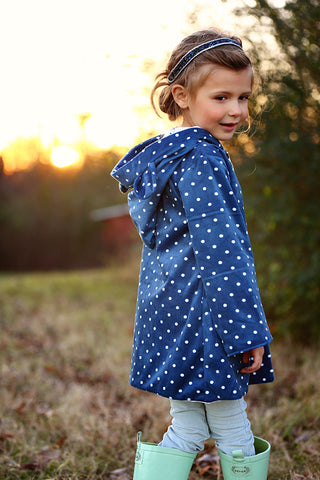
It is extremely comfortable and can be made in a huge range of fabrics, from cottons to fleece, to wool, the sky is the limit.
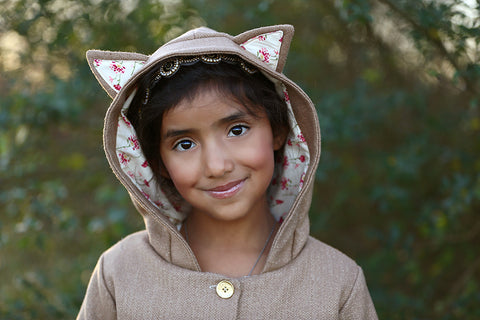
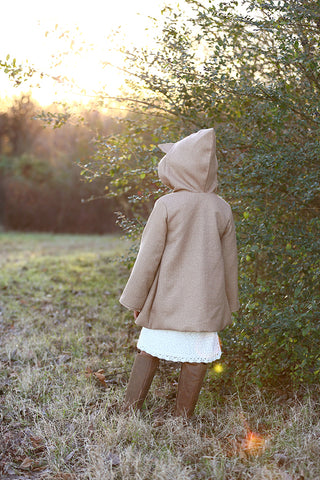
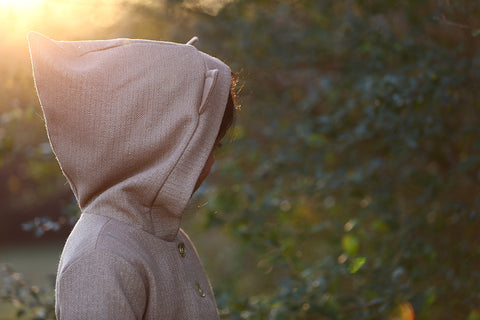
Not only are we giving you the hood, we are adding in an adorable fun animal ear addition! With 3 different animal ear options, there is something your little one will adore! The cat ears are so lovely. We love the look of these ears, sweet but stylish ears that are subtle and look great for girls of all ages. The perfect pair of ears for girls who want a bit of whimsy.
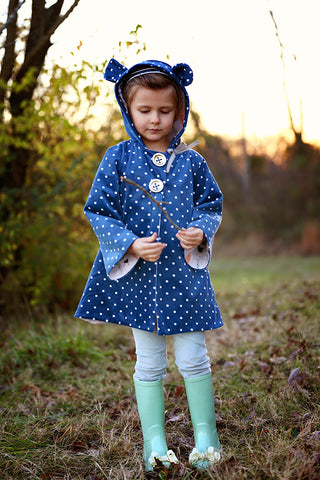
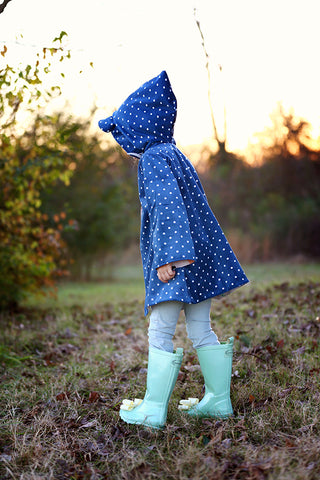
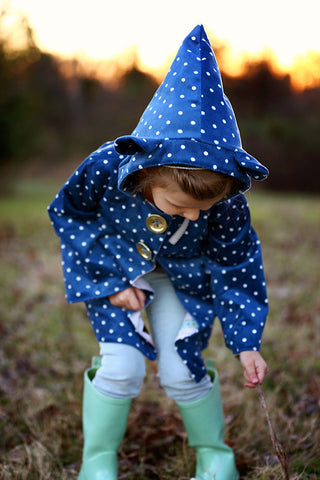
If you're looking for something on the wild side, then the bear ears are just what you need! These adorable ears, while a bit larger than the cat ears, are a perfect choice for showing off your sassy side!
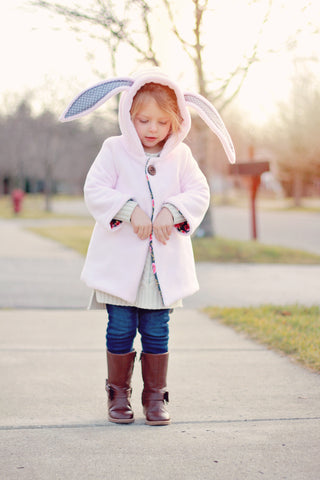
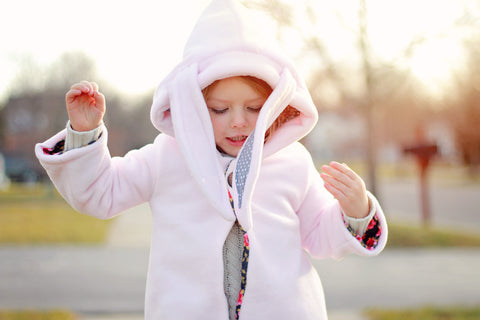
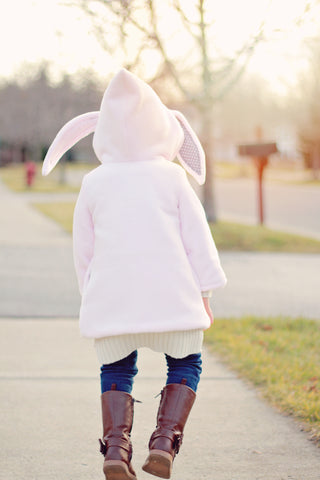

The last set of ears is oh so sweet! The bunny ears are flippy and floppy and so much fun! Make in super warm fleece, and this jacket will keep your little one cozy warm. Warning, these ears may induce hopping! Lots and lots of hopping!
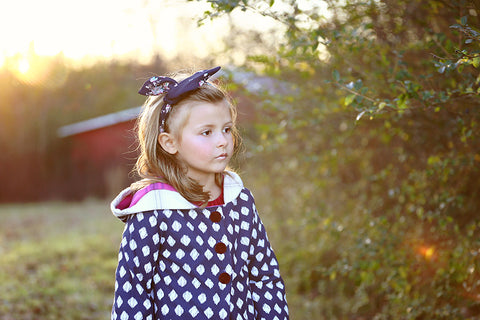
If animals ears aren't your thing, then leave the ears off for a simple and sophisticated look.
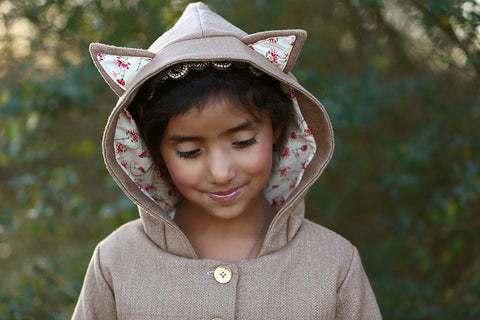
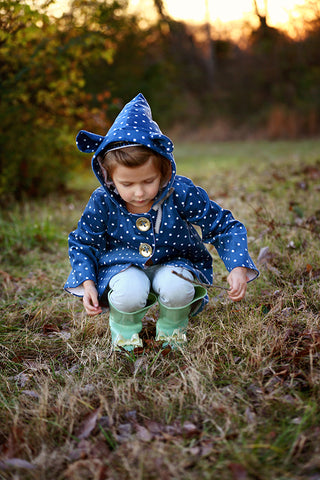
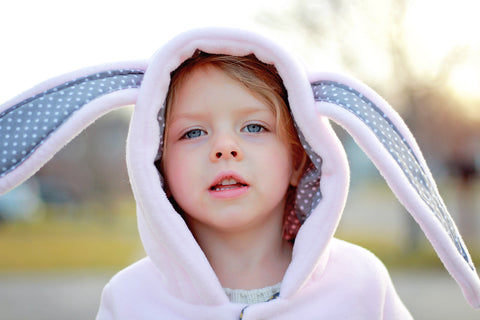
We amazing versatility, this pattern will give your net Molly Jacket the pizzazz it needs to turn heads!
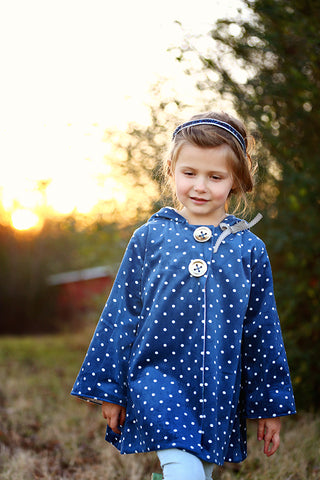
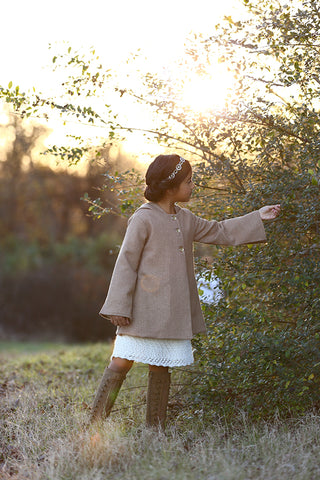
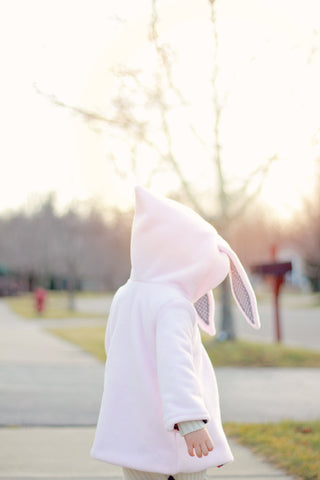
Add your copy of the Molly Hood Add-on to your Violette Field Threads pattern library! And don't forget to show off your creations in our FB Group and tag us on Instagram!
Inseam Pockets: How to add inseam pockets to any pattern + {free pocket pattern}
With December well under way, we finally can start sharing a secret project that has taken months of preparation and development! We've been bubbling over with anticipation for some time, so today's first of a series of blog posts feels very exciting indeed! Over the next few weeks, we have some much requested "how-to's", freebies and a very special giving project that we can't wait to share! Without further adieu, our first freebie is an inseam pocket pattern and a full PDF tutorial detailing "How to Add An Inseam Pocket to Anything".
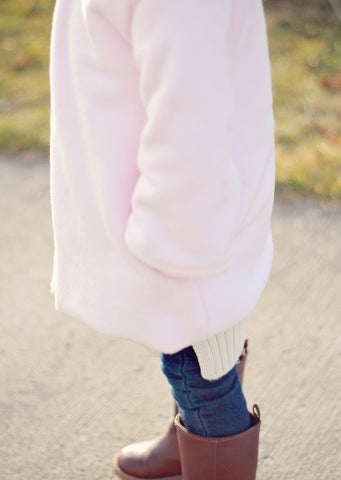
If you are anything like me, you love pockets. My daughter has followed in my footsteps and adores her treasure keepers just as much. Every time I make her something she asks if it will have pockets. She loves any item that has pockets much more than it's pocket-less counterparts. Unfortunately, not all patterns have pockets included, so what do you do?
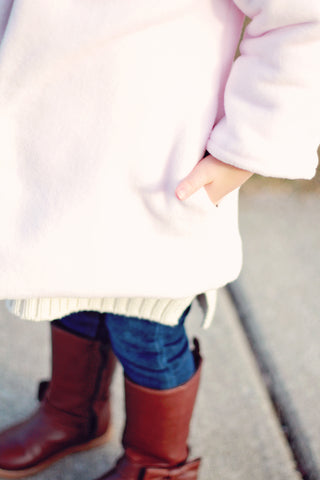
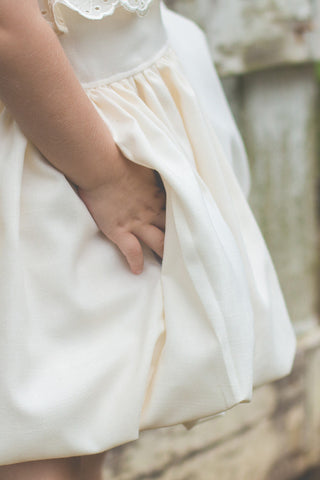
We are to help! So many of you want more pockets, and today we are here to share a {free} Inseam Pocket Pattern, with full tutorial and pattern pieces for 2 sizes (children's and women's)! So now you can add pockets to not only your little lady's clothing, but to yours too! Add to Molly, Genevieve, or any other VFT pattern!!
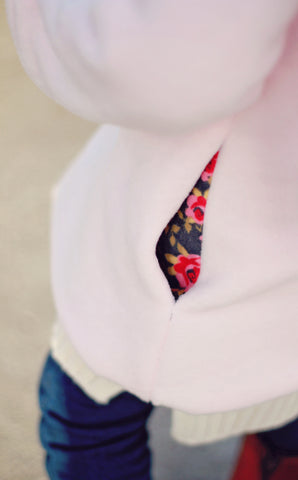
Adding pockets to any pattern is oh so simple! You'll print out those pockets pieces and get to work! Make sure you cut out 2 mirrored sets of pockets.
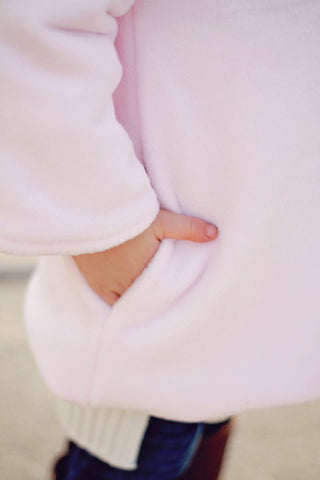
Once your pieces are cut, you'll finish the raw edges with either a zig-zag stitch or with your serger.
Then, you'll add the pockets to your garment's side seams. It's a very easy process, probably much easier than you've imagined. Have we convinced you yet to give it a try? Simply head on over to the shop and download your free copy of the Inseam Pockets PDF Pattern. Print out the PDF full of step by step instructions and pictures. There you have it! We can't wait to see all of your creations featuring these lovely pockets!

Check back in tomorrow for another fantastic freebie we can't wait to share with you!
